Dream Escape: Chapter 1 – After many years, because of nightmares, the protagonist returned to an old house in the deep forest. Continuous rain and a cold night created an uncomfortable environment, and he decided to get into the house. The situation in the house is the same as before, but, perhaps, recently it has been constantly recalled in the dreams of the hero. Upon entering the house, he felt an inexplicable heartbeat. There is something strange here that he never noticed as a child.
Dream Escape: Chapter 1 – Walkthrough
Here you can watch the complete walkthrough of Chapter 1: Deep forest old house, in the game Dream Escape.

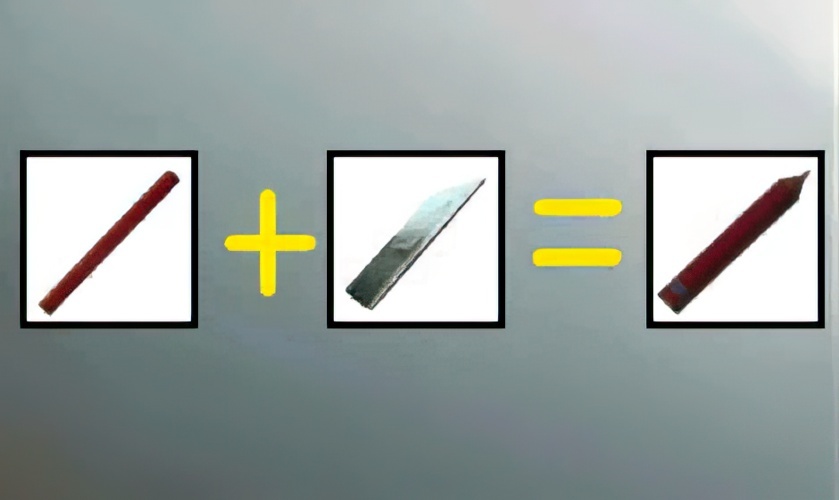
1. Pick up the wooden stick on the floor in front of the door.
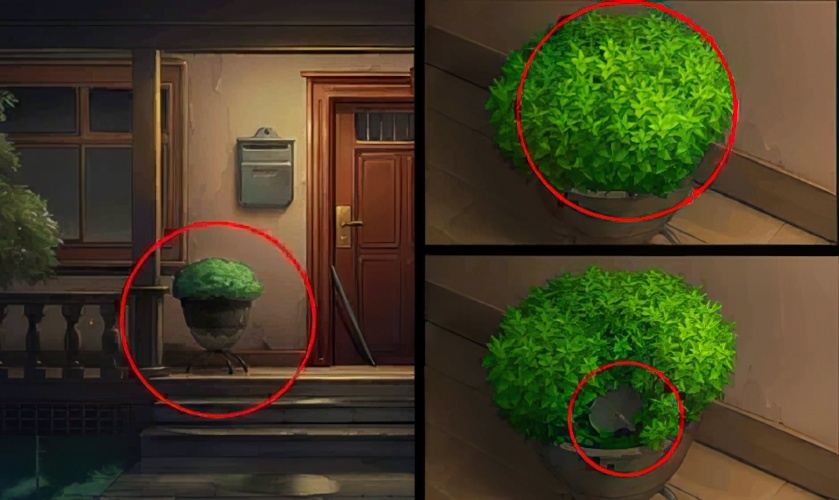
2. Look for the head part of the shovel in the grass.
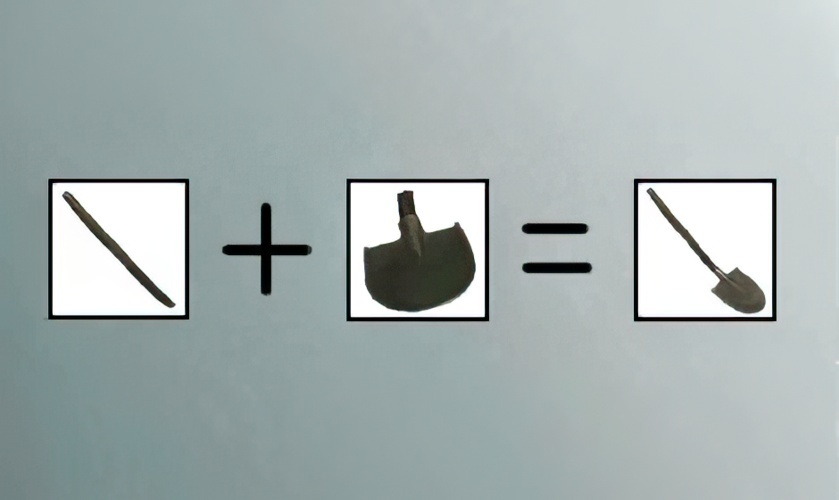
3. Assemble the picked stick and the head of the shovel together to obtain a small shovel.
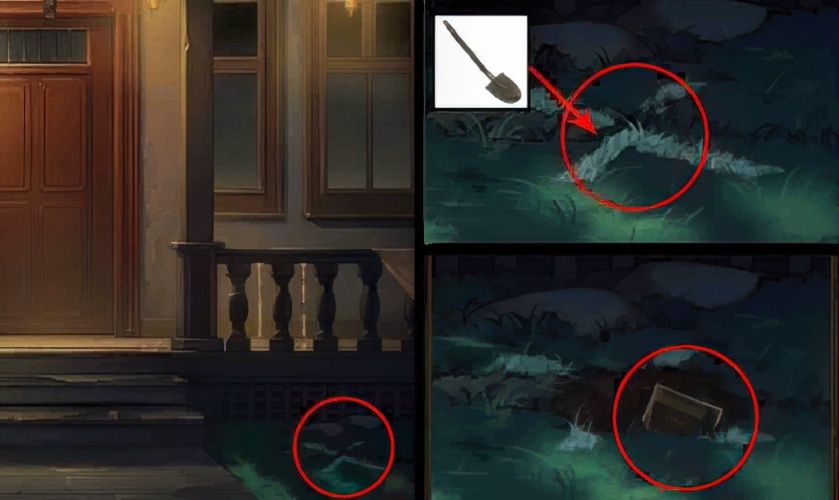
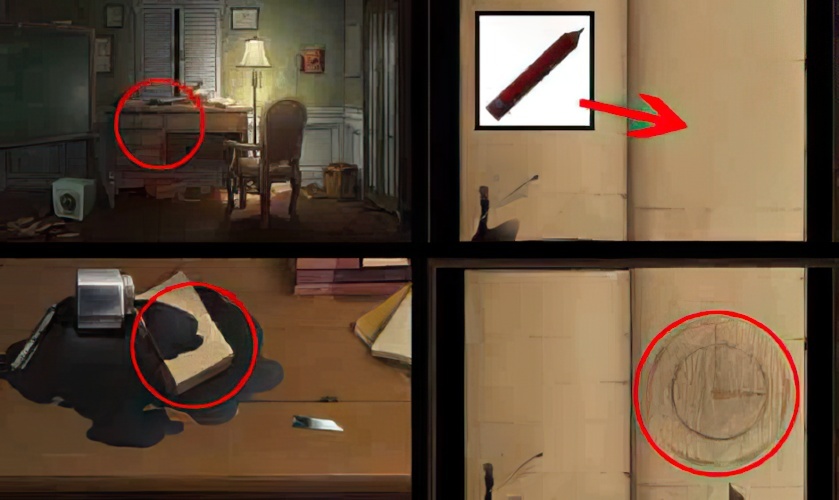
4. Obtain a small shovel and dig out marked soil to obtain an old photo.
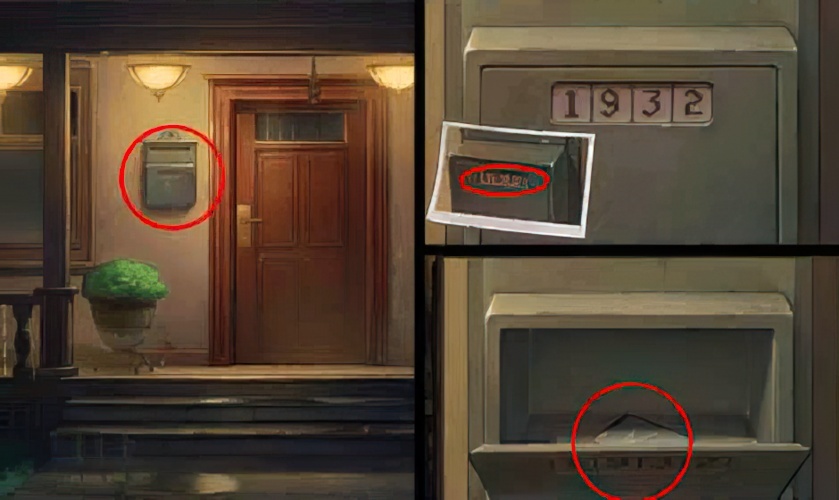
5. According to the code on the photo, open the code box next to the door and get the card.
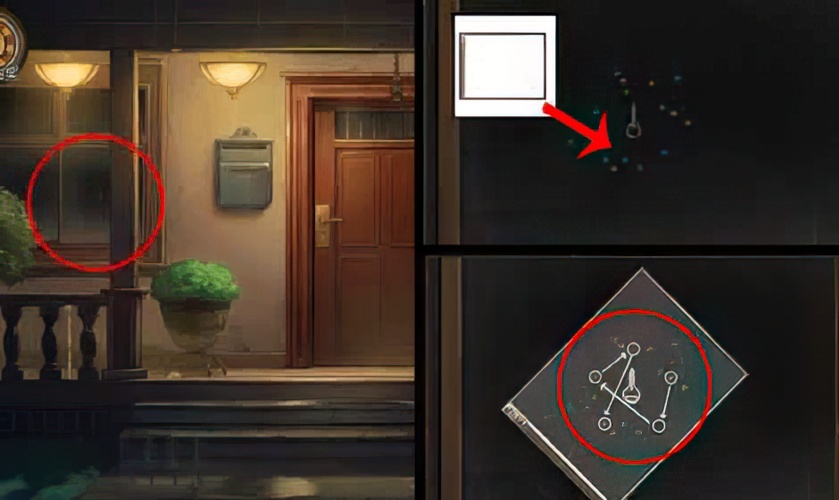
6. Use the card on the left window to get 5 colored dots.
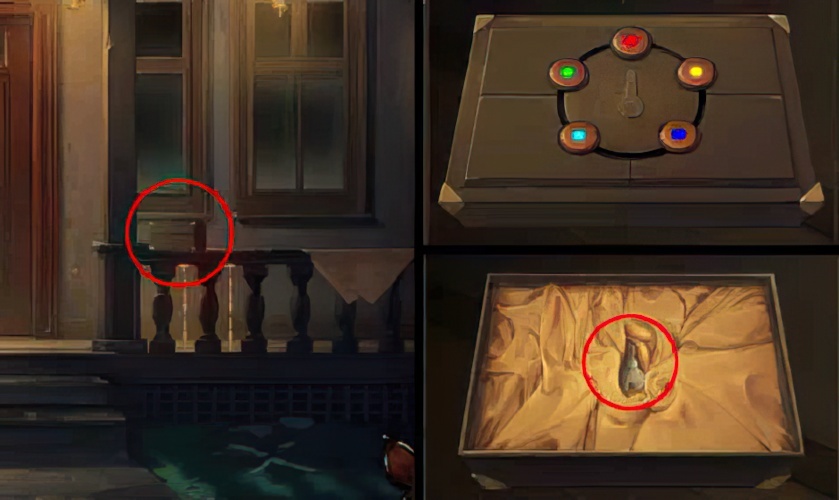
7. According to the arrangement of the dots, open the box and get the door key.
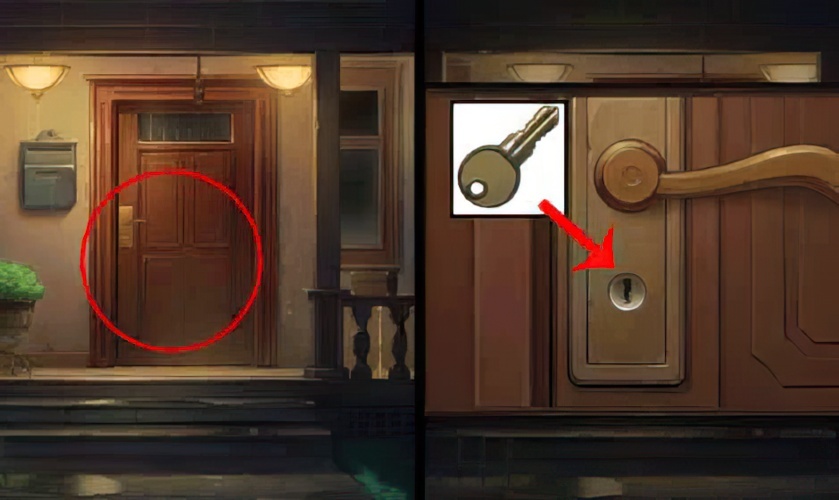
8. Open the door with the key and enter the house.
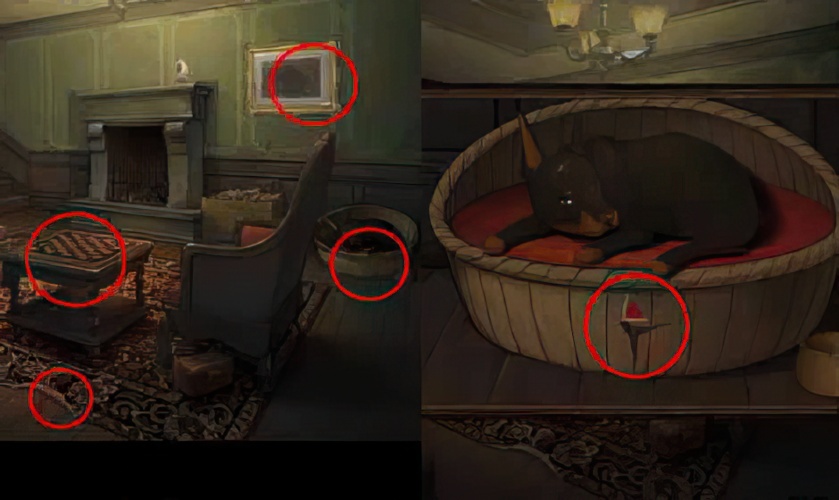
9. Find 4 places with dancing girls patterns.
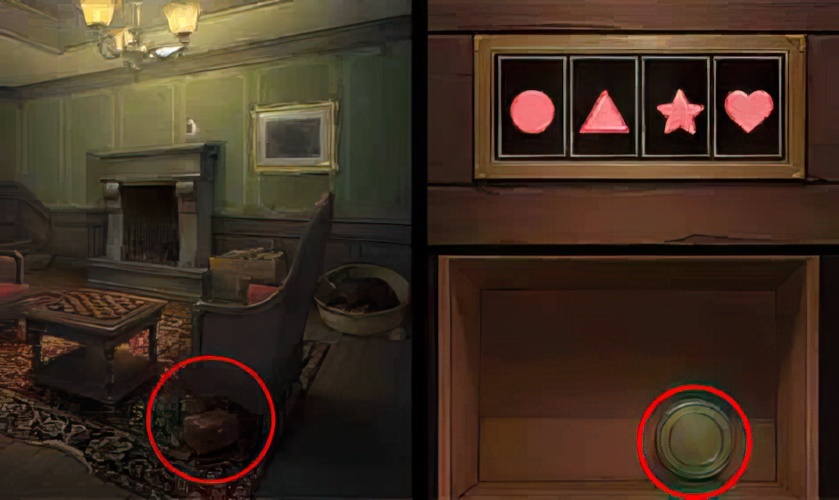
10. Click on the box on the ground, adjust the 4 patterns until they are the same as the dancing girl pattern, and get the dog food in the box.
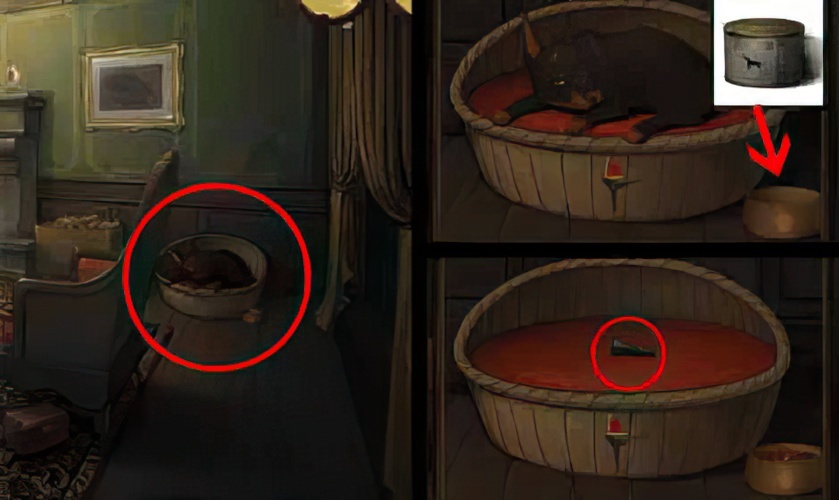
11. Pour the dog food into the dog’s bowl, and after the dog leaves, get the chess piece in its kennel.

12. Put the chess piece on the board, the key will appear on the board after finishing the game, get the key.

13. Open the piano with the key, play and lift up all the piano codes, get the wooden stick.
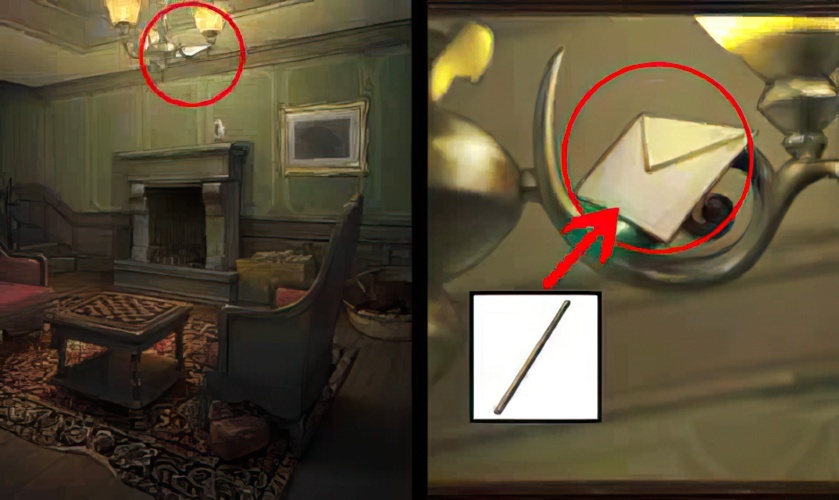
14. With the help of a wooden stick, remove the envelope from the chandelier.
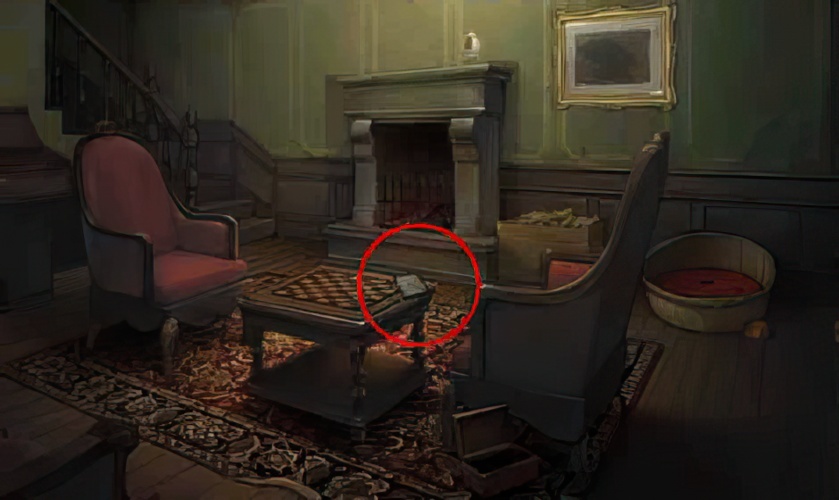
15. Pick up the envelope that fell on the table.
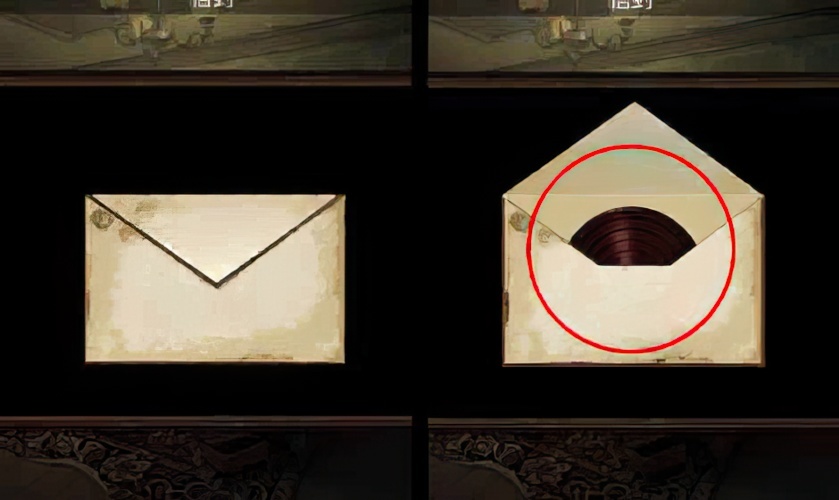
16. Open the envelope and get the turntable in the envelope.
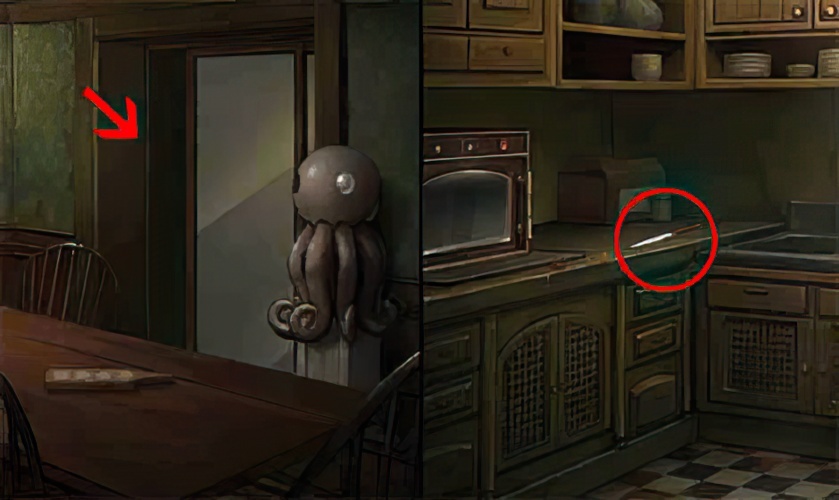
17. Enter the kitchen and get the knife on the stove.
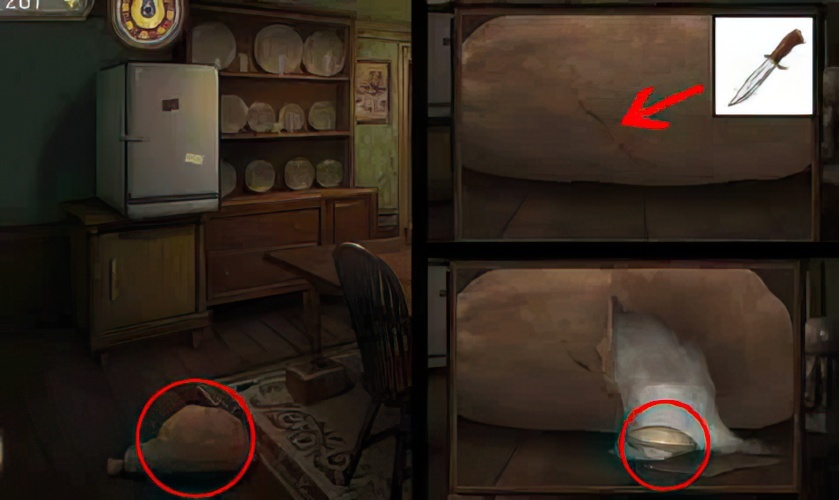
18. Go back to the dining room, cut through the linen bag with a knife, and pick up the shells that fell on the floor.
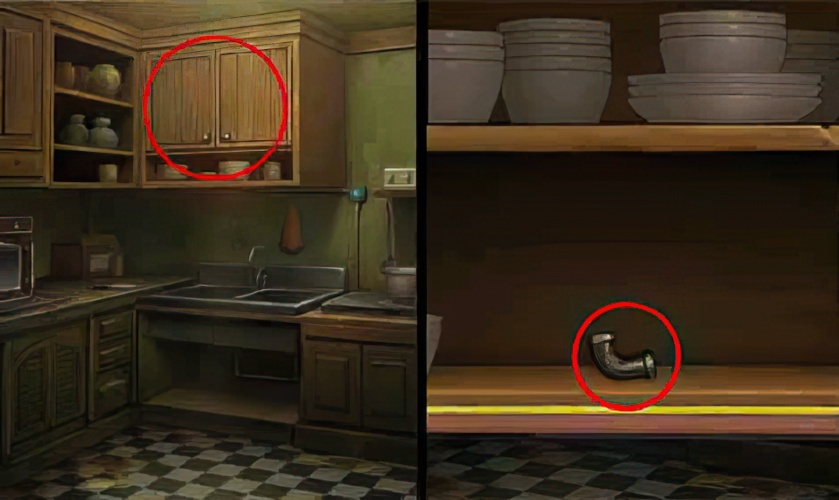
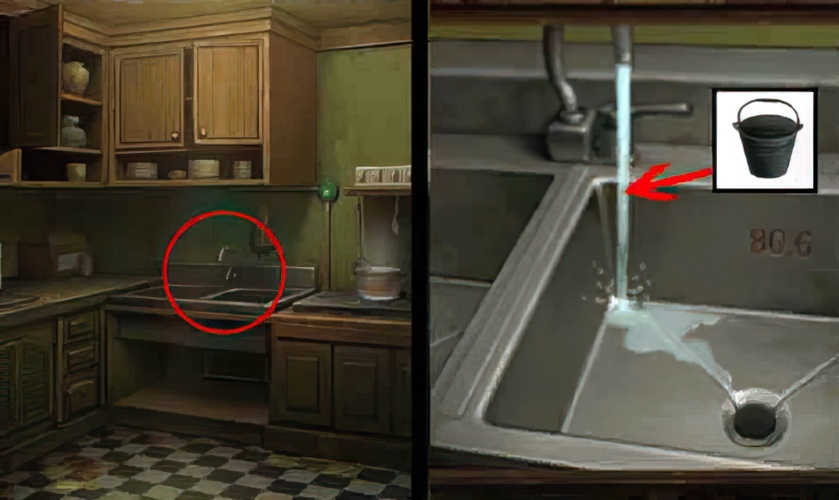
19. Enter the kitchen, open the cabinet above and take the water pipe inside.

20. The water pipe is installed at the water pipe below the sink.
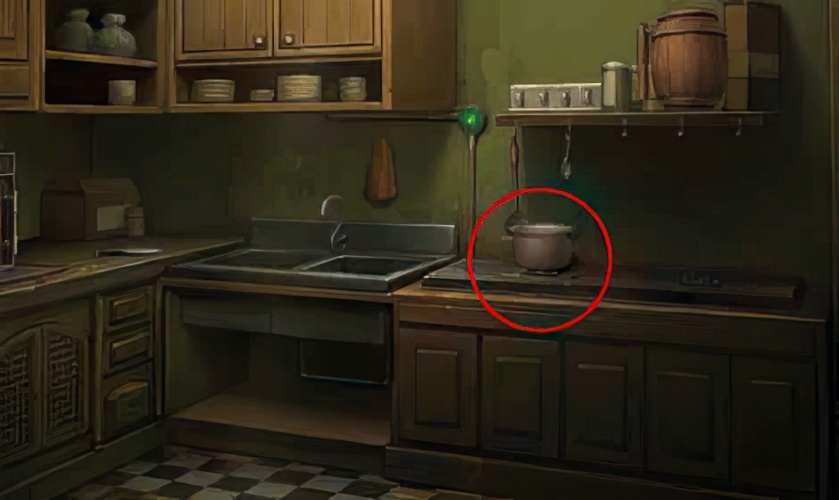
21. Take away the pot on the stove.
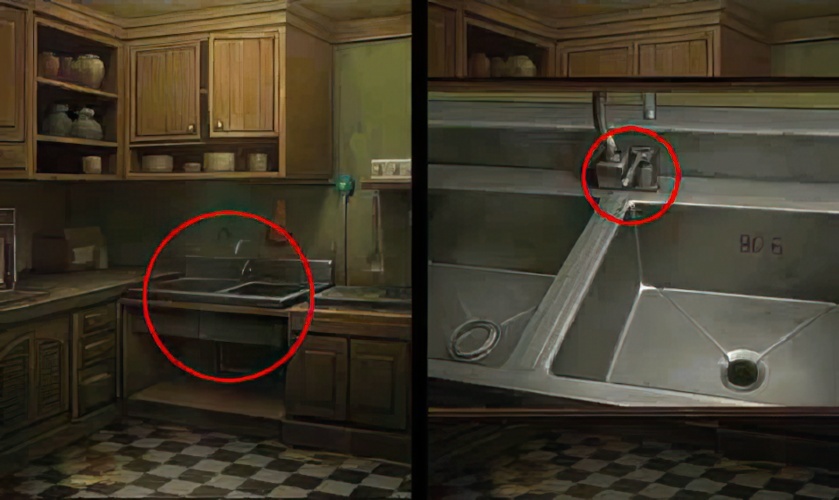
22. Open the water tap.
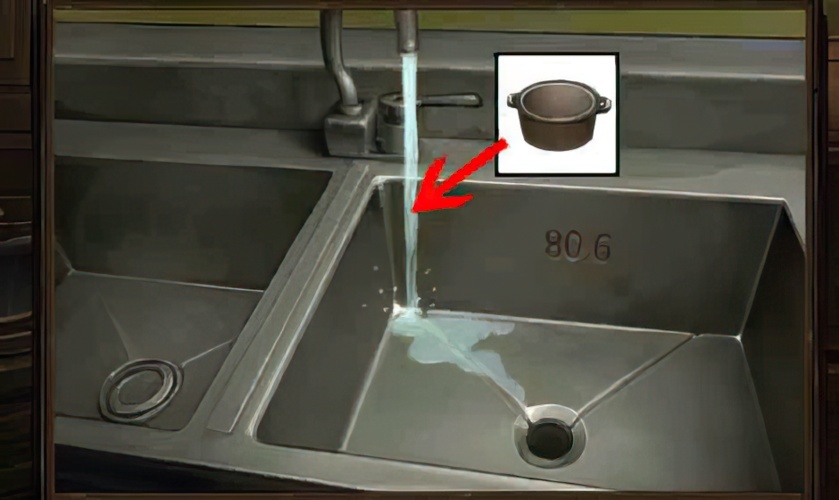
23. Fill the pot with water.
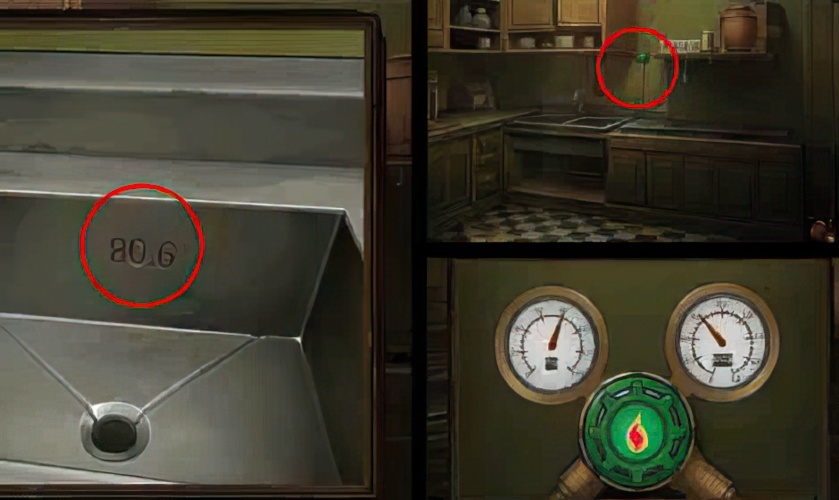
24. According to the number on the sink, adjust the pointer on the gas meter.
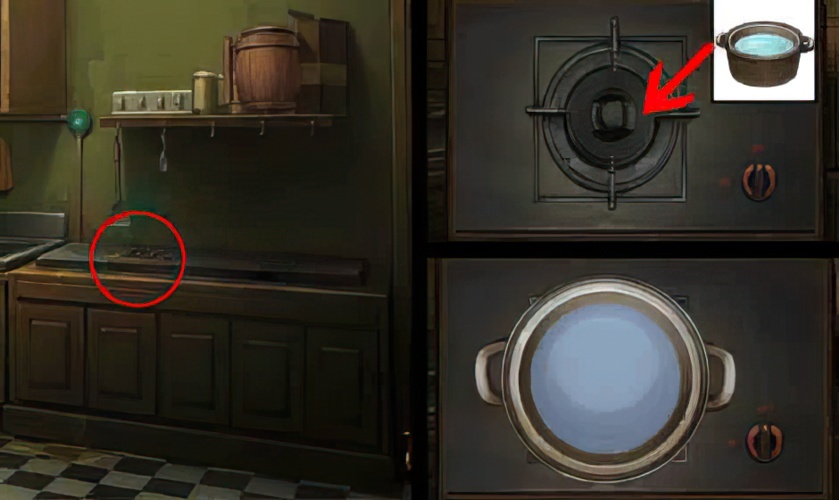
25. Put the pot on the gas stove.
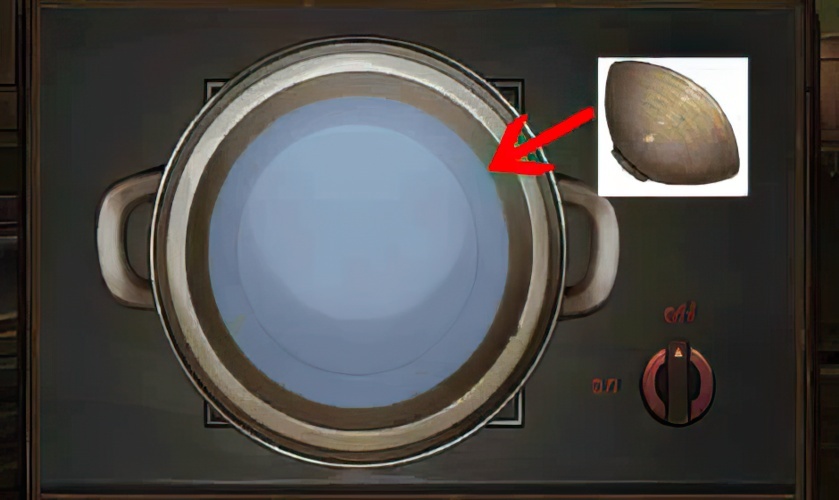
26. Put the shell in.

27. Turn on the gas stove, open the shell, and get the pearl inside.
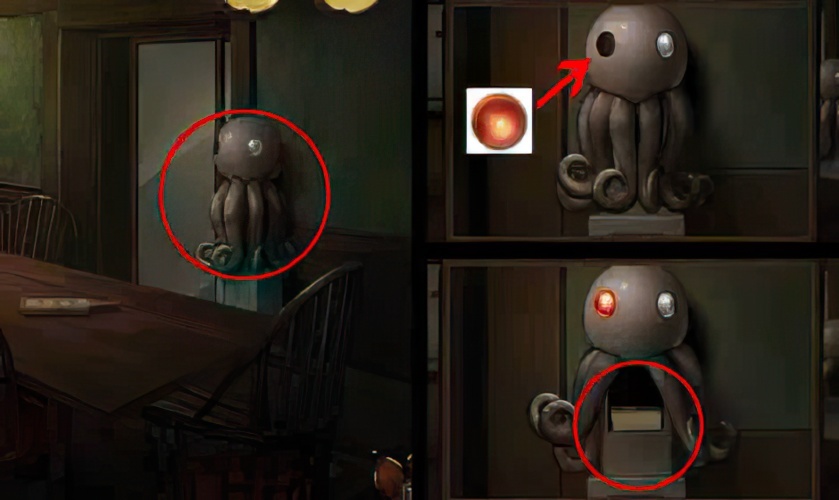
28. Put the pearl in the eyes of the octopus and get the book blocked by the feet of the octopus.
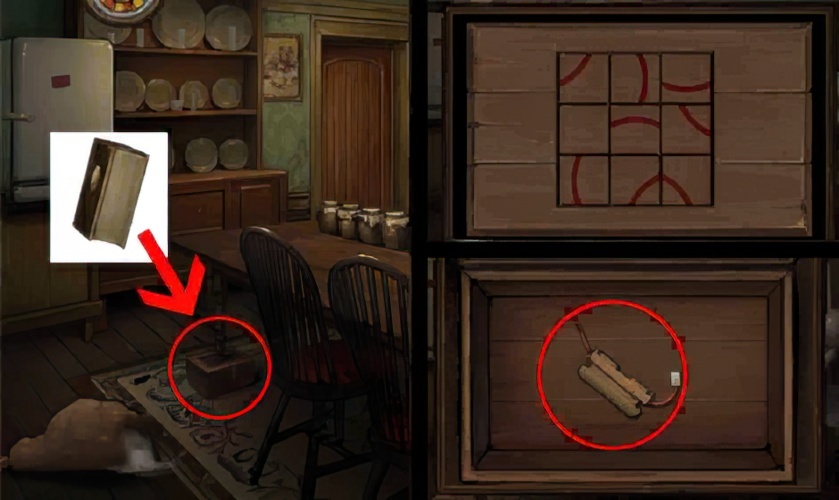
29. Exchange the box under the table with the book, complete the puzzle on the box, and get the fuse.

30. Get the biscuit mold on the table in the dining room.

31. The fuse is installed on the microwave in the kitchen, and the cookie mold is placed in the microwave.
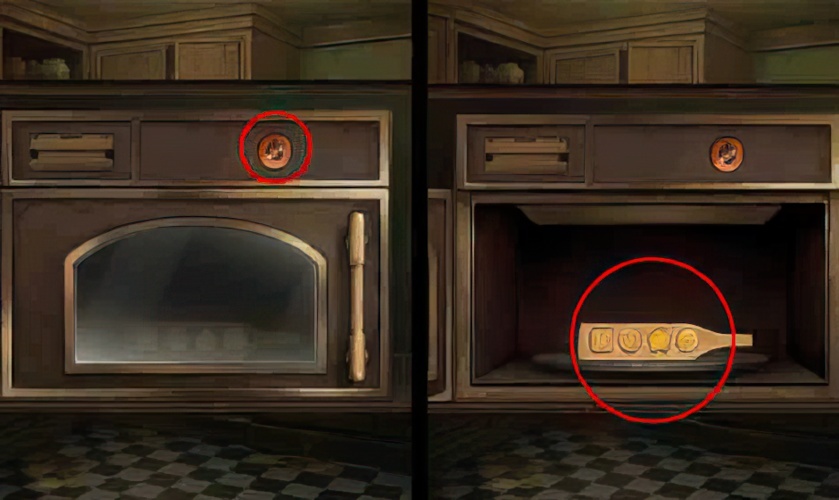
32. Turn on the microwave and get 4 biscuits.

33. Put the biscuits in the groove of the cabinet above the microwave, open the cabinet and get the triangle square.
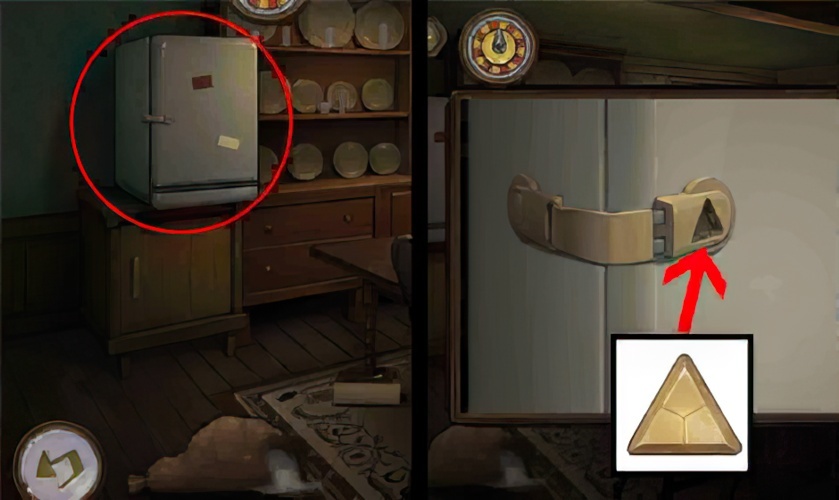
34. Go back to the dining room, open the refrigerator with a triangle square, and get the key in the refrigerator.

35. Use the key to open the basement door and enter the basement.
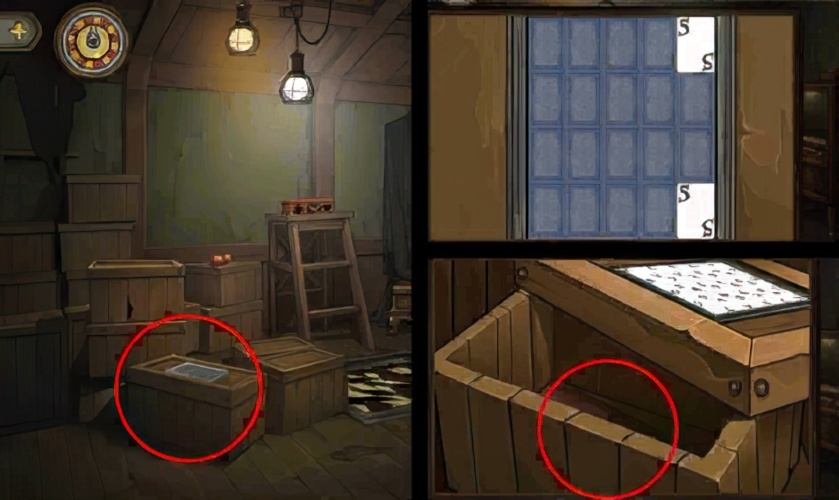
36. Complete the mini game on the lid of the box and get the empty remote inside.
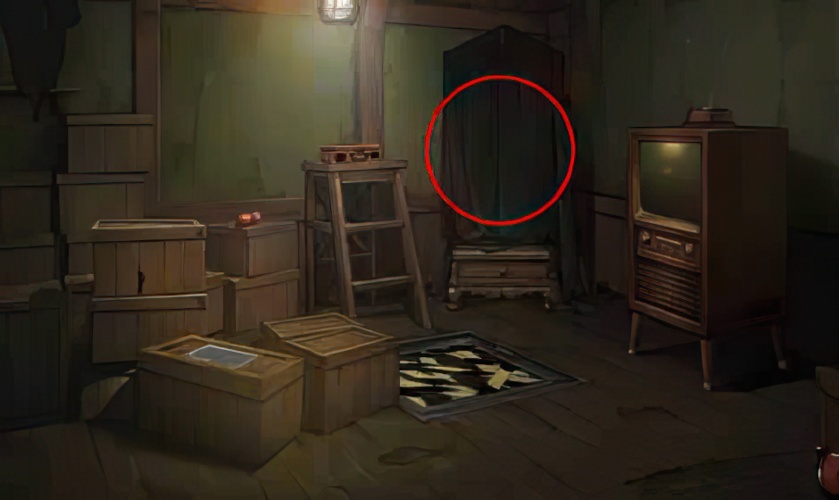
37. Get the black cloth on the mirror.

38. Enter the kitchen and wet the black cloth in the sink.
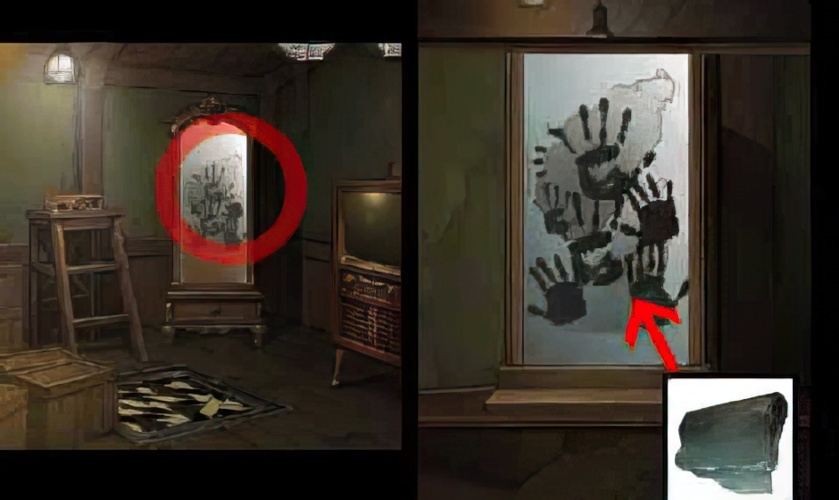
39. Go back to the basement, wipe the mirror clean with a wet cloth, and get 4 sets of numbers.

40. Cut the apple with a knife and get the battery in the apple core.
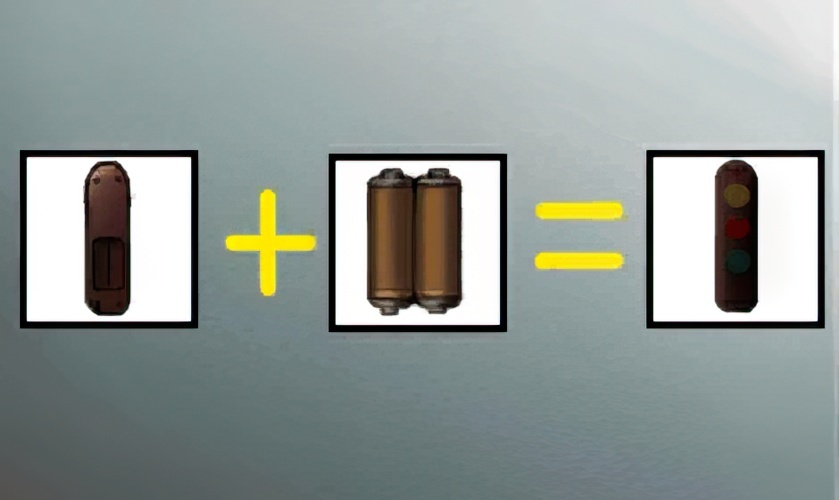
41. Assemble the battery and the empty remote together.

42. Turn on the TV with the remote.
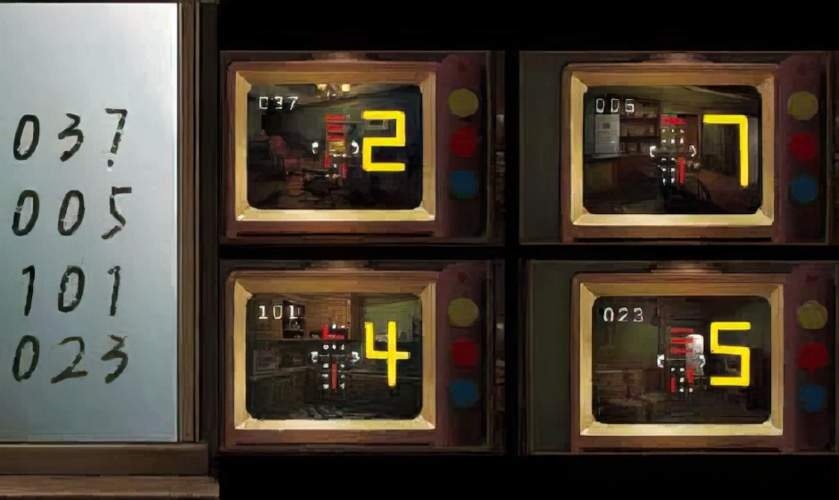
43. According to the numbers in the mirror, adjust the TV channel and get the password 2745.
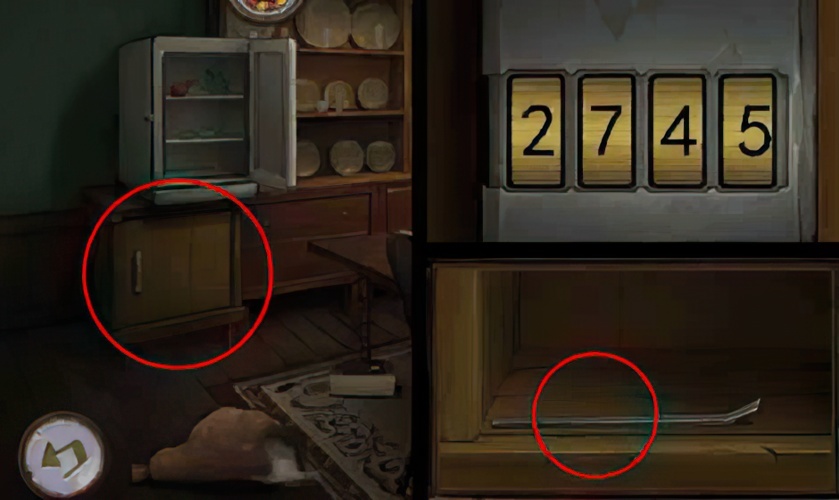
44. Go back to the dining room, according to the password 2745 on the TV, open the cabinet door under the refrigerator and take the crowbar.
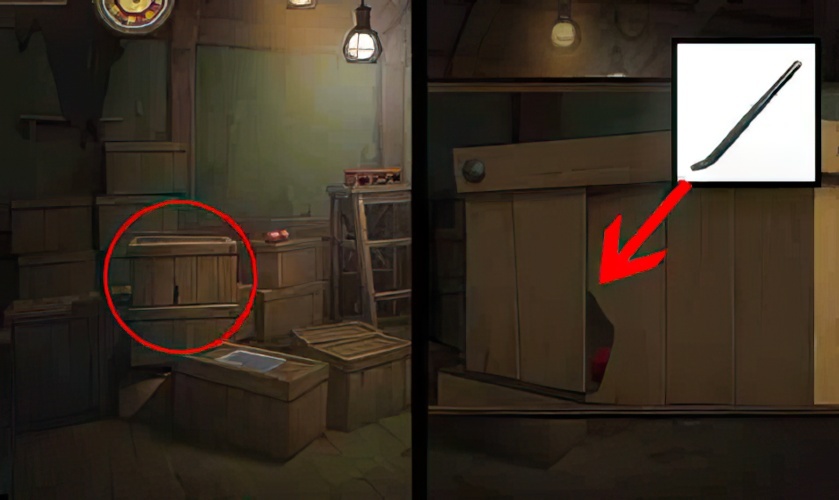
45. Go back to the basement and use a crowbar to pry and open the seamed box to get the insecticide.

46. Go back to the dining room, kill the cockroaches under the cabinet with insecticide, get the stylus.
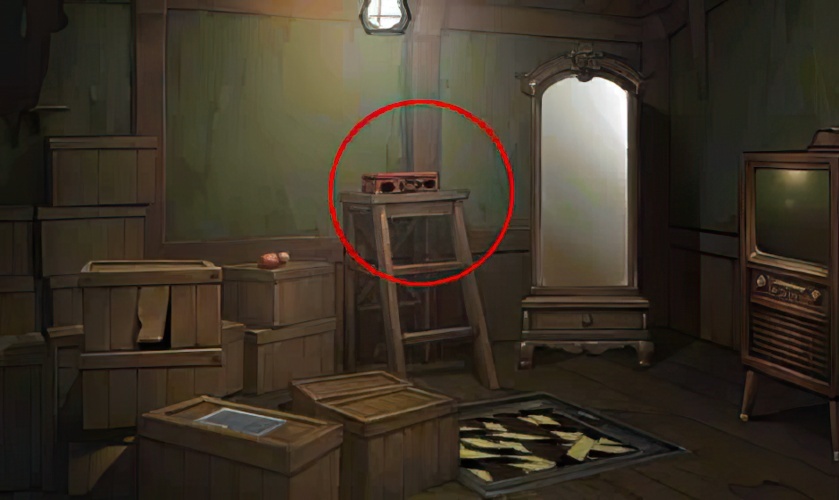
47. Get the empty record player on the basement ladder.

48. Put the turntable and stylus into the record player.
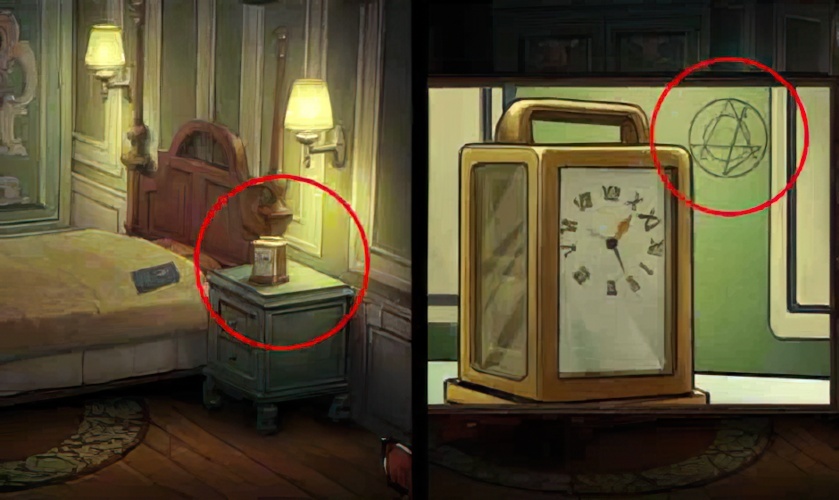
49. Click on the stairs to enter the right room on the second floor and view the pattern on the wall behind the alarm clock.
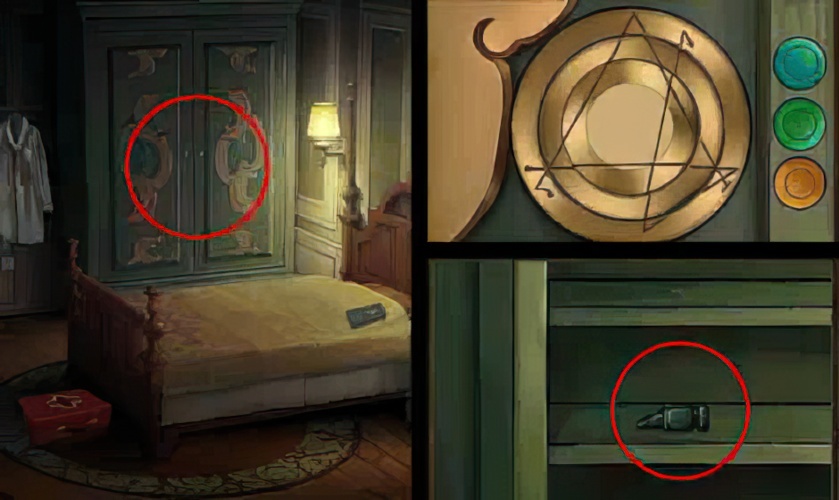
50. Check the closet, according to the pattern found on the wall of the bedside table, rotate the disc on the closet to get the hammer.
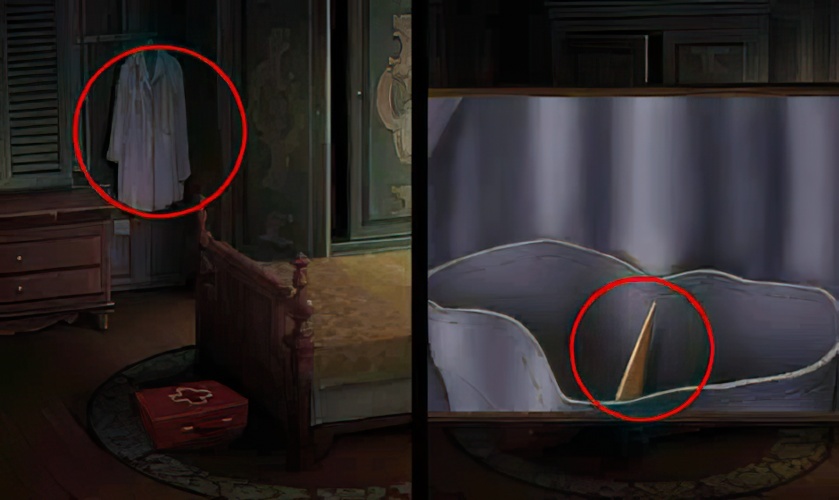
51. Check the white coat and get the golden pointer in the pocket.
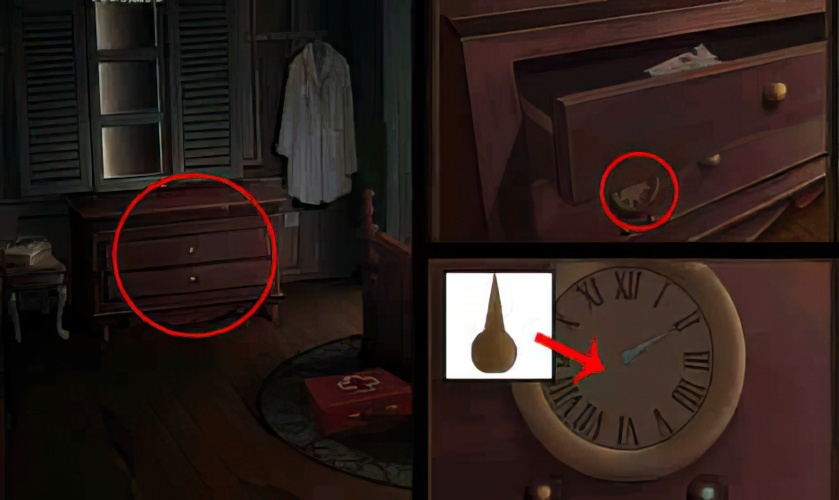
52. Install the hands on the dial of the drawer.
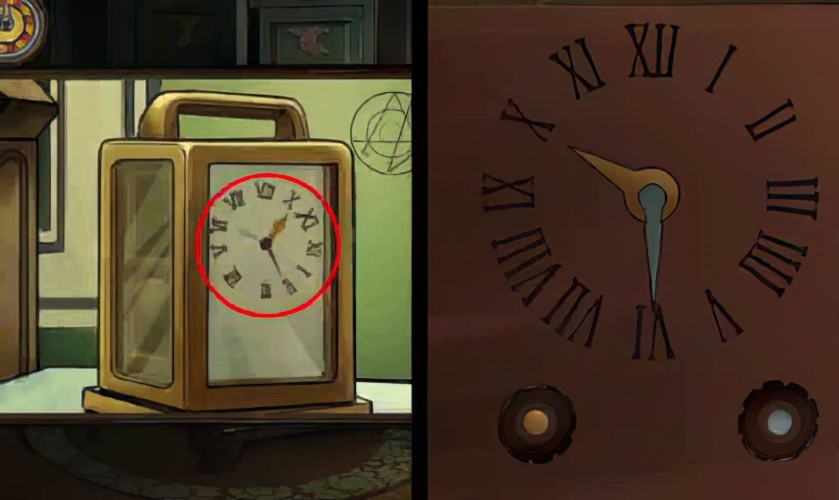
53. Rotate the pointer to the same time as the stop time on the alarm clock X:VI, and get the wooden handle of the hammer.
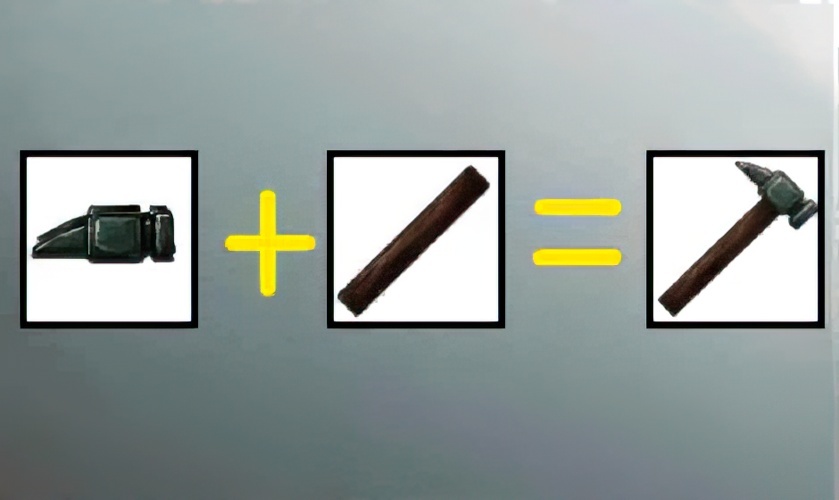
54. Assemble the hammer head and handle together into a hammer.
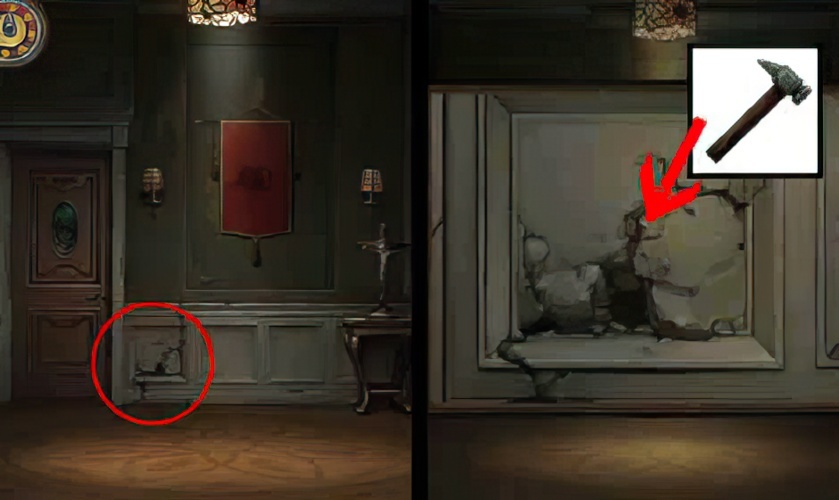
55. Go back to the hallway, use a hammer to break the cracks in the tile and get the magnets inside.
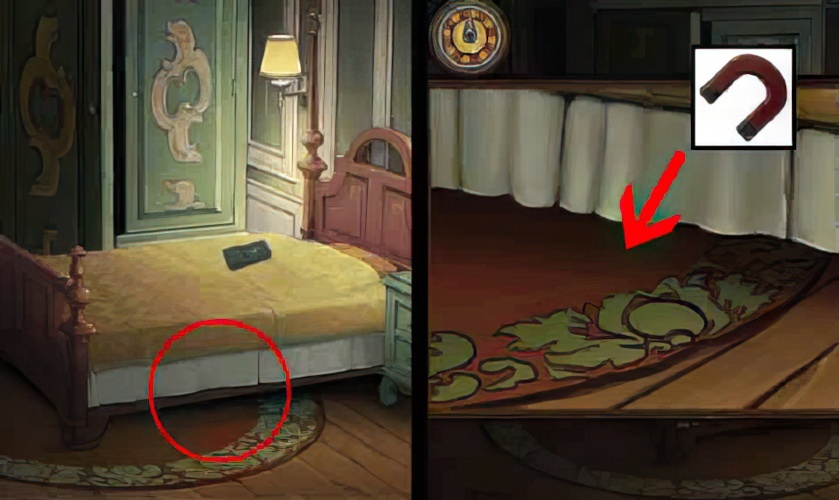
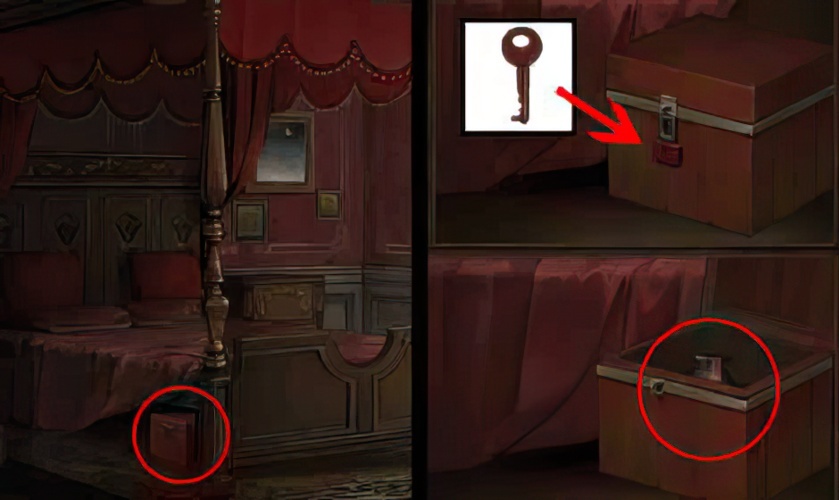
56. Use a magnet to suck out the key under the bed in the second bedroom.

57. Go back to the corridor and use the key to open the door of the master bedroom.
58. Turn on the lights.
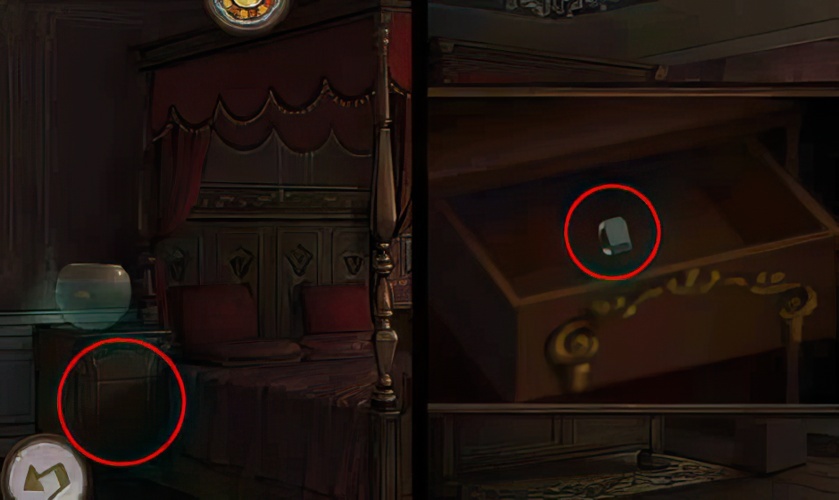
59. Open the bedside drawer in the master bedroom and get the head of the electric shock device.
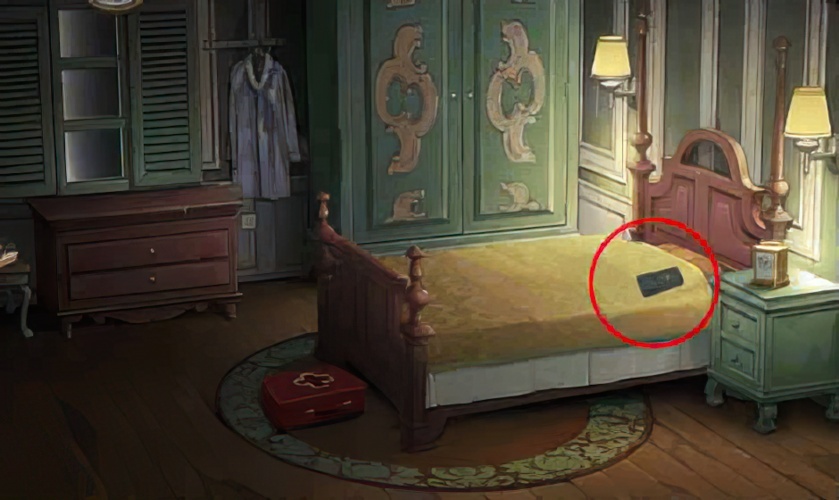
60. Get the handle of the electric shock device on the bed in the second bedroom.

61. Assemble the head and handle of the electric shock device together into a complete electric shock device.
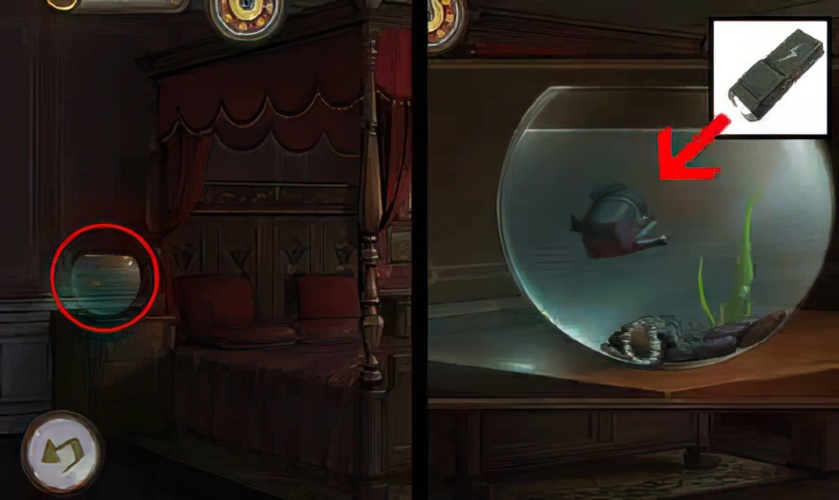
62. Use an electric shock to stun the piranha in the fish tank on the bedside of the master bedroom, and take away the necklace from the fish tank.

63. Investigate under the pillow in the master bedroom and find the wrench.
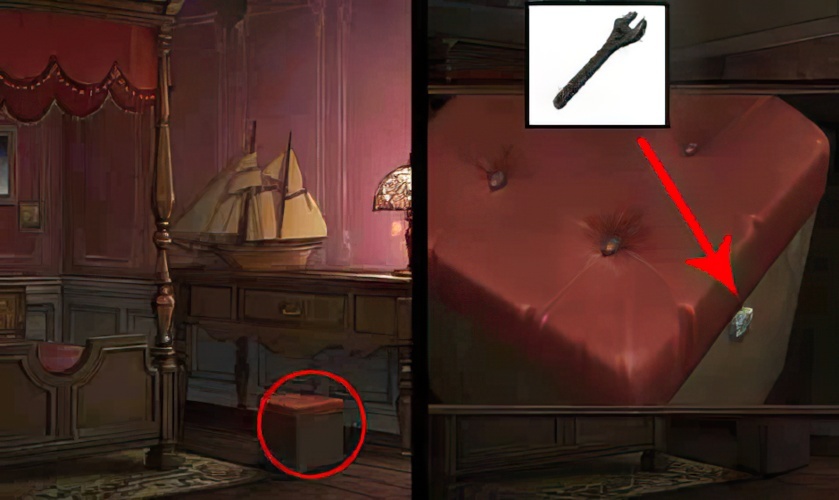
64. Use a wrench to unscrew the nut on the master bedroom stool, open the storage stool, and remove the glass knife inside.

65. Use a glass knife to remove the half jewel from the necklace.
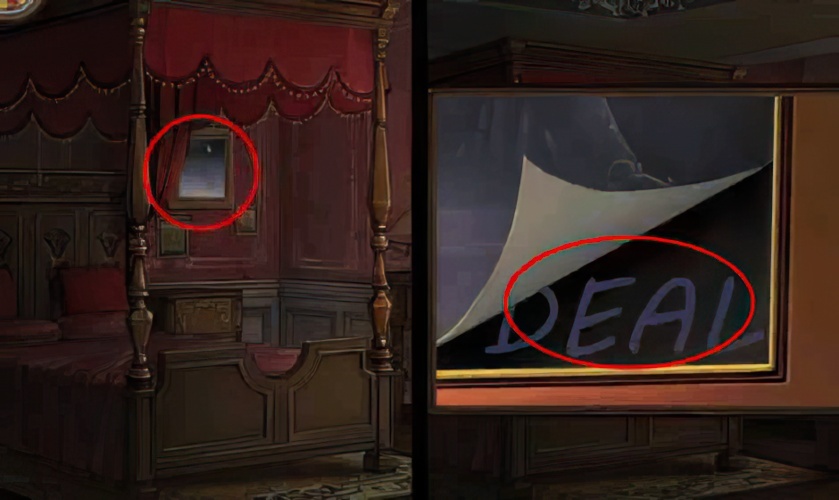
66. Check the portrait of the bedside in the master bedroom and get the 4-letter code DEAL.
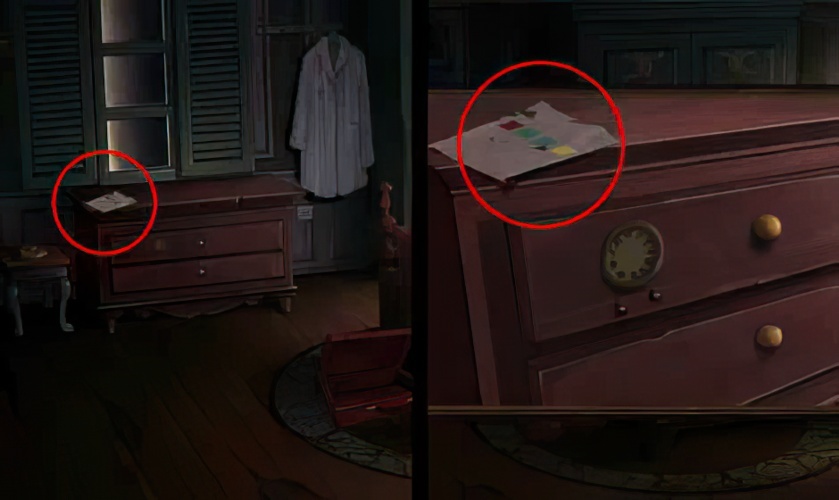
67. Go back to the second bedroom and get a small piece of paper with red, green, blue, and yellow squares drawn on the low cabinet.
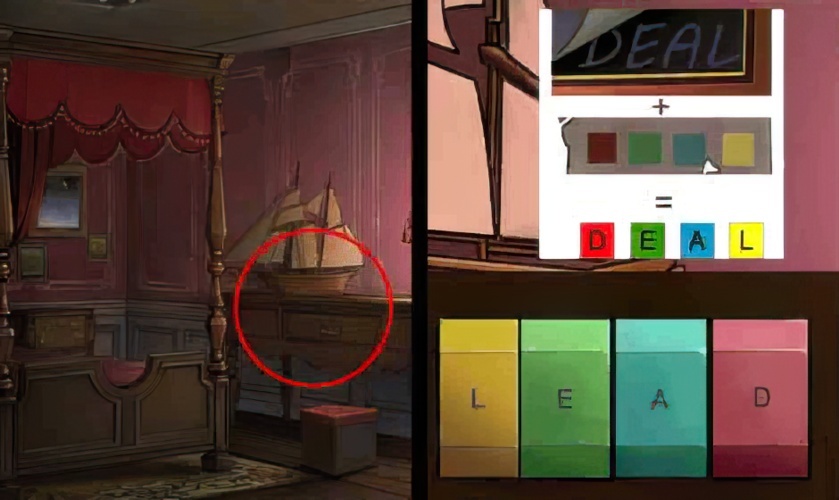
68. Combine the password LEAD on the note and the portrait, open the drawer of the master bedroom table, and get the dome of the jewelry box.
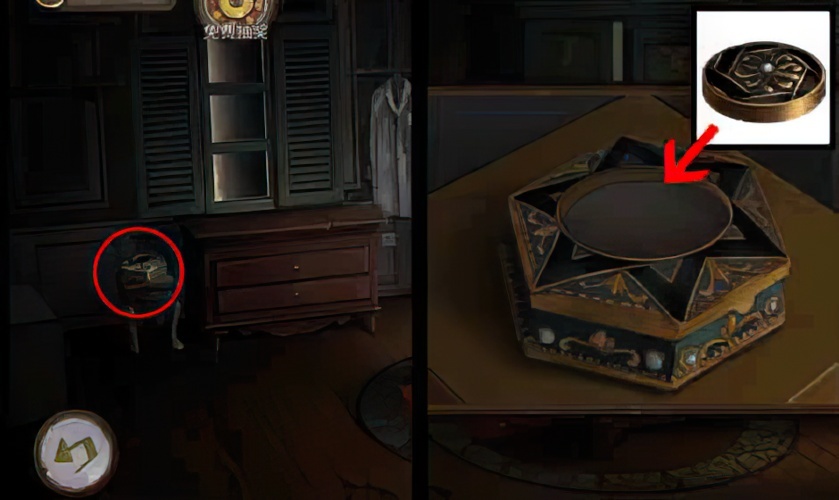
69. Install the dome on the jewelry box on the low table of the second bedroom, open the jewelry box and get the half gem inside.
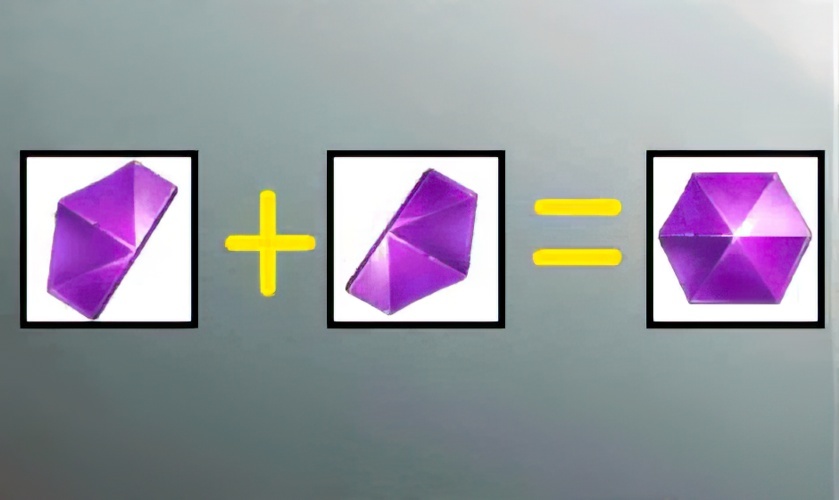
70. Put two and a half gems together.
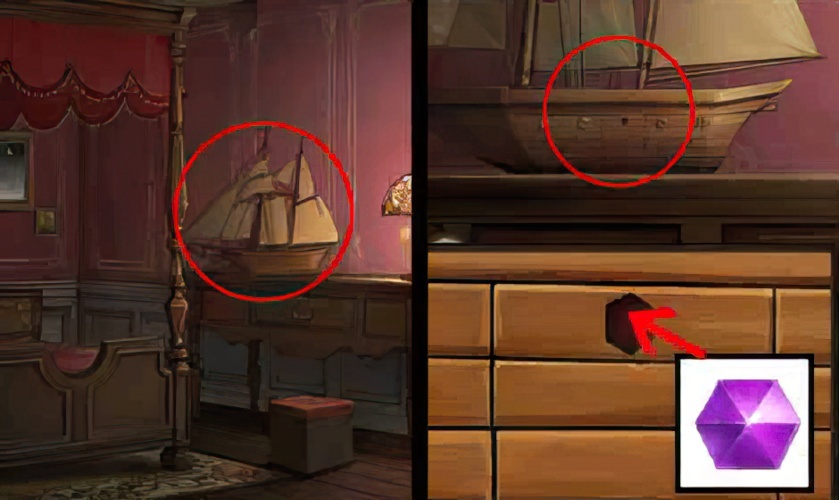
71. Put the assembled gems on the ship model and get the key to the study.
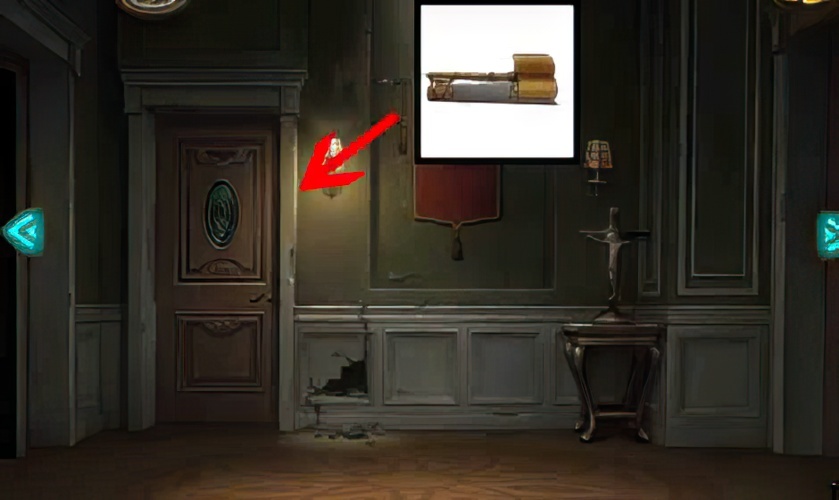
72. Go back to the corridor and use the key to open the door of the study.
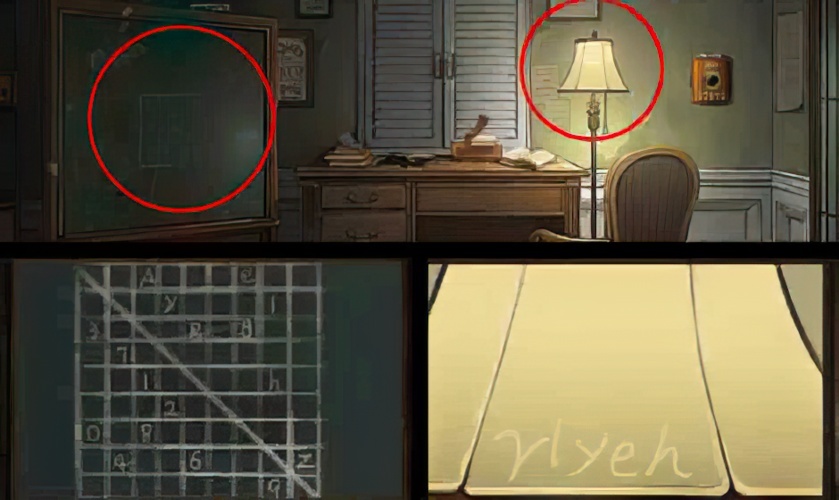
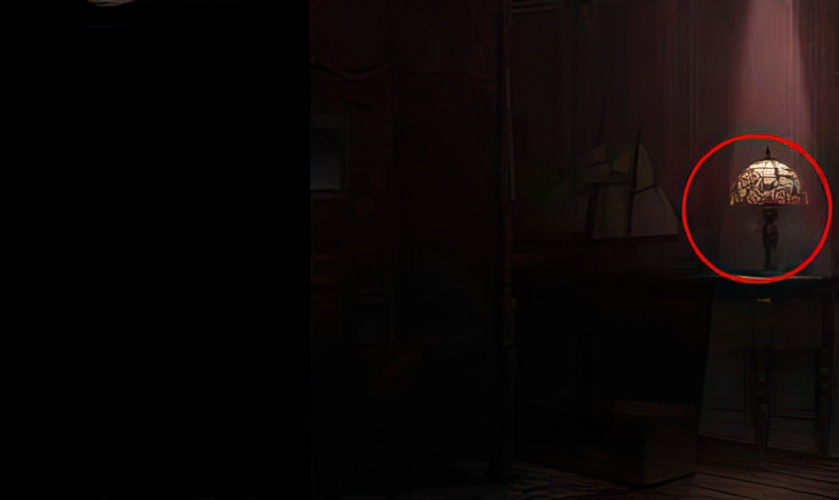
73. Check the lampshade and blackboard, and find the number 14706 corresponding to the letter on the lampshade on the blackboard.
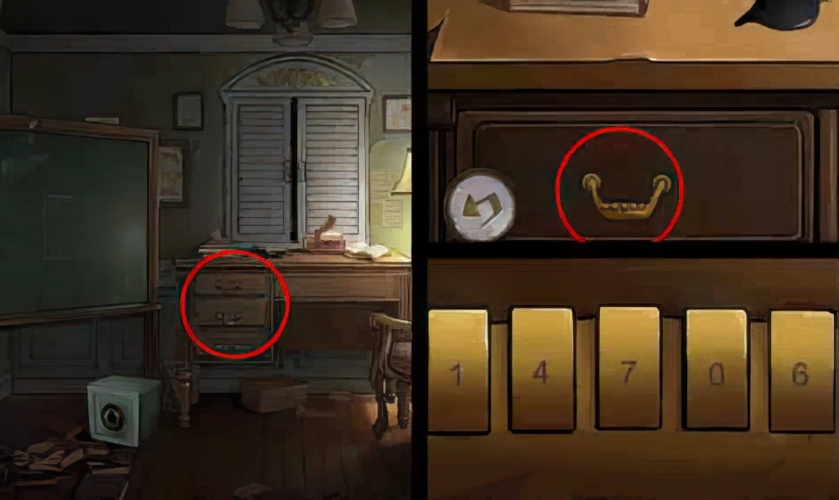
74. Open the drawer of the desk according to the lampshade and blackboard password 14706 and get the detergent.
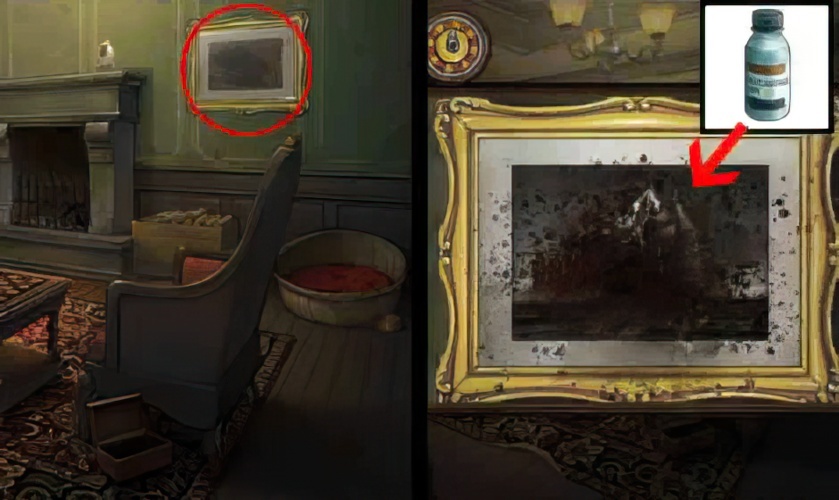
75. Go back to the living room, clean up the portrait on the wall with detergent, and get the code LOVE.
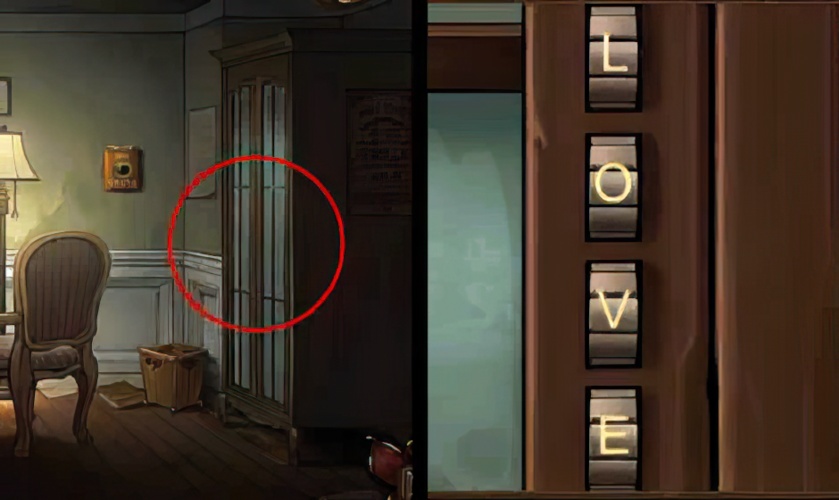
76. Open the glass cabinet in the study room according to the letter LOVE on the portrait of the living room, and get the pocket watch in the cabinet.

77. Get the pencil on the table in the master bedroom.
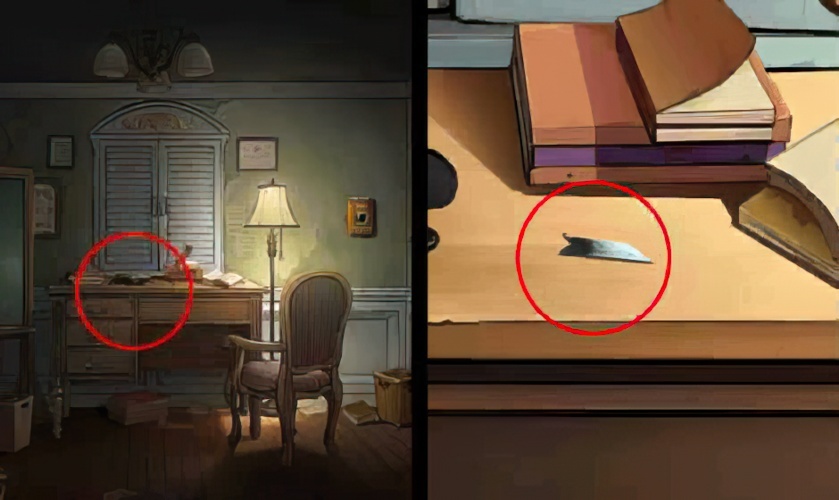
78. Get the blade on the desk in the study.
79. Sharpen the pencil with a razor blade.
80. Use a pencil to draw the original mark on the notebook.

81. According to the mark L, turn the minute hand of the pocket watch to 12 and the hour hand to 3, get ripening agent.
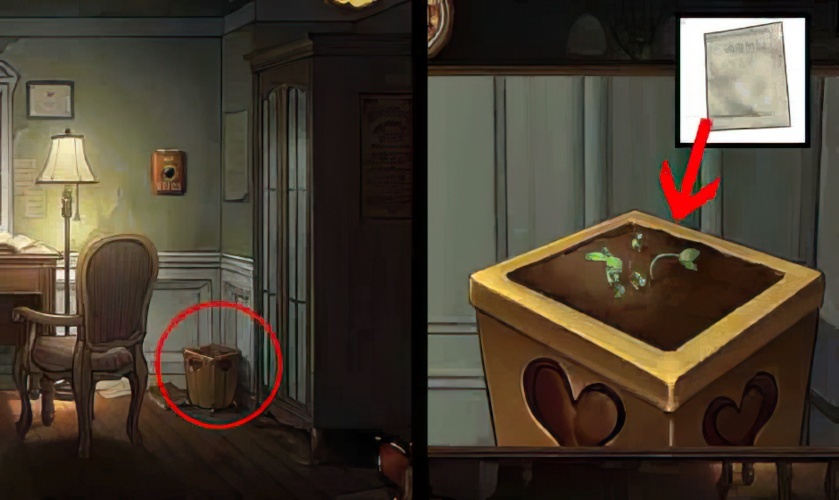
82. Apply the ripening agent to the flowerpot, and the flowerpot will bloom blue pink yellow purple orange red green, 7 colors of flowers.
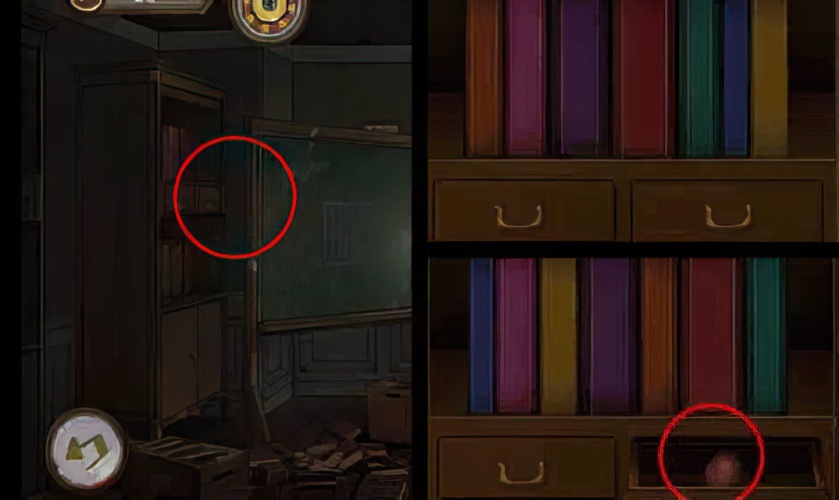
83. According to the arrangement order of the flowers, adjust the book on the bookcase and get the heart in the drawer.
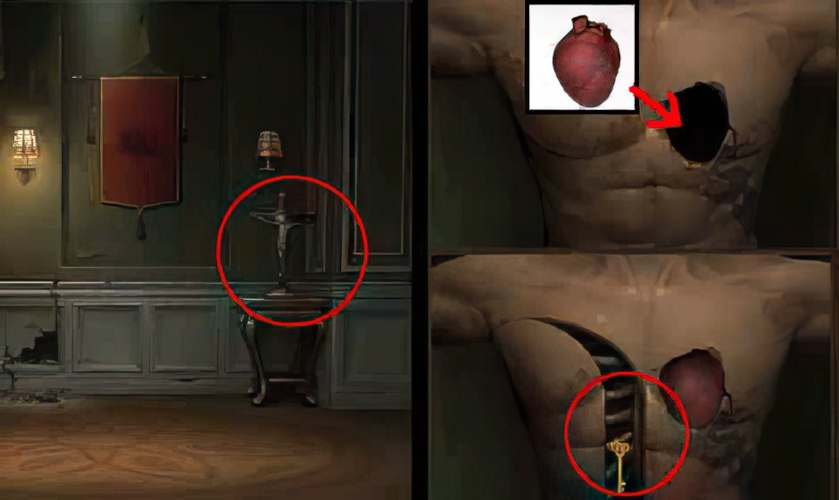
84. Go back to the corridor, put the heart into the chest of the Christ statue, and get the key to the dark room.

85. Go back to the basement and open the door of the dark room.
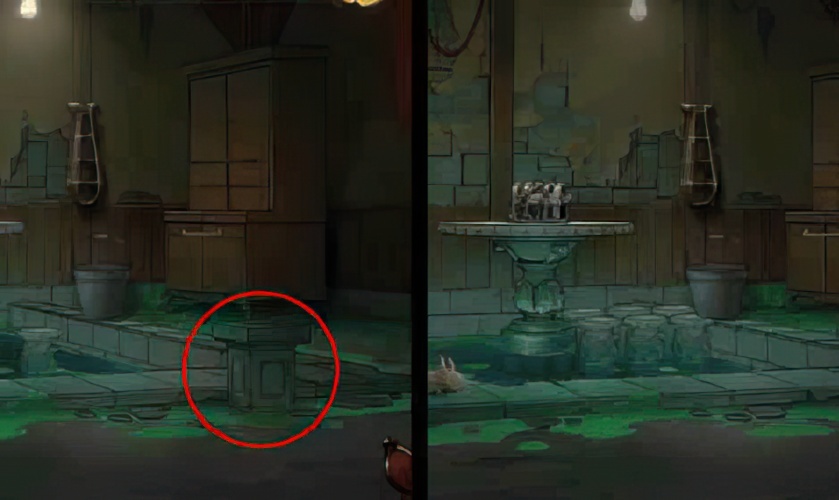
86. Complete the Sokoban game by the pool.
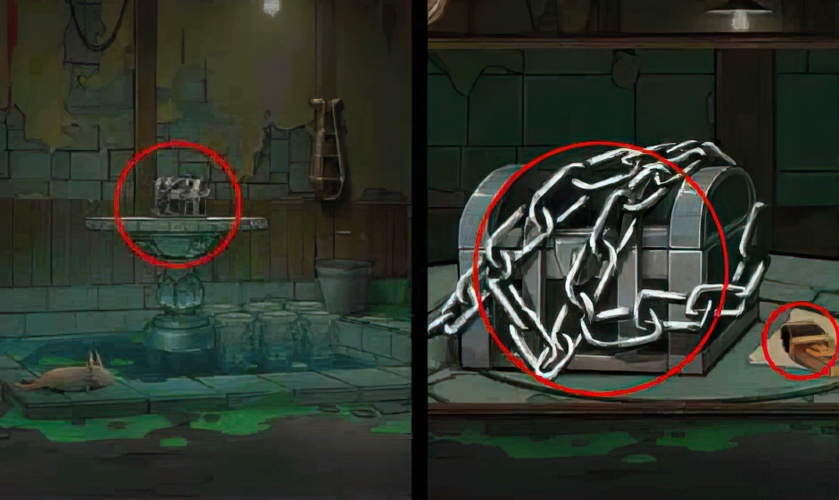
87. Get the iron box and matches in the middle of the pool.
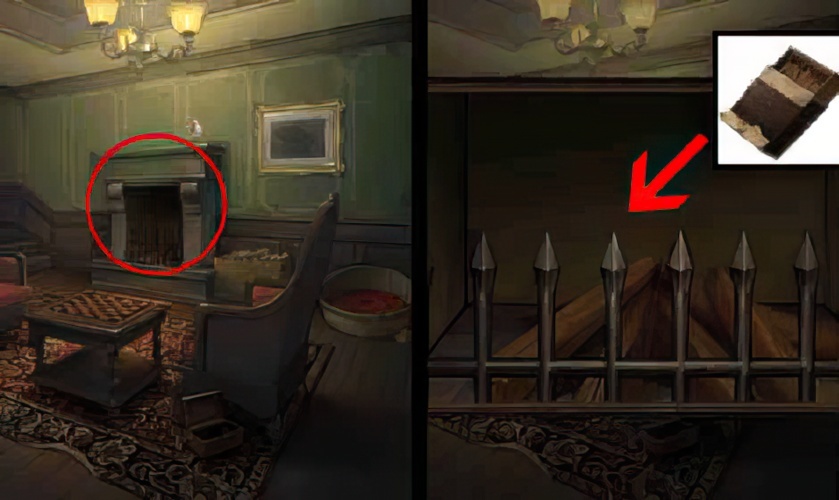
88. Go back to the living room and light the fireplace with a match.

89. Put the box in the stove.
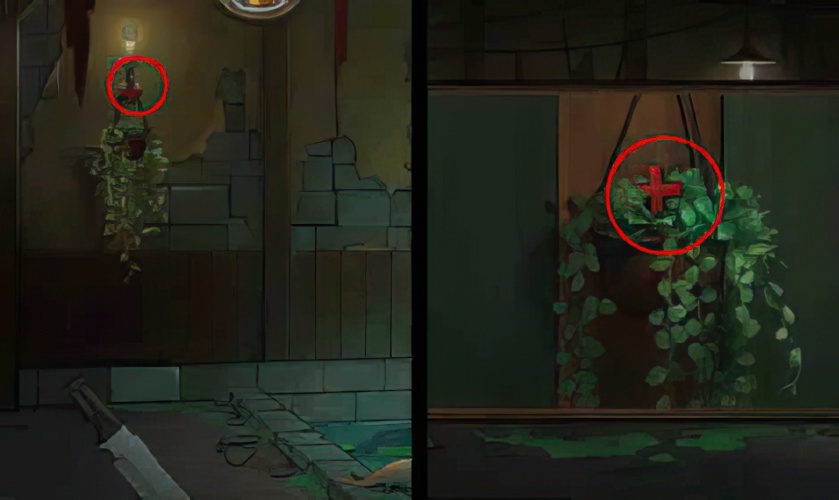
90. Find the red cross among the green plants in the dark room.
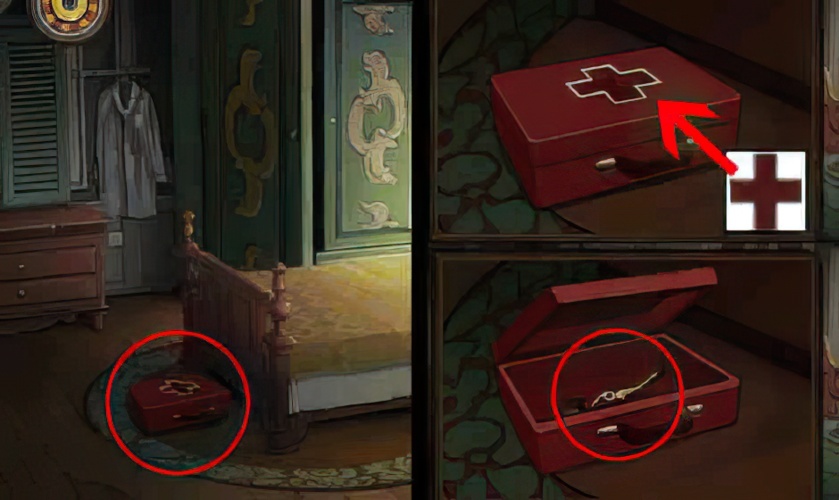
91. Put the red cross into the recess of the second bedroom medical box, open the box and get the vase and half of the pliers.
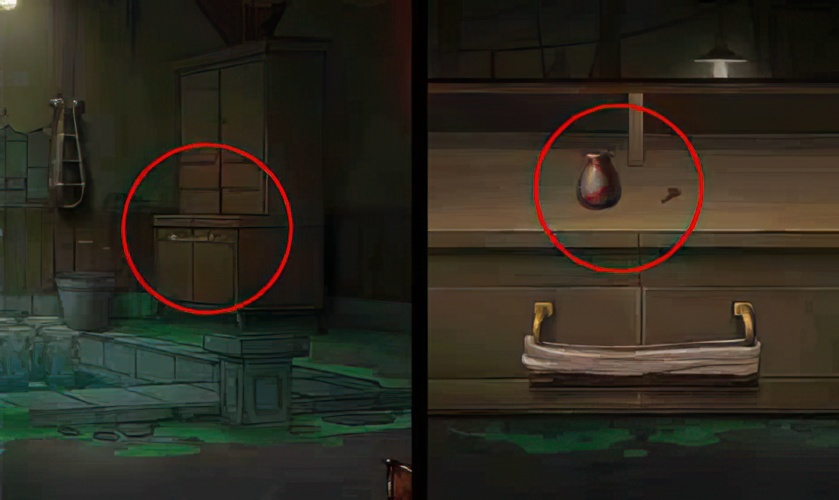
92. Get the vase and key on the cabinet in the dark room.
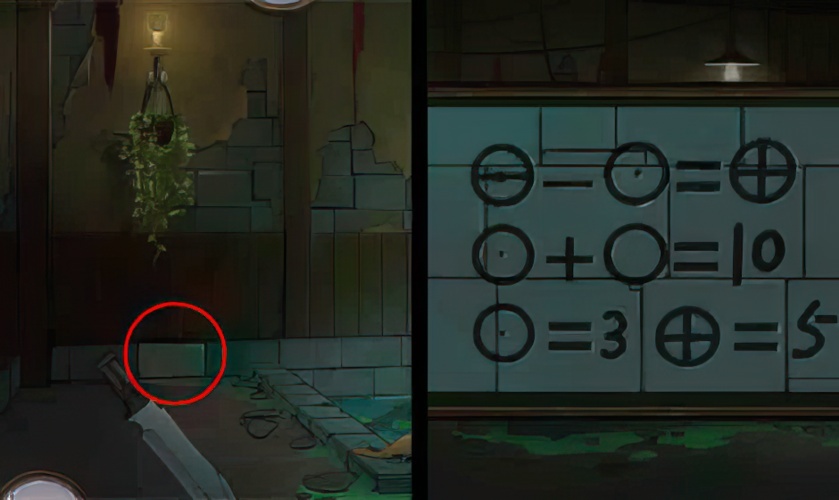
93. Look at the calculations on the tile under the darkroom wall, and calculate the numbers represented by 4 circles 3875.

94. Go back to the corridor, according to the number 3875 represented by the 4 circles, open the mechanism on the wall and get the vase.
95. Use the red key to open the box under the bed in the master bedroom and get the vase.

96. Go back to the dark room, place the vases in the order of purple blue yellow red on the wall, open the drawer, and get the other half of the pliers.

97. Assemble two and a half pliers together into a complete pliers.

98. Use pliers to remove the wire wrapped around the handle of the darkroom table, and get the screwdriver in the drawer.
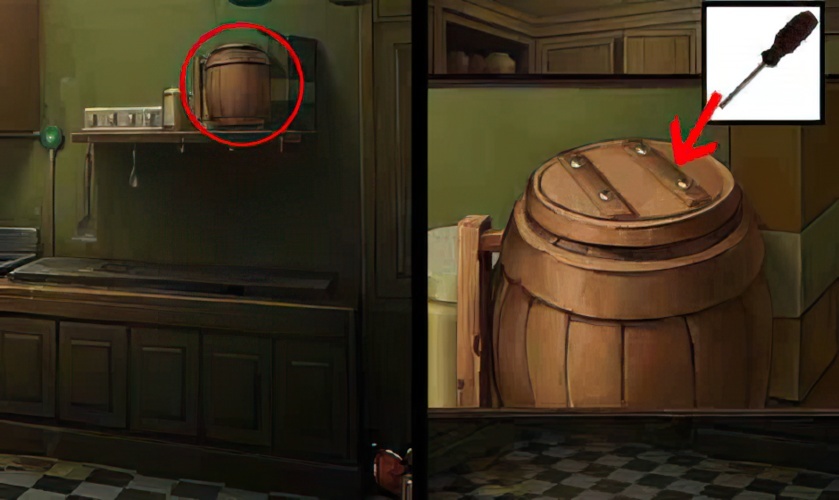
99. Enter the kitchen, open the barrel with a screwdriver, and get the oil pot.
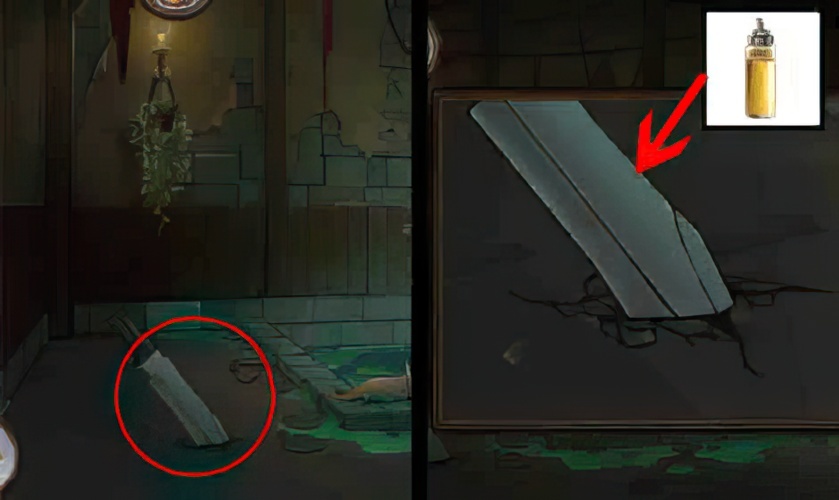
100. Go back in the dark room, the oil pot acted on the machete on the ground and pulled out the machete.
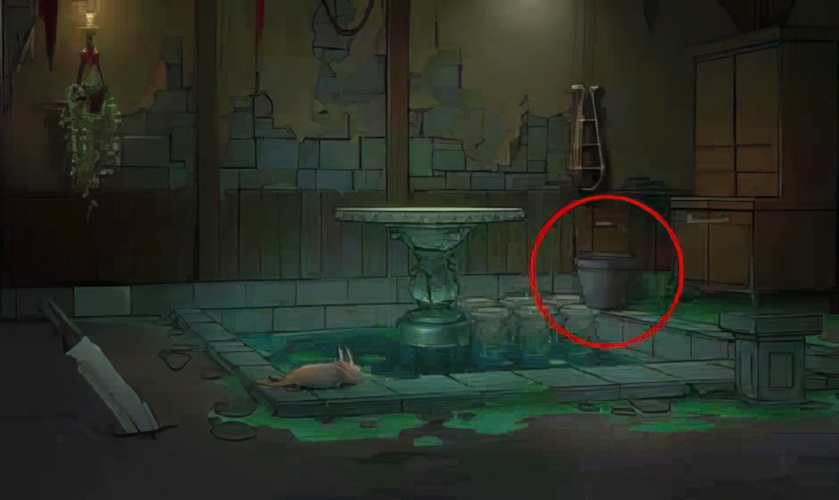
101. Get the iron bucket in the dark room.
102. Go to the kitchen and fill the iron bucket with water.
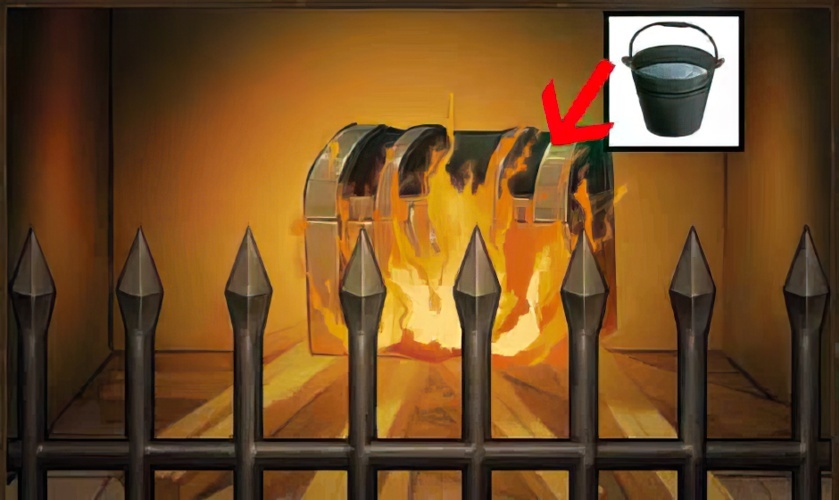
103. Use the water in the bucket to extinguish the red-hot iron box in the stove in the living room.
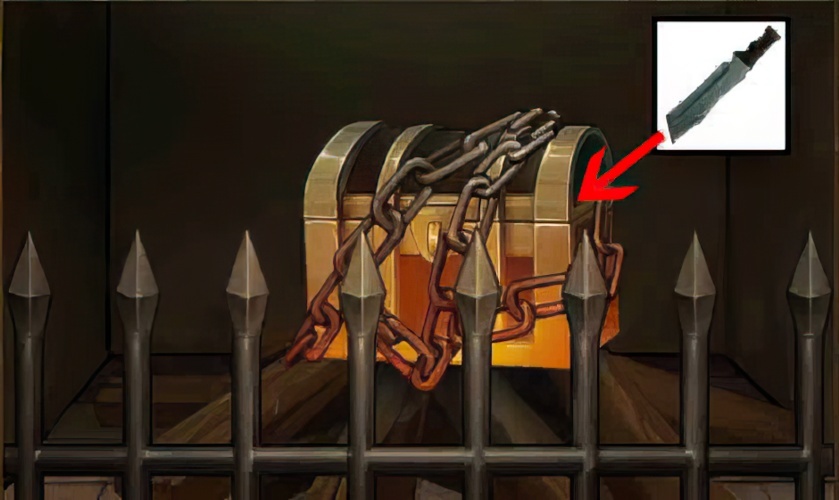
104. Use a machete to chop off the fragile iron chain.
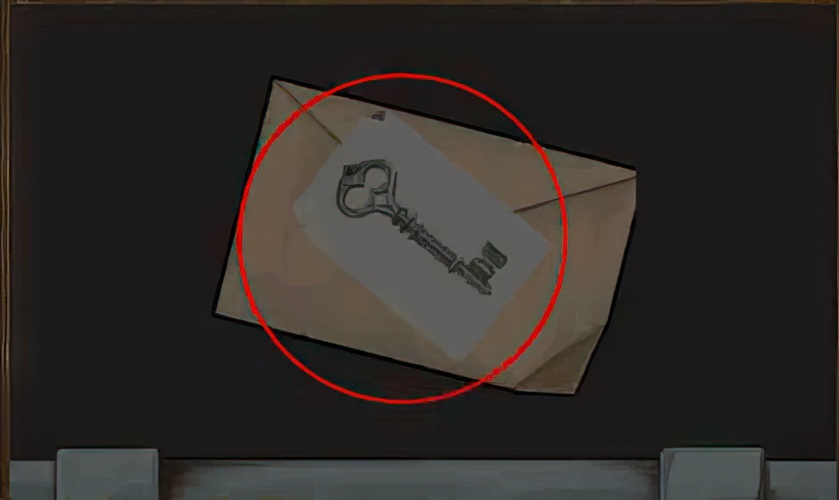
105. Take away the letter and key design drawings from the box.
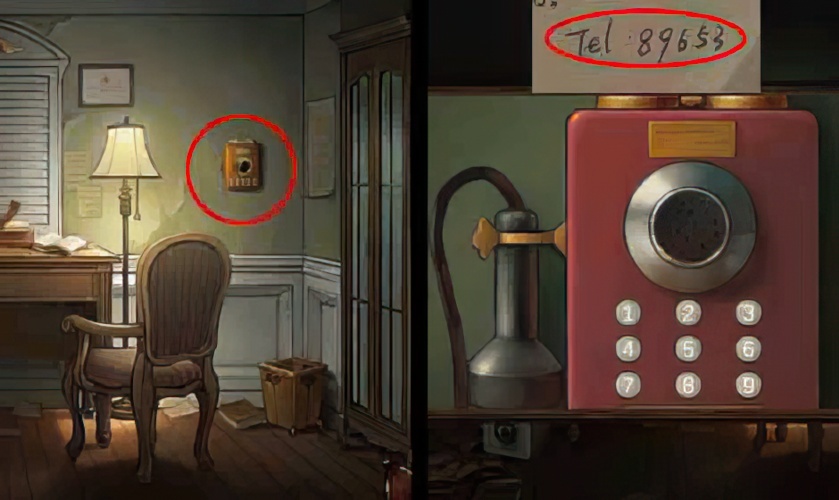
106. Dial the phone number 89653 left in the letter in the study room.

107. Get the turnplate on the garage table.
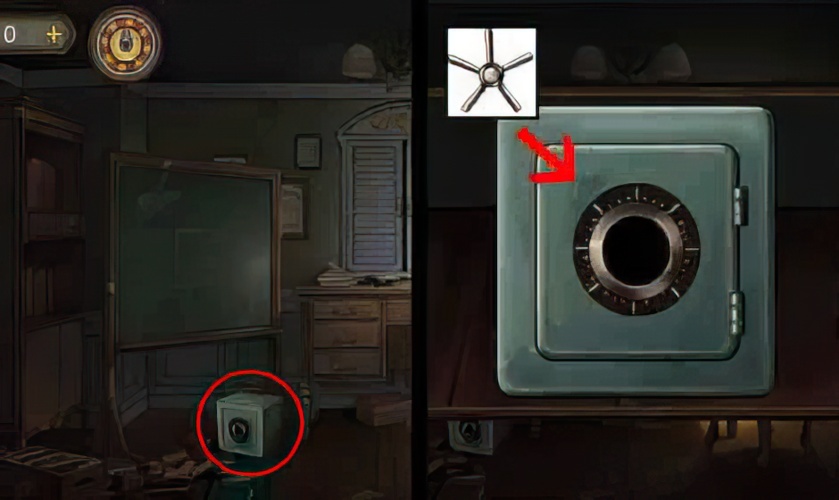
108. Go back to the study, the turnplate was installed in the safe on the floor, open it, and get half a gear knife.
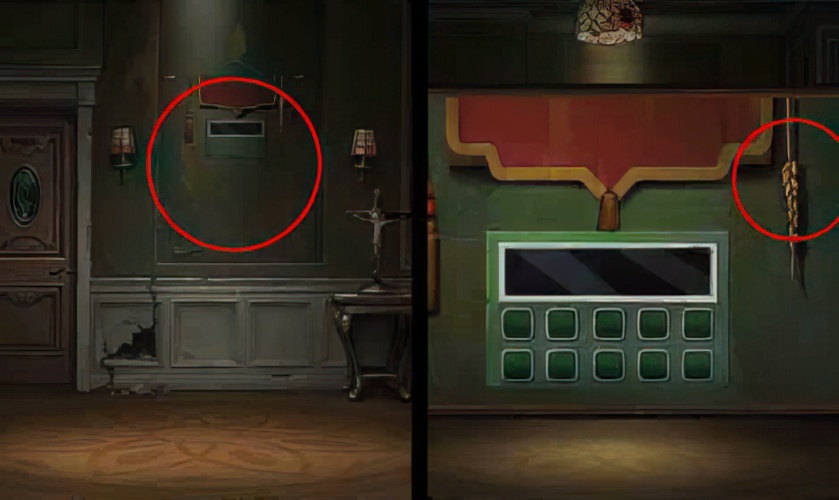
109. Get the ear of rice on the hanging picture in the corridor.
110. Go back to the garage, feed the ears of rice to the cow, and get the rocking handle on its neck when the cow leans down.

111. Open the car door with a crank, and get the metal adhesive and rag in the car.

112. Wipe the license plate with a rag to obtain the license plate number NTW-487.

113. Open the drawer according to the license plate number NTW-487 and get the other half of the gear knife.
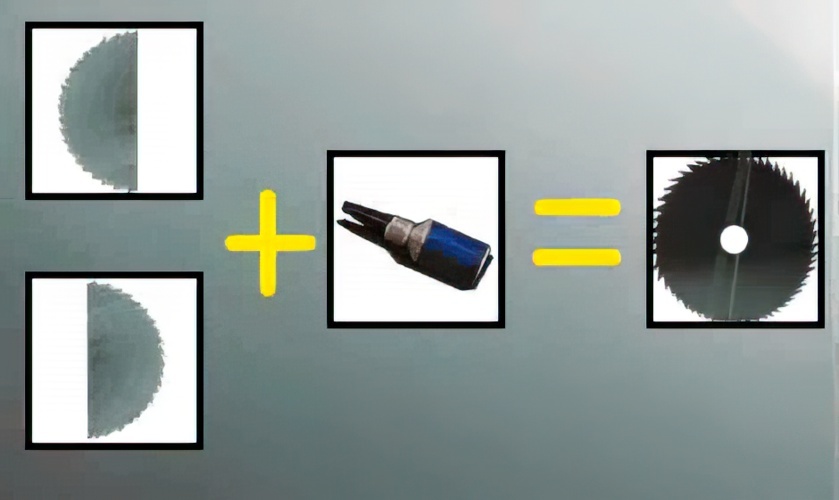
114. Assemble two gear knives together into a complete gear knife.

115. Complete the mechanism on the back wall of the car to get the rewarded metal piece.
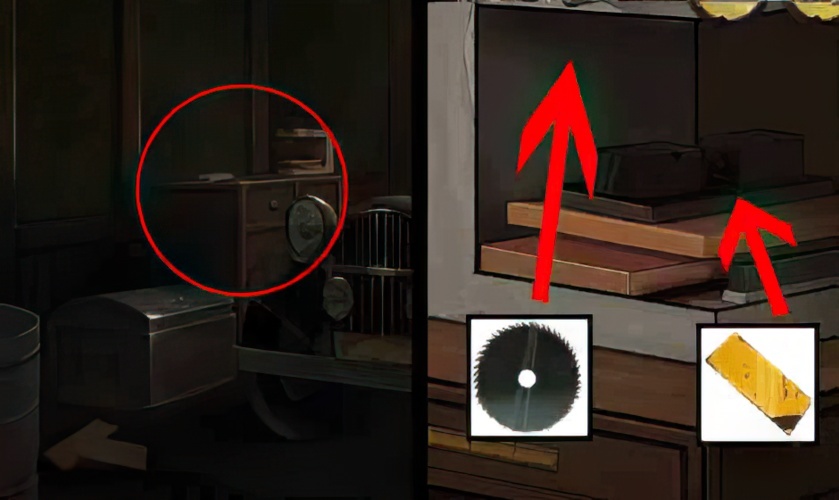
116. Install the gear knife on the machine, put on the metal piece, and turn on the machine.

117. Make the same key according to the key drawing obtained in the box.
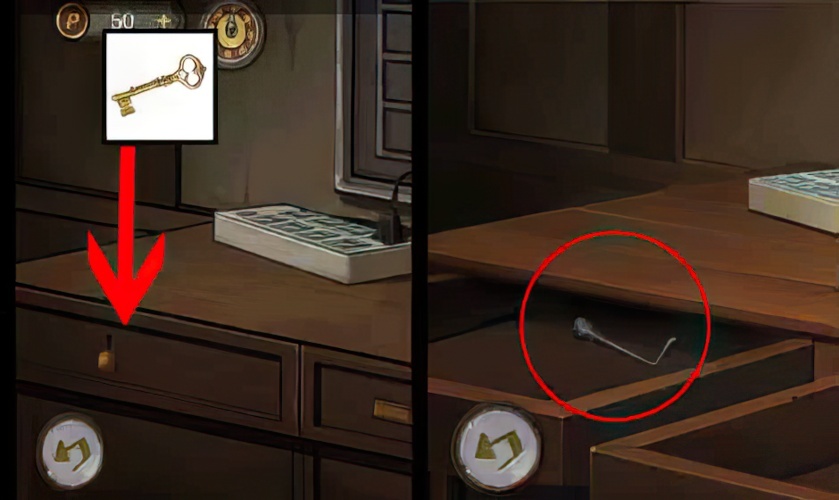
118. Use the made key to open the cabinet drawer and get the shifter.
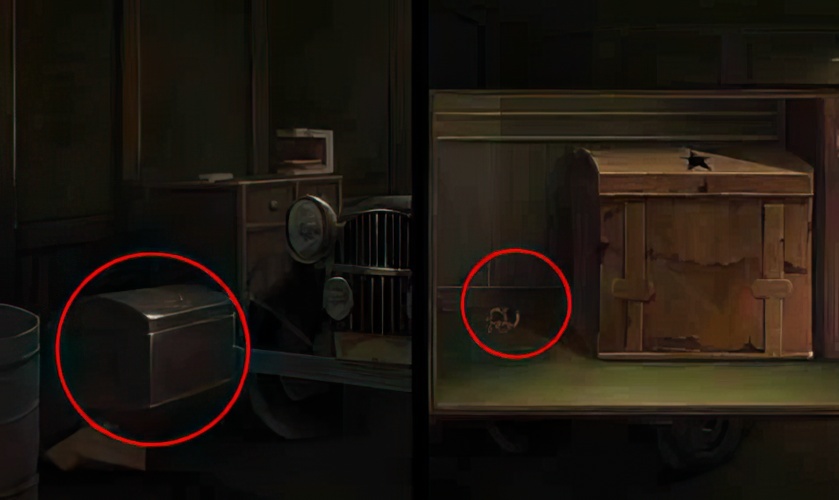
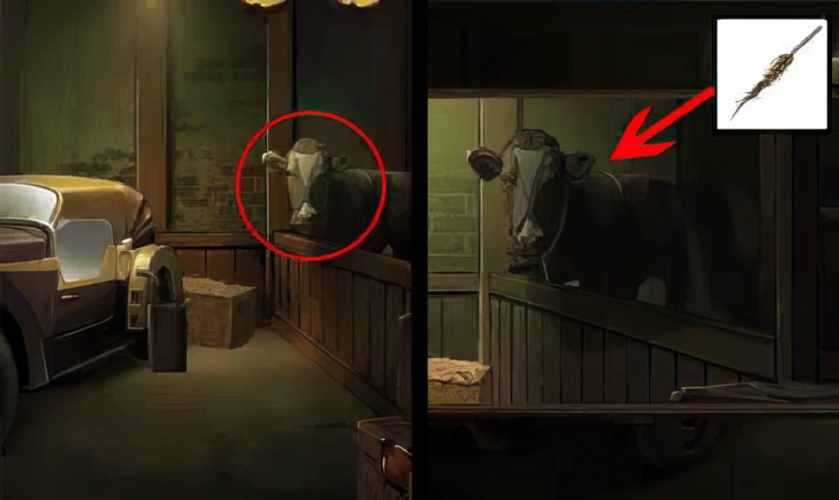
119. Look at the box in the corner and find the earthworm behind the box.
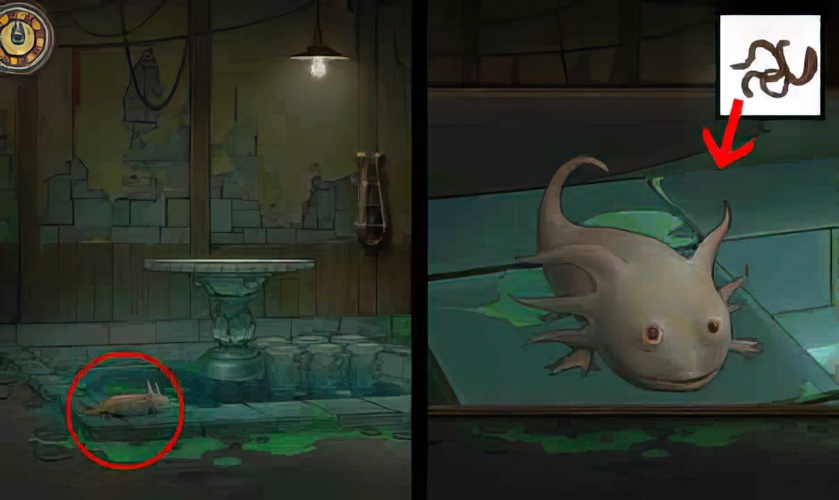
120. Go back to the dark room and feed the earthworms to the hexagonal dragon by the pool. The hexagonal dragon picks up a pentagonal square from the water.
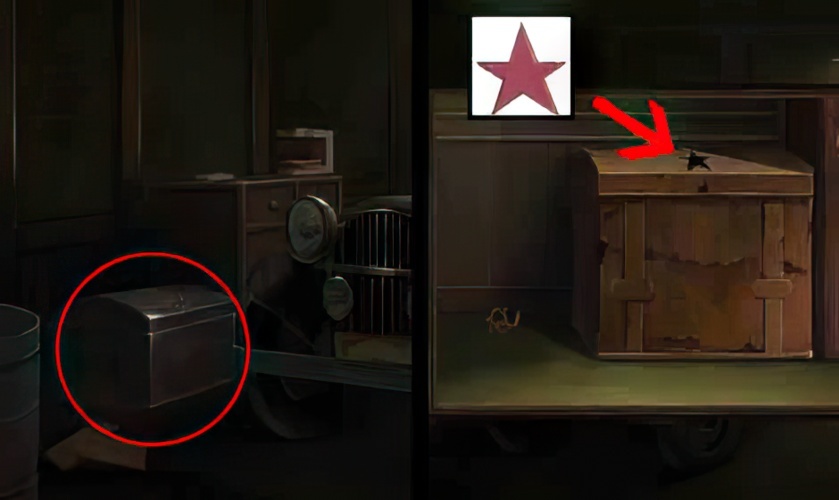
121. Go back to the garage, put the five-pointed star square in the groove of the box, open the box and get the oil pipeline inside.
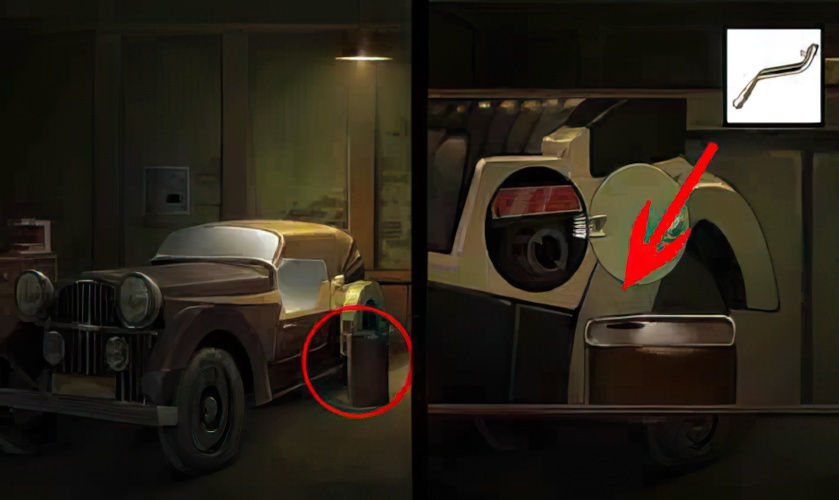
122. Install the fuel pipe between the car and the fuel tank to fill the car with fuel.
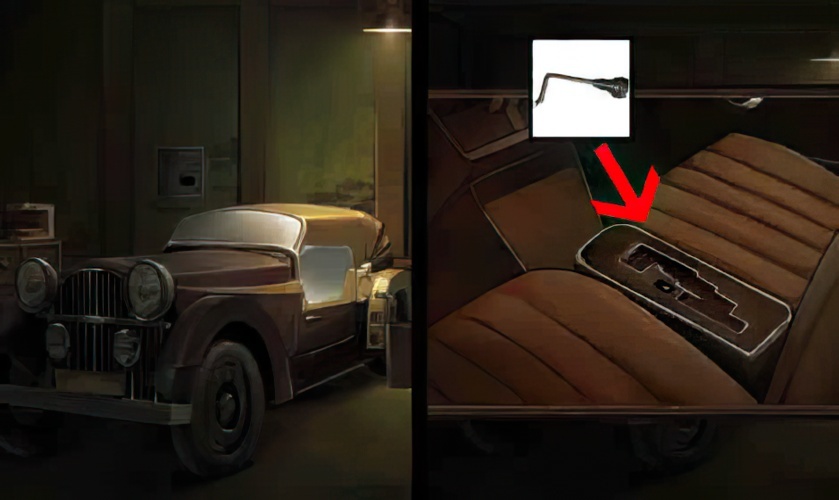
123. Install the shifter in the car.


