Connected Hearts 6: Vanished Beauty (Bonus Chapter) – Continues the story of the missing girls in Seabridge Bay, but this time offers a glimpse of the events from Eli’s perspective. The musician has a secret of his own he keeps photos of the missing girls and tries not to show them to Jules. When Mallory vanishes without a trace, Eli decides to help his new acquaintance and continue the investigation, which has long been linked to the search for his sister Emily. New clues lead Eli to Jules and Mallory’s room, and then to forest hideouts and gathering places of the Children of Dawn cult. As he examines the evidence left behind, he learns more about Caleb Morrow’s methods and the preparations for the upcoming ritual. The girls are not merely held captive by force; using hypnosis and special herbal concoctions, the cultists strip their captives of the ability to resist. After the initial plan is threatened, preparations for the ritual are moved to the lagoon. The situation becomes even more dangerous when Jules is captured and falls under hypnosis. Now she is convinced that the ritual must be completed and does not realize that she is in the hands of people who want to use her for their own purposes. Eli continues his search and finally meets Emily. Gradually, the girl’s memories of the past return, and she helps her brother make sense of what is happening and locate the place where Jules is being held. To free his beloved, Elay must distract Caleb’s followers, infiltrate the cult’s camp, and find a way to free Jules from their influence.
Bonus Chapter Walkthrough

- Take FRESCO FRAGMENTS 2/2 (I).
- Use FRESCO FRAGMENTS 2/2 on the fresco, take METAL PLATE, MIRROR (J).
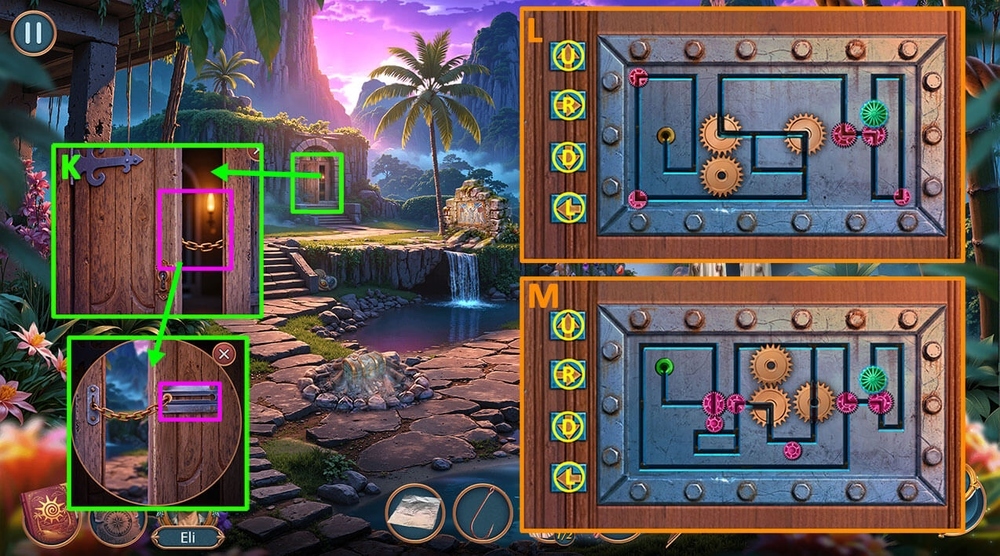
- Use MIRROR on the door, use HOOK on the chain (K).
- Easy solution: Click U, R, D, L, U, L, U, L, D, R, R, D, D, L, U, R, D, L, U (L).
- Hard solution: Click U, R, D, L, U, L, U, L, D, L, U, L, D, D, L, U, R, U, L, L, U (M).
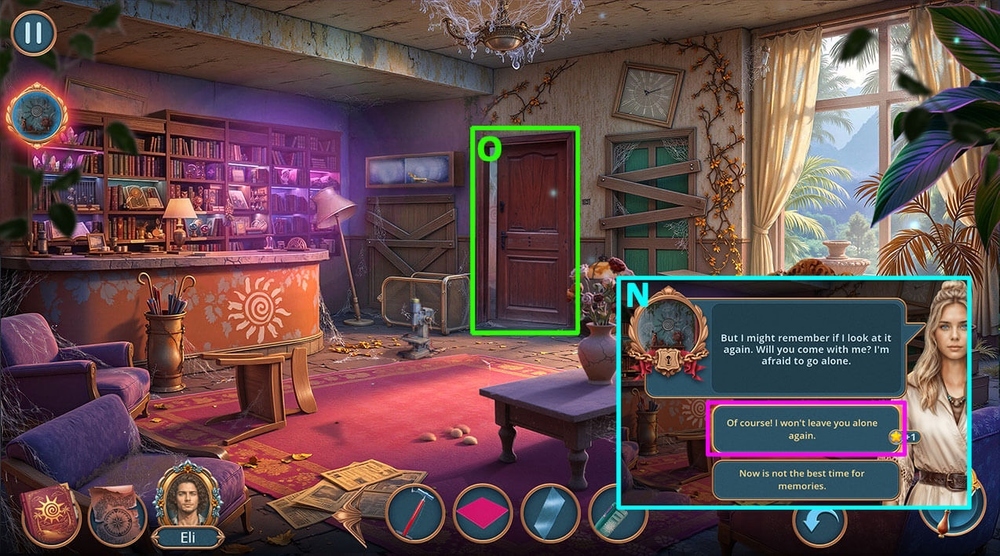
- Select this option, earn CULTIST’S WALKIE-TALKIE (N).
- Go forward (O).
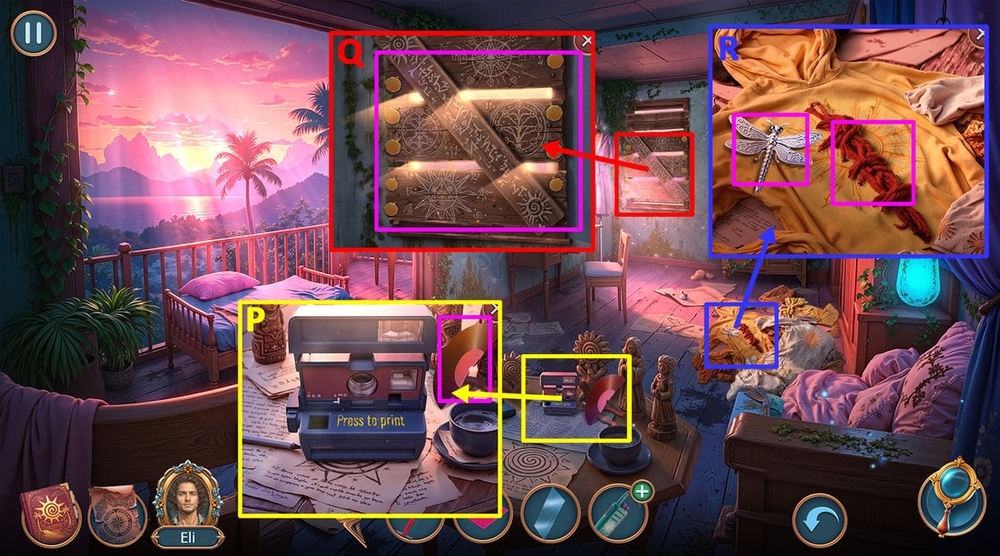
- Take RECORD FRAGMENTS 1/2, PLIERS (P).
- Use PLIERS on the nails, take SCISSORS (Q).
- Take SILVER DRAGONFLY, use SCISSORS on the seams, take BAND-AID (R).
- Go back.
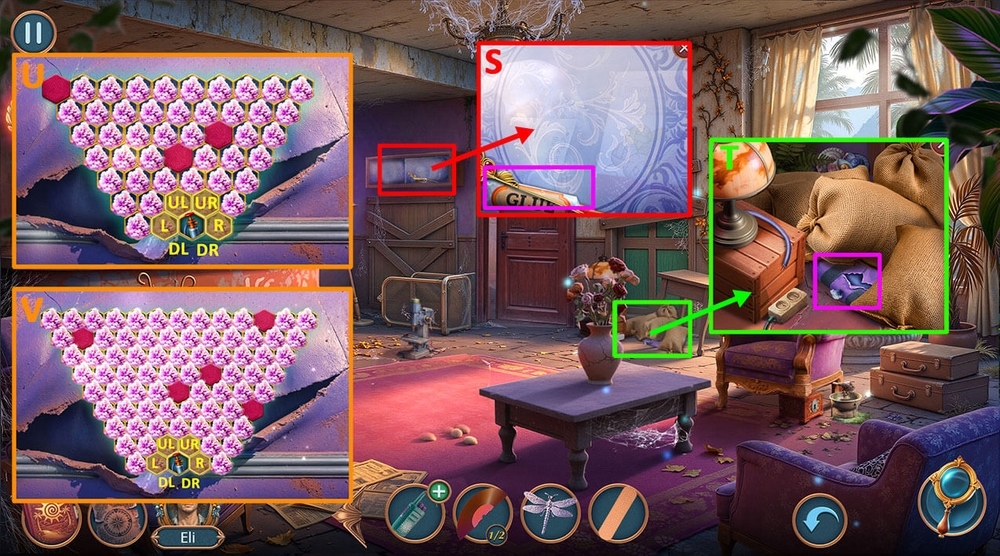
- Take LOCK PICKS 1/2, GLUE (S).
- Use GLUE, RUBBER, HAND PUMP on the gap (T).
- Easy solution: Click R, UR, L, DL, DR, R, UL, R, DL, L, UL, R, DR, DL (U).
- Hard solution: Click R, UR, UL, R, UR, L, DL, L, UR, UL, L, DR, R, UL, UR, R, DL, L, DR, R, UR, UL, L, DR, R, UL (V).
- Take OXYGEN TANKS 1/2, read the note with a drawing, take DRAWING OF STONES.
- Go back.
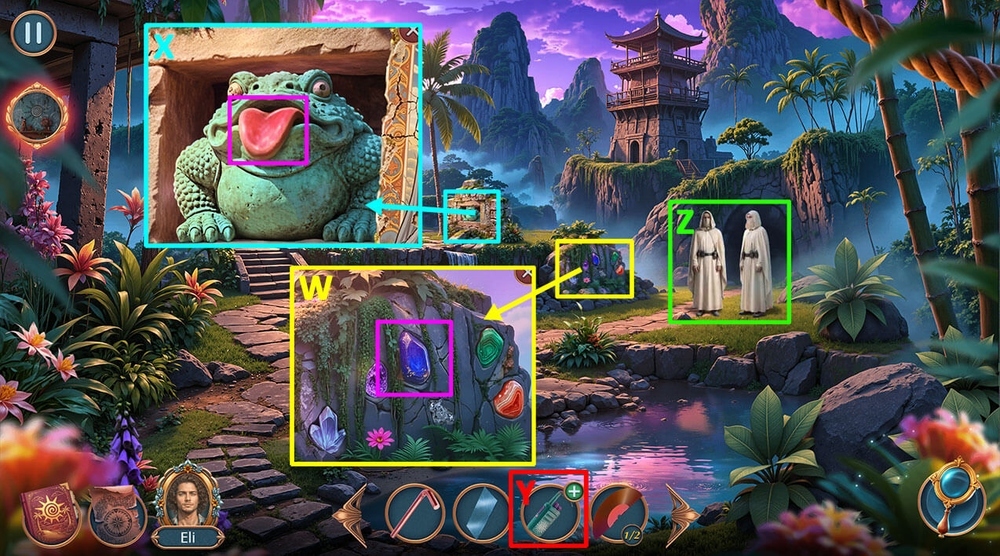
- Use DRAWING OF STONES on the rock, take a look at the photo, take DIAMOND, WIRE (W).
- Use SILVER DRAGONFLY on the frog’s tongue, take RECORD FRAGMENTS 2/2 (X).
- Use WIRE, FOIL on CULTIST’S WALKIE-TALKIE, earn WALKIE-TALKIE (Y).
- Use WALKIE-TALKIE on the cultists (Z).
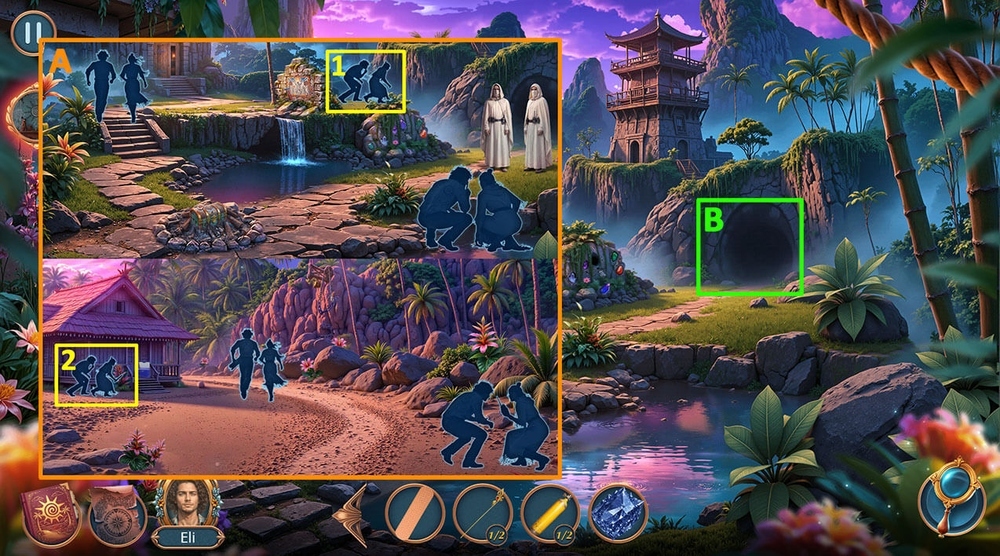
- Solution: Click 1, 2 (A).
- Go forward (B).

- Select this option (C).
- Read the note (D).
- Read part of the note, take BOOK LIST 1/2, take COMB (E).
- Use COMB on the moss (F).
- Play puzzle, earn SHARPENING CIRCLE (G).

- Use SHARPENING CIRCLE on the trolley, take BREATHING TUBE, BROKEN GLASS CUTTER (H).
- Go to Old Hotel Room.
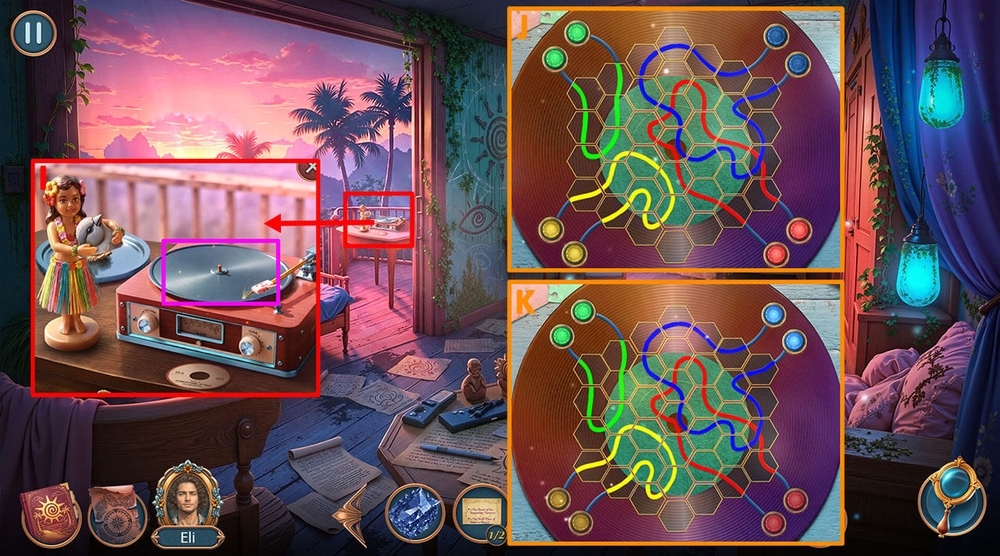
- Use RECORD FRAGMENTS 2/2 on the record player (I).
- Easy solution: Follow the instructions in the image (J).
- Hard solution: Follow the instructions in the image (K).
- Take BIRD’S HEAD.
- Go back.

- Use DIAMOND on BROKEN GLASS CUTTER, earn GLASS CUTTER (L).
- Use GLASS CUTTER on the glass (M).
- Easy solution: Swap 3-6, 1-4, 3-6 (N).
- Hard solution: Swap 1-4, 2-5, 1-4 (O).
- Take BROKEN RING, read both parts of the note, take BOOK LIST 2/2.
- Use BIRD’S HEAD on the bird without its head, use BAND-AID on the gap, take CAMERA BUTTON (P).
- Go forward (Q).
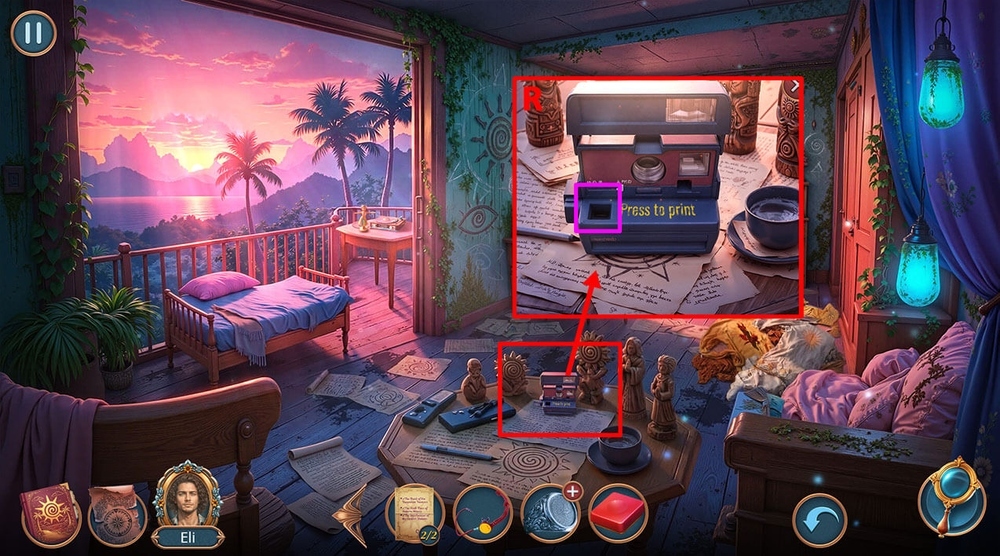
- Use CAMERA BUTTON on the camera, examine the photo, read the note (R).
- Go back.
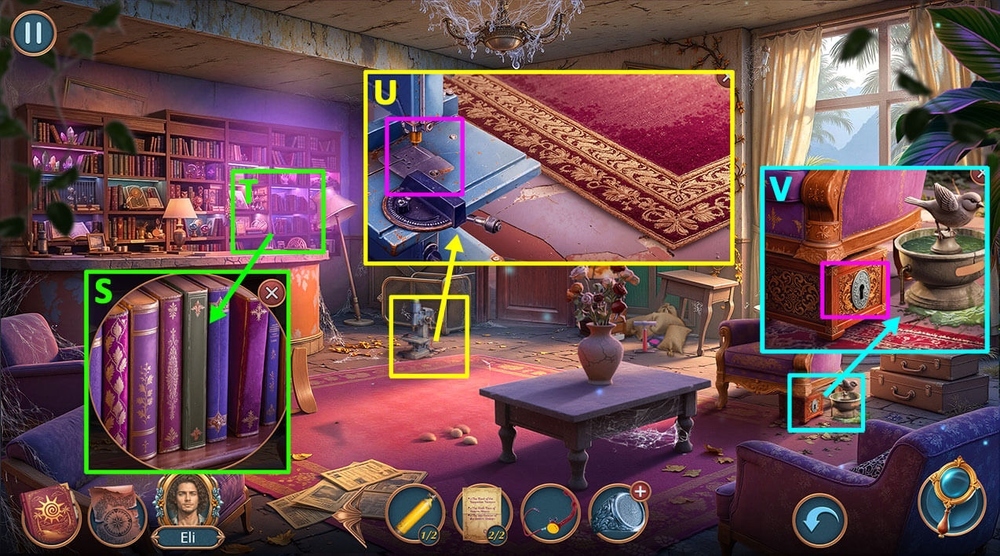
- Use BOOK LIST 2/2 on the bookcase (S).
- Play puzzle, earn SAW BLADE (T).
- Use SAW BLADE, METAL PLATE on the machine, take LOCK PICKS 2/2 (U).
- Use LOCK PICKS 2/2 on the box lock, take PAPER WITH SYMBOLS (V).
- Go to Cave behind the Waterfall.
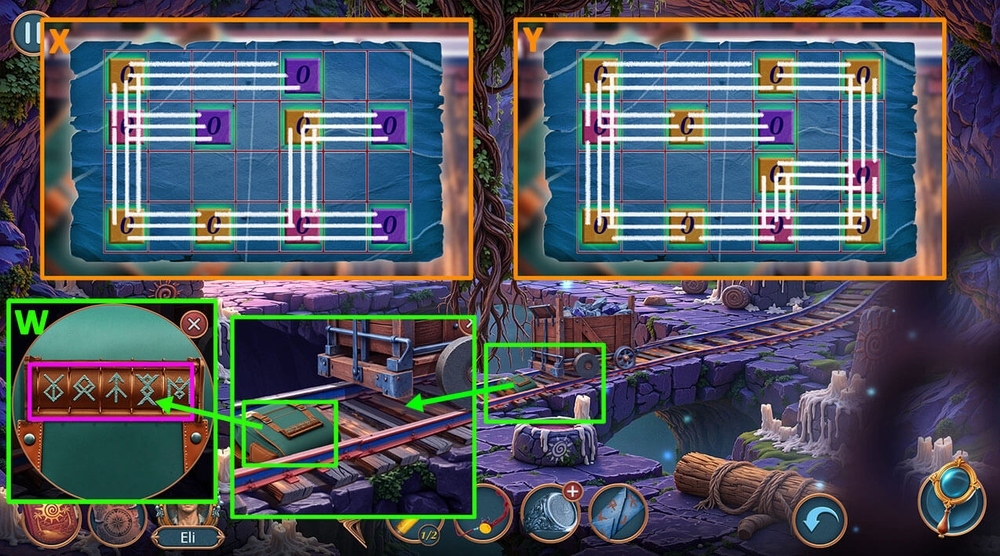
- Use PAPER WITH SYMBOLS on the backpack (W).
- Easy solution: Follow the instructions in the image (X).
- Hard solution: Follow the instructions in the image (Y).
- Take WOVEN BRACELET, GOLDEN STENCIL.

- Use GOLDEN STENCIL on the panel with rubies (Z).
- Easy solution: Follow the instructions in the image, then click PLAY (A).
- Hard solution: Follow the instructions in the image, then click PLAY (B).
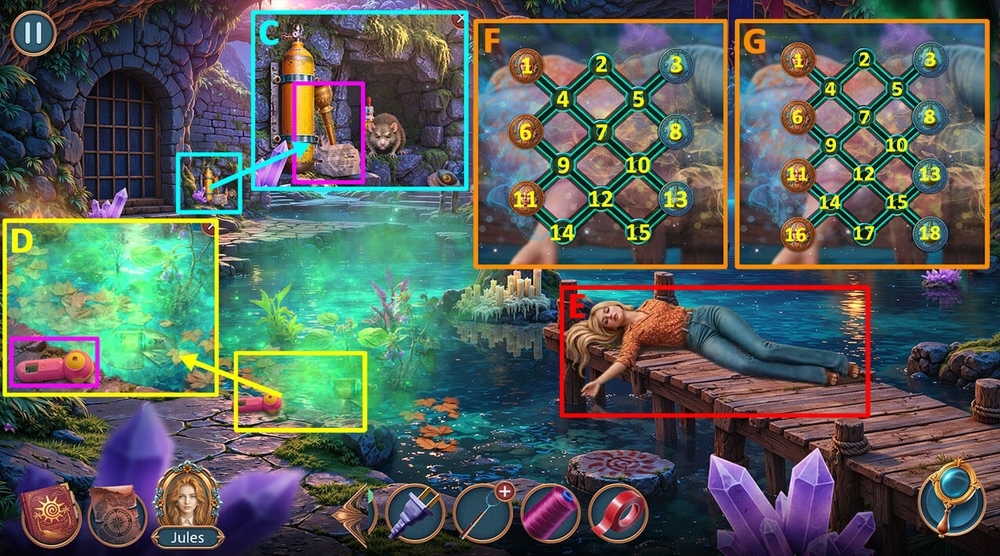
- Read the note, take SPIRAL SUN AMULETS 1/2, TORCH, BATTERY (C).
- Use BATTERY, BLADES on the fan, take AMMONIA (D).
- Use AMMONIA on Mallory (E).
- Easy solution: Click 1-4, 6-9, 11-14, 9-11, 4-6-9, 3-5-2-4-1, 8-5-2-4, 13-10-8-5-2, 9-12-15-13, 11-9-12-10-8, 4-6, 2-4, 8-5-3, 14-12-10-8, 6-9-11, 4-6 (F).
- Hard solution: Click 1-4, 6-9, 11-14, 9-11, 4-6-9, 3-5-2-4-1, 8-5-2-4, 13-10-8-5-2, 18-15-13-10-8-5, 9-12-15-18, 11-9-12-15-13, 14-17, 4-6-9, 2-4-6, 5-2-4, 13-10-8-5-3, 17-15-13-10-8, 16-14-17-15-13, 9-11-14-16, 4-7-9-11 (G).
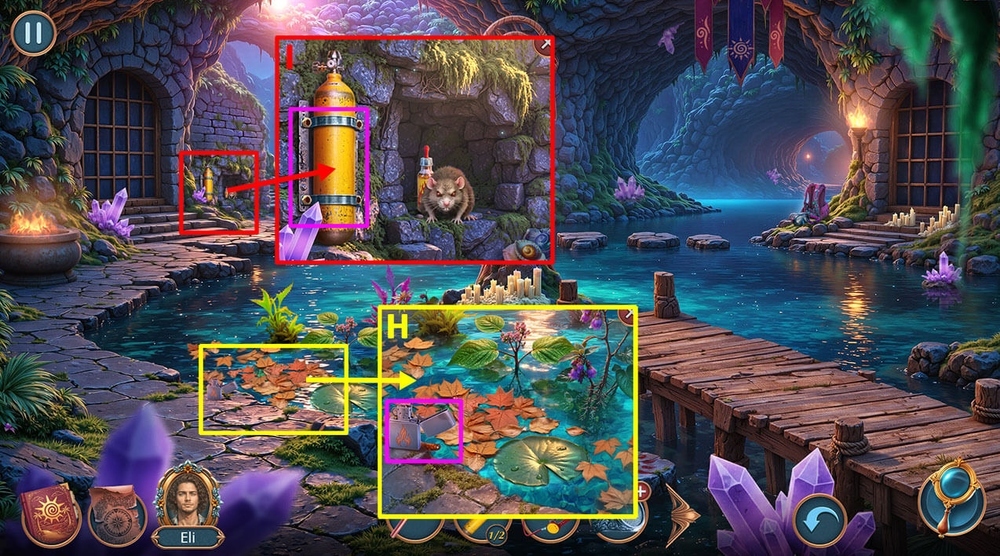
- Take EMPTY LIGHTER and RAZOR (H).
- Use HEX KEY on the hinges, take OXYGEN TANKS 2/2 (I).
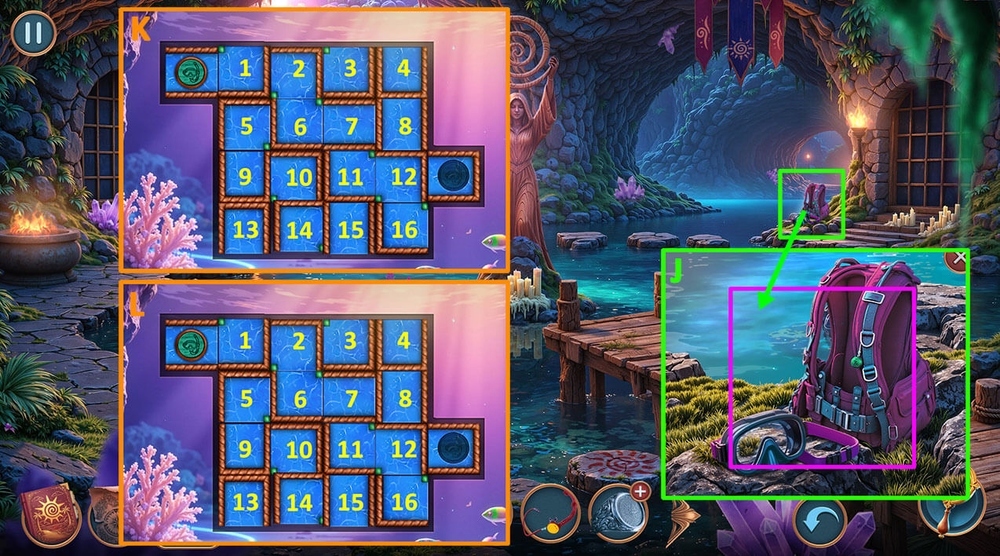
- Use OXYGEN TANKS 2/2, BREATHING TUBE on the base of the scuba gear (J).
- Easy solution: Click 1 (3 times), 5 (3 times), 6 (3 times), 2 (3 times), 3 (2 times), 7, 11 (3 times), 10, 14 (3 times), 16 (3 times), 12 (2 times), 14 (2 times), 1, 3, 10 (2 times), 2 (K).
- Hard solution: Click 1 (3 times), 5 (3 times), 6 (3 times), 2, 3 (2 times), 11 (3 times), 10, 14 (3 times), 16 (3 times), 12 (3 times), 1 (3 times), 4, 2 (3 times), 3 (3 times), 10, 7, 12, 4 (3 times) (L).
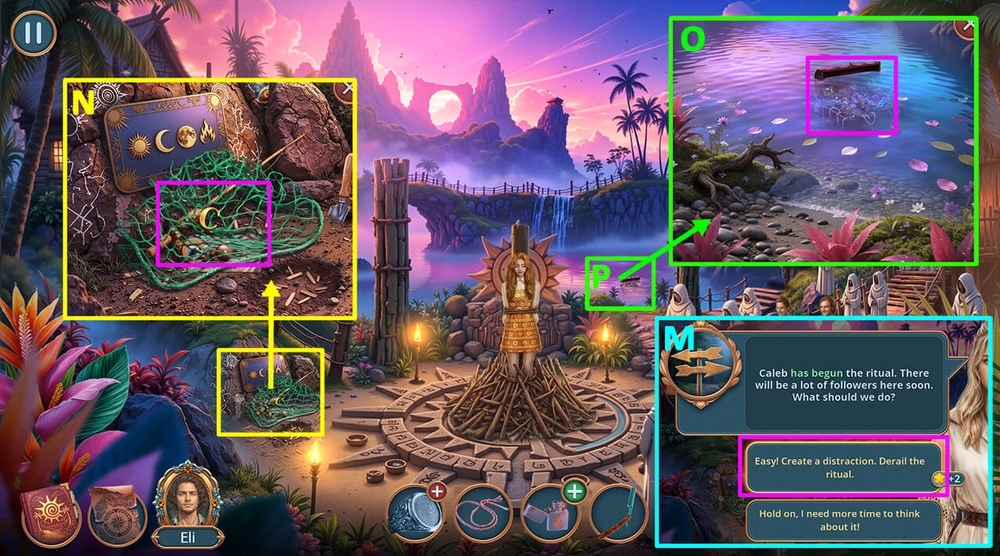
- Select this option (M).
- Take RING PART, use RAZOR on the net, take FISHING ROD, read the note (N).
- Use FISHING ROD on the chest (O).
- Play puzzle, earn METAL DETECTOR (P).
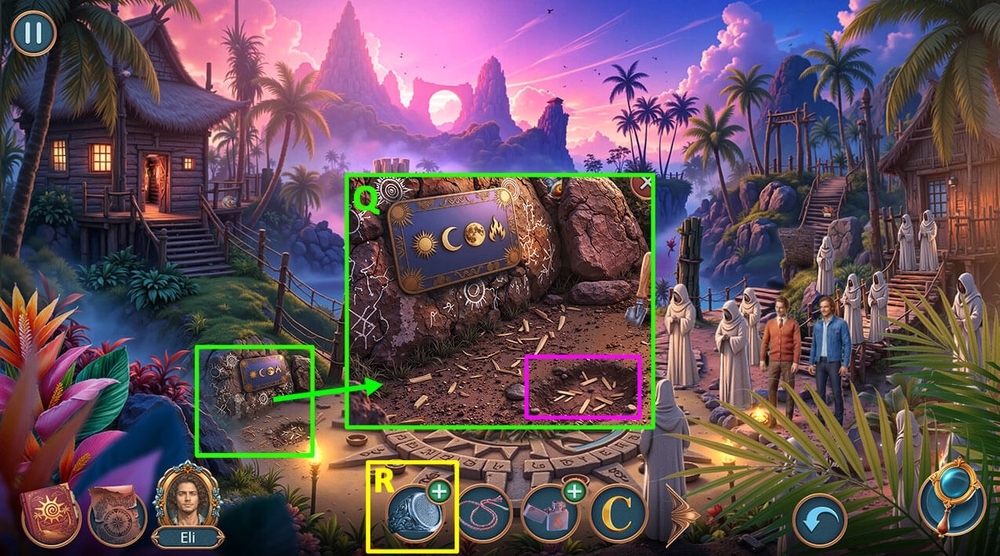
- Use METAL DETECTOR on the hole, take SOLDERING IRON (Q).
- Use SOLDERING IRON and RING PART on BROKEN RING (R).
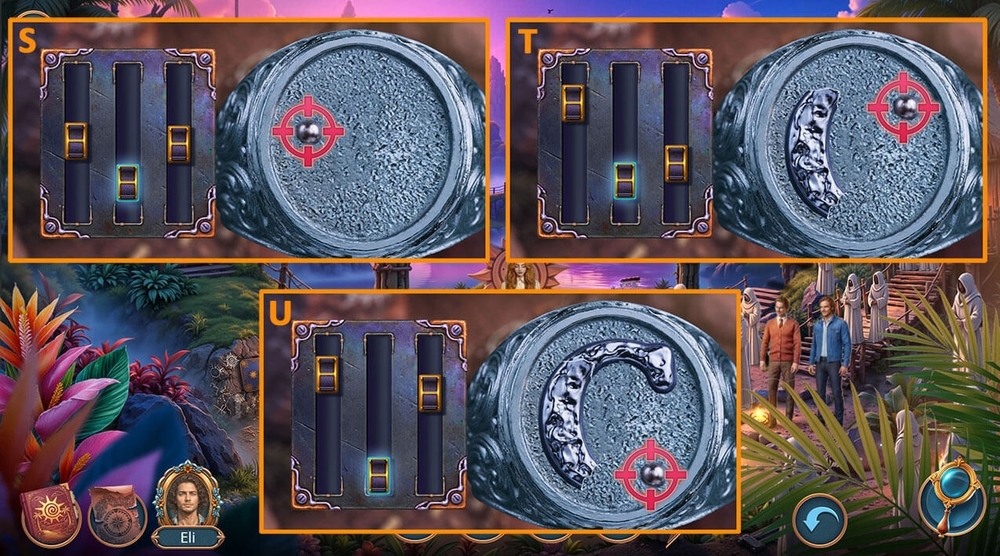
- Easy solution: Follow the instructions in the image (S-T-U).

- Hard solution: Follow the instructions in the image (V-W-X).
- Take SIGNET RING.
- Go to Near the Cave Entrance.

- Use SIGNET RING on the letter-shaped slot on the chest, take METAL PLATE WITH SYMBOLS (Y).
- Go to Lagoon.
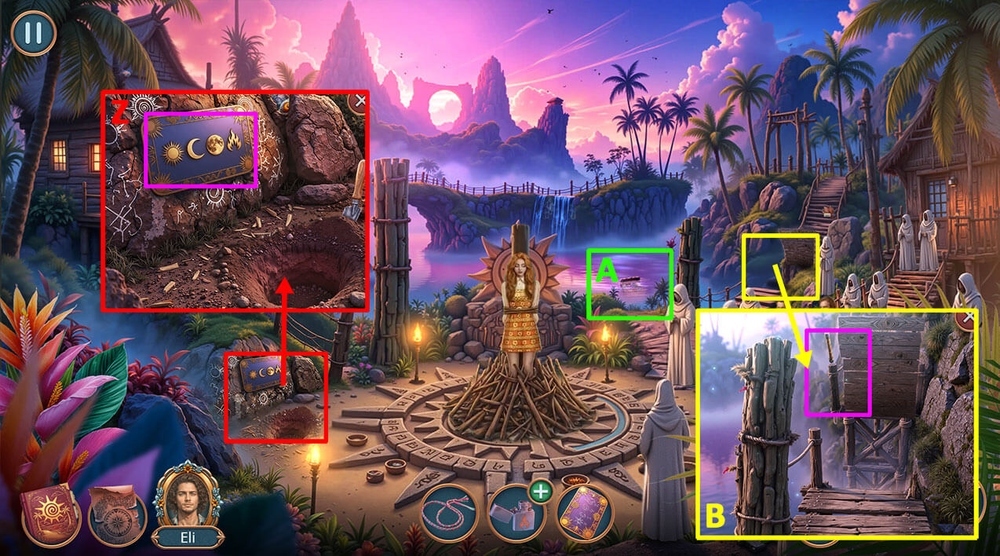
- Use METAL PLATE WITH SYMBOLS on the signs, take DRY LEAVES 1/2 (Z).
- Play puzzle, earn LOADED CROSSBOW (A).
- Use LOADED CROSSBOW on the bridge mechanism, read the note, take DRY LEAVES 2/2, PIED PIPER (B).
- Go back.

- Use PIED PIPER on the rat (C).
- Easy solution: Follow the instructions in the image (D).
- Hard solution: Follow the instructions in the image (E).
- Take OIL.
- Use OIL and WOVEN BRACELET on EMPTY LIGHTER, earn LIGHTER (F).
- Go forward (G).
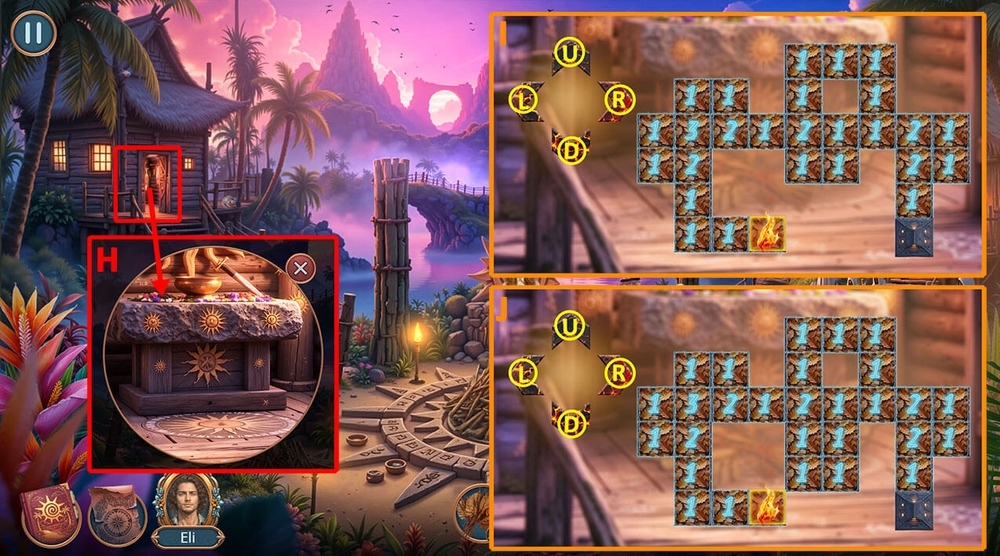
- Use DRY LEAVES 2/2, LIGHTER on the altar (H).
- Easy solution: Click L (2 times), U (3 times), L, D, R, U, R, U, L, D, R (4 times), D, L, U (3 times), R (2 times), D (2 times), R, D, R, U, L, D (2 times) (I).
- Hard solution: Click L (2 times), U (3 times), L, D, R, U, R, U, L, D, R (4 times), D (2 times), L, U (4 times), R (2 times), D (2 times), R, D, R, U, L, D (2 times) (J).
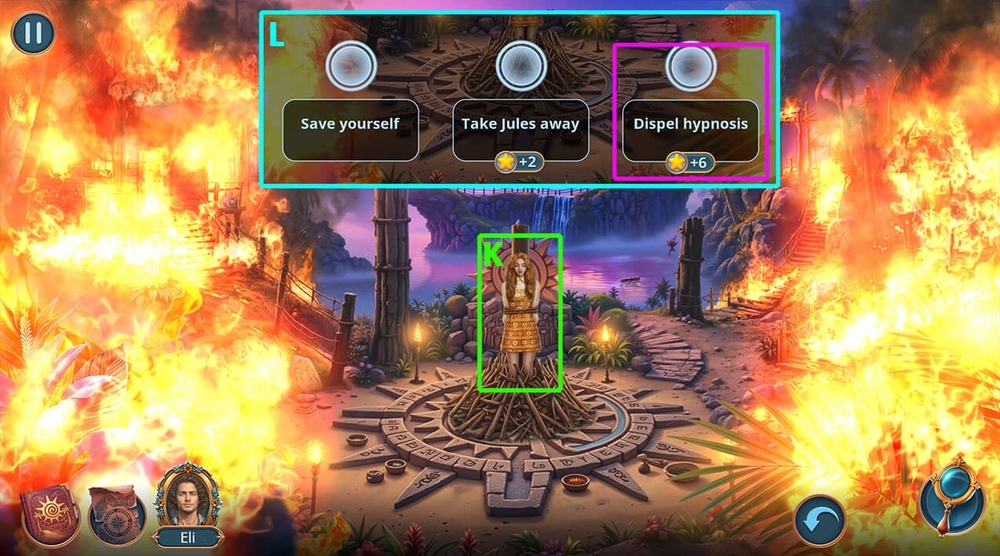
- Click on Jules (K).
- Select this option (L).
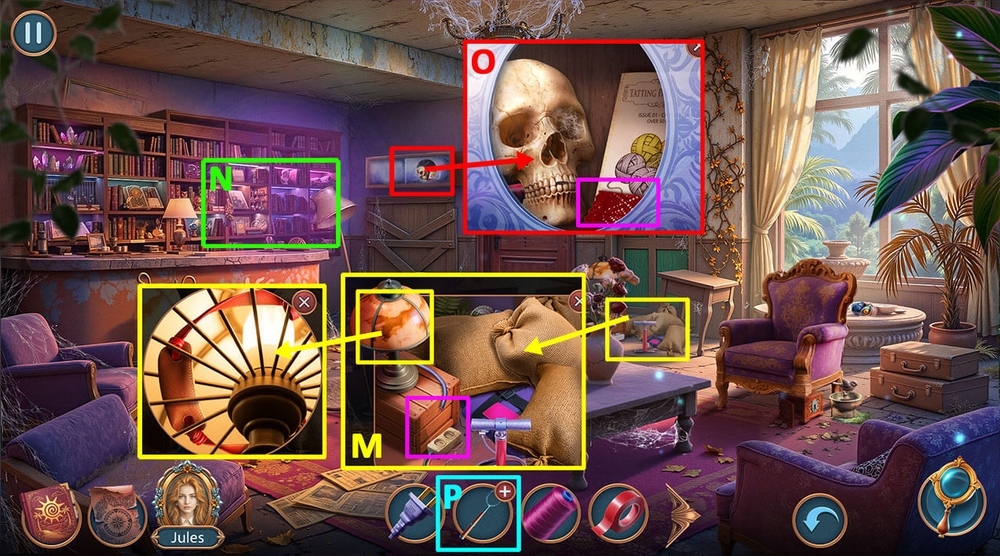
- Use PLUG and STICKY TAPE on the wire, take SLINGSHOT BAND (M).
- Play puzzle, earn TATTING SHUTTLE (N).
- Click on the torn stocking, use TATTING SHUTTLE and THREADS on the torn stocking, earn STOCKING (O).
- Use STOCKING on GRABBER, earn SCOOP NET (P).
- Go to Underground Lake.

- Use SCOOP NET on the leaves, take FOAM (Q).
- Go back.
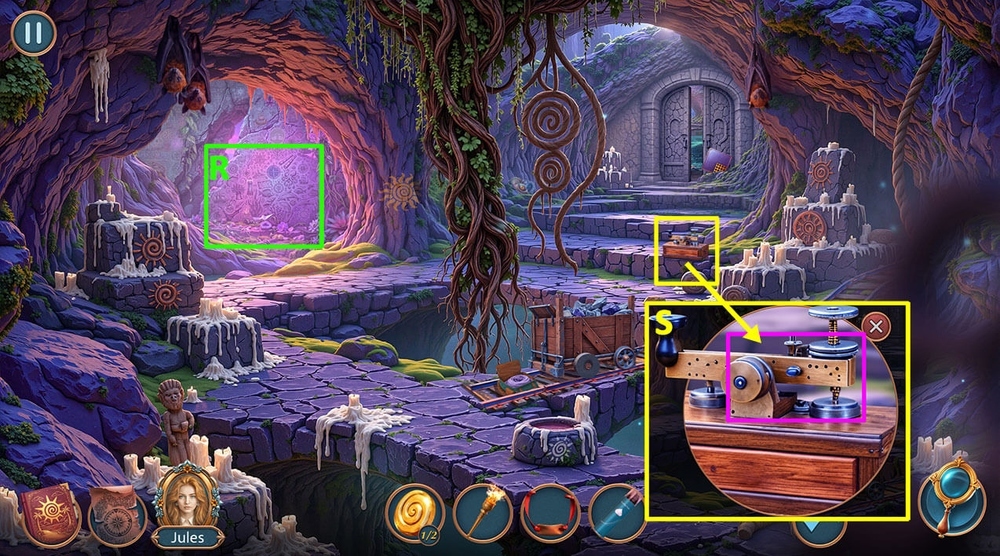
- Play puzzle, earn MORSE CODE (R).
- Use MORSE CODE on the machine, take GUNPOWDER, BRUSH (S).
- Go back.
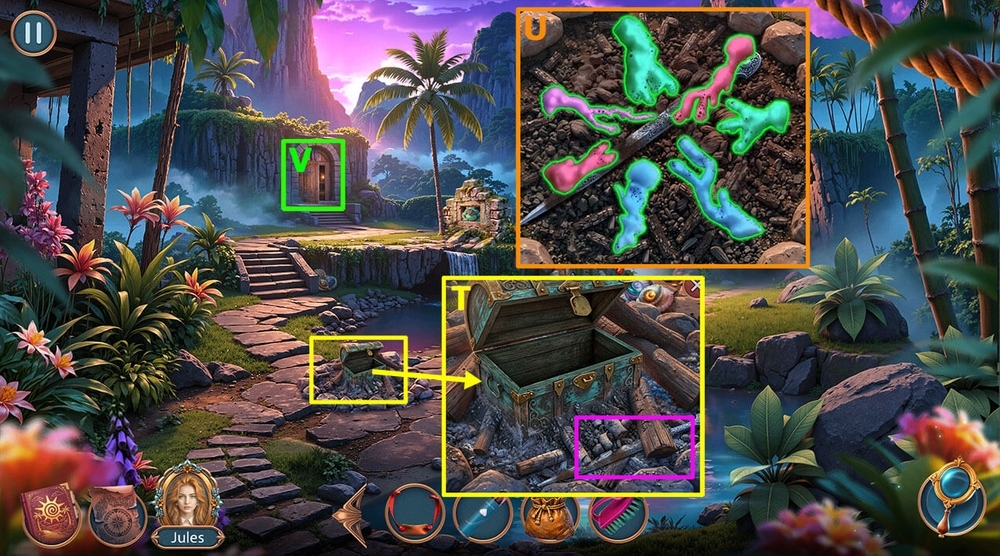
- Use FOAM, BRUSH on the soot (T).
- Easy/Hard solution: Follow the instructions in the image (U).
- Earn DAGGER.
- Go forward (V).
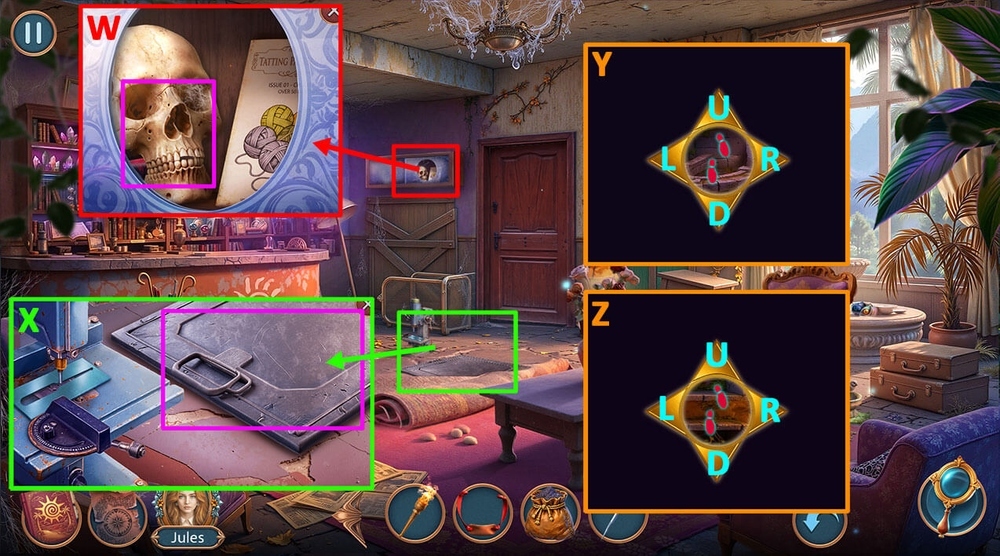
- Use DAGGER on the skull, take WICK, DYNAMITE (W).
- Use TORCH and DYNAMITE on the hatch (X).
- Easy solution: Click U, R, U, L, U, R, U, R, D, R, D, R, U, R, U, L, U, L, U, R, D, R, R, U (Y).
- Hard solution: Click L, U, L, U, R, U, L, U, R, U (3 times), L, D, L, D, R, D, D, L, D, R, D (2 times), L, U, L (2 times), U, R, U, R, U, L, U, R, U, L, L (Z).

- Take COLORED STONE (A).
- Use SLINGSHOT BAND and COLORED STONE on the slingshot, take COCONUT (B).
- Use COCONUT on the trap, take COCONUT MILK (C).
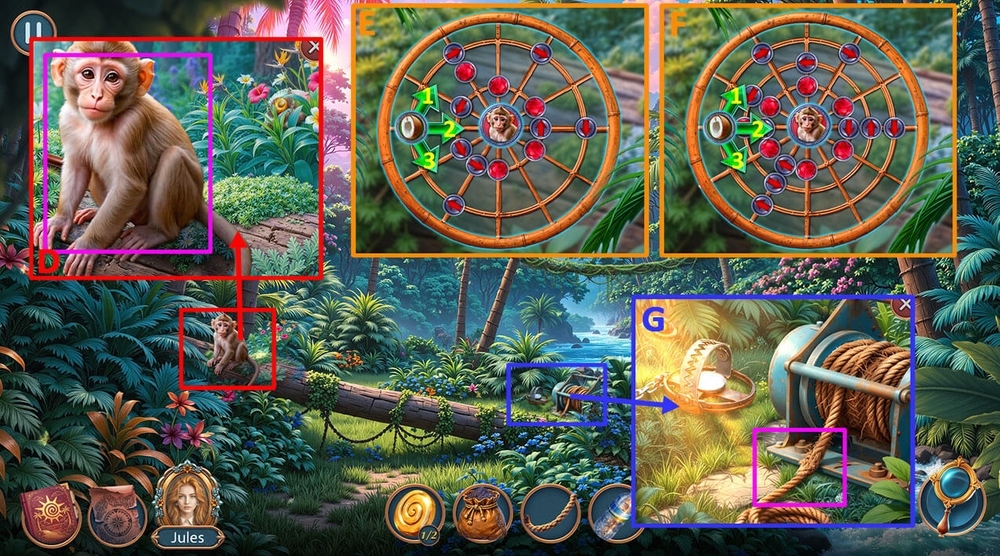
- Use COCONUT MILK on the monkey (D).
- Easy solution: Click 1 (4 times), 2 (2 times) (E).
- Hard solution: Click 1 (3 times), 2, 3, 2 (2 times) (F).
- Take FLARE GUN AMMO and MAGNIFYING GLASS.
- Use MAGNIFYING GLASS on the winch, take LASSO (G).

- Use LASSO on the vine (H).
- Easy solution: Follow the instructions in the image (I).
- Hard solution: Follow the instructions in the image (J).
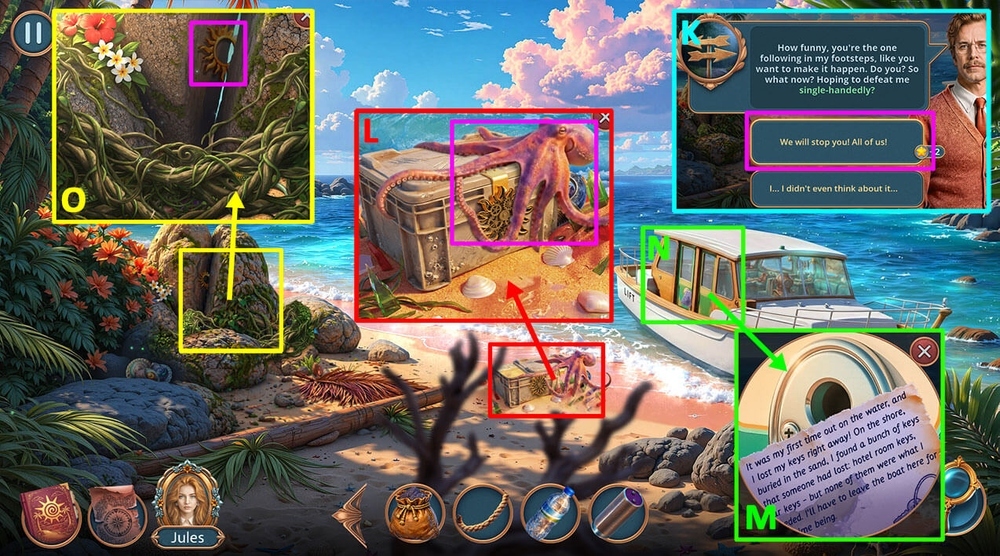
- Select this option (K).
- Use BOTTLE OF FRESH WATER on the octopus, take FLINT AND STEEL (L).
- Read the note, use GUNPOWDER, WICK, and FLINT AND STEEL on the lock (M).
- Play puzzle, earn ANCHOR PENDANT (N).
- Use ANCHOR PENDANT on the stuck amulet part, take SPIRAL SUN AMULETS 2/2 (O).
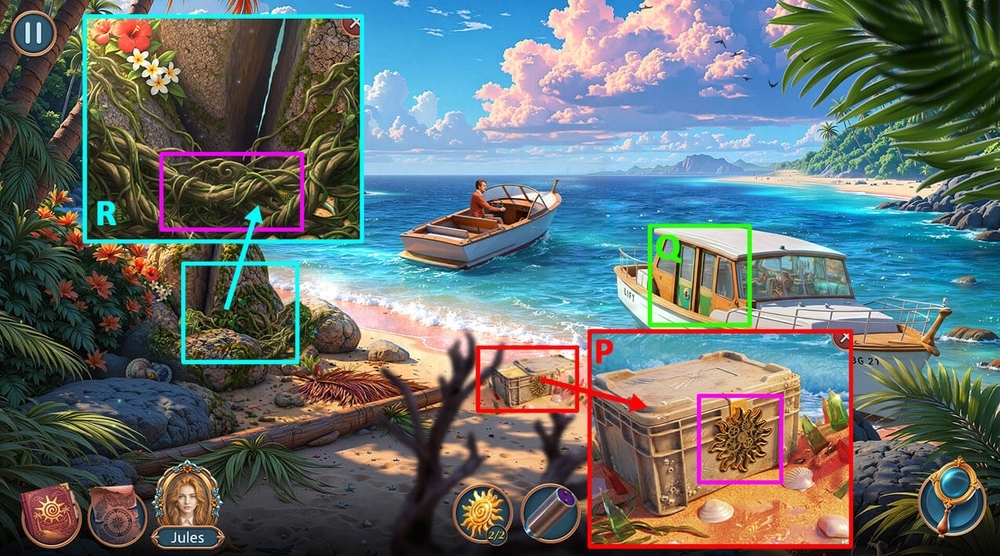
- Use SPIRAL SUN AMULETS 2/2 on the amulet slot, take FLARE GUN (P).
- Play puzzle, earn SHARP CORAL (Q).
- Use SHARP CORAL on the vines, take TRIGGER (R).
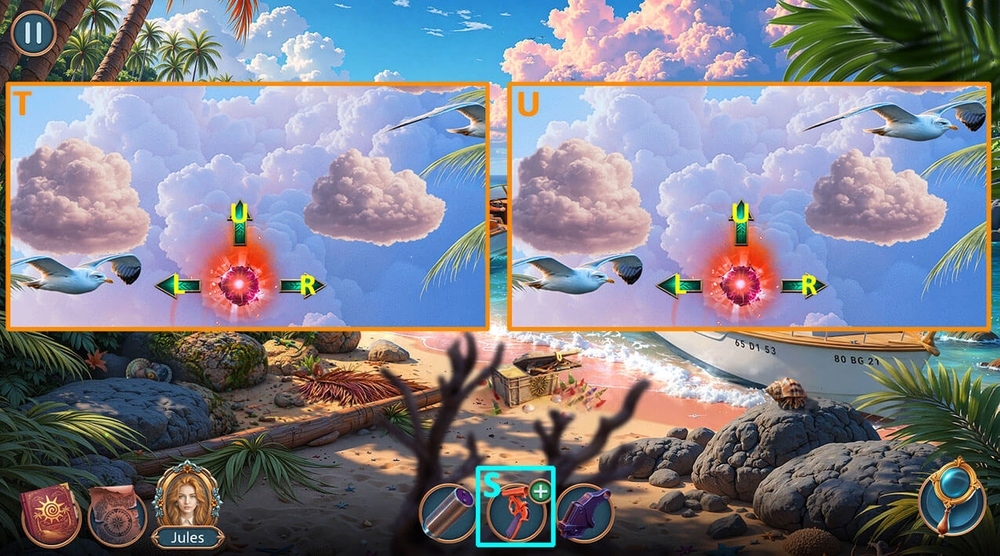
- Use TRIGGER, FLARE GUN AMMO on FLARE GUN, earn LOADED FLARE GUN (S).
- Easy solution: Click U (3 times), R, L, U, L (2 times), U (2 times), R (2 times), U, R, L, R, L, U (4 times), L, U, L, R, U, R (3 times), U, L, U (2 times), L (2 times), U (T).
- Hard solution: Click U, L, R, U (2 times), R, U (6 times), L, U (2 times), L, U (2 times), R, U (2 times), R, U, R, U (U).
Congratulations! You have completed the game Connected Hearts 6: Vanished Beauty.