Dark City 11: Florence (Bonus Chapter) – After completing her investigation, Agatha receives an invitation to a formal ceremony in Florence, where city officials plan to honor her for her service. However, the celebration ends with an unexpected incident: Sabrina Servetti, the mayor’s daughter, suddenly attacks the guests, behaving like a wild animal. It soon becomes clear that similar incidents have been occurring in Florence for several weeks. Respected citizens are losing control of themselves, becoming aggressive, and ceasing to behave like ordinary people. Mayor Federico Servetti turns to Agatha for help, as his daughter’s condition is worsening and the causes of what is happening remain unknown. The investigation leads the detective to a sanatorium where all the victims had been treated. There, Agata meets psychotherapist Maria Nuti, who previously worked with Dr. Vito Lanza. Their joint research on hypnosis and animal-assisted therapy was intended to help people cope with emotional disorders. But after their collaboration ended, Lanza set out to develop his own serum, which promised to rid people of neuroses and hereditary diseases, as well as significantly increase their physical strength. For his experiments, the doctor secretly obtained Maria’s patients’ medical records without her permission. The results of the experiments turned out to be nothing like he had expected; the drug triggered bouts of uncontrollable rage and turned people into something resembling predators. In search of the culprit, Agatha travels to Lanza’s country villa, where she uncovers details of his research. The doctor’s obsession has personal roots: the death of his mother, who suffered from a hereditary disease, compelled him to devote his life to creating a remedy capable of transforming the human body. But to activate the serum, he needed a special device linked to Leonardo da Vinci’s Vitruvian Man. To finish work on the mechanism, Lanza secretly smuggled Giulio Golgi out of prison by forging documents regarding his death and forced the engineer to work on creating the device. By threatening Camilla, he left Giulio no choice. Now Agatha must uncover all the details of these illegal experiments, stop Lanza, and find a way to reverse the consequences of his experiments.
Bonus Chapter Walkthrough
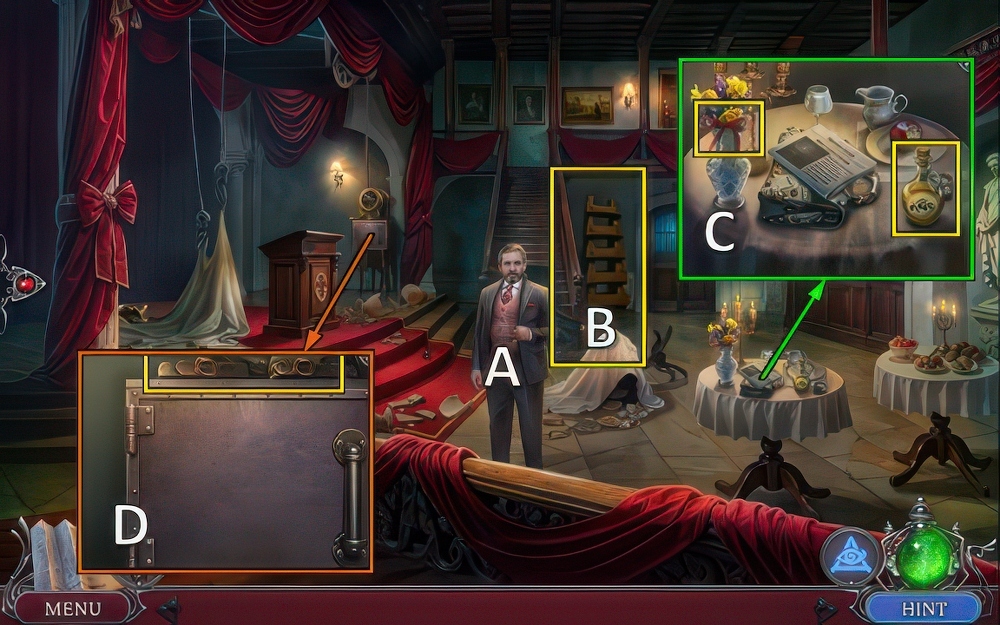
- Talk (A).
- Take LADDER (B).
- Take RIBBON and OLIVE OIL (C).
- Take BELTS (D).
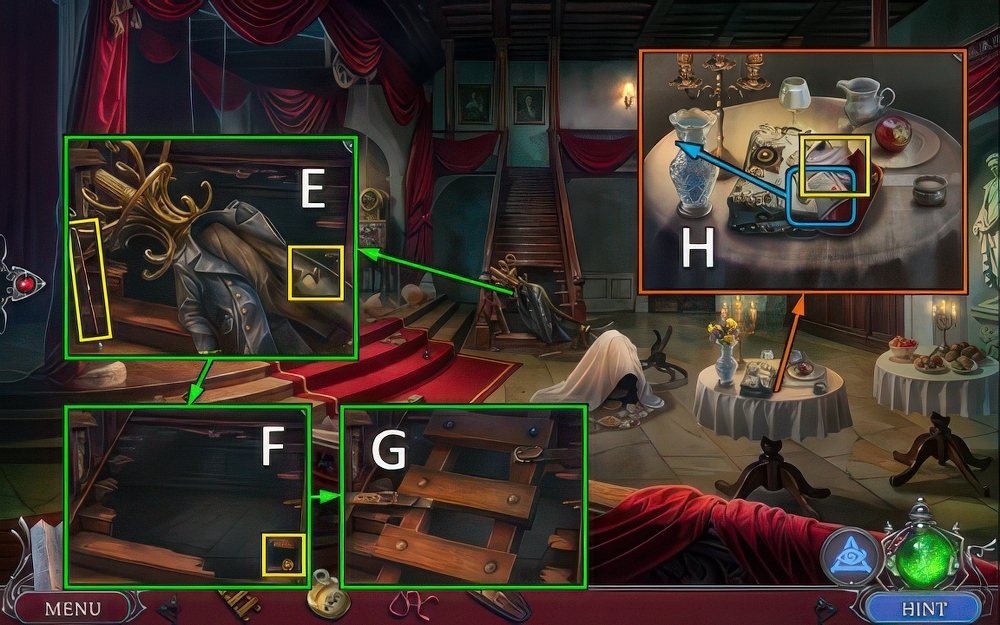
- Take CANE and KNIFE.
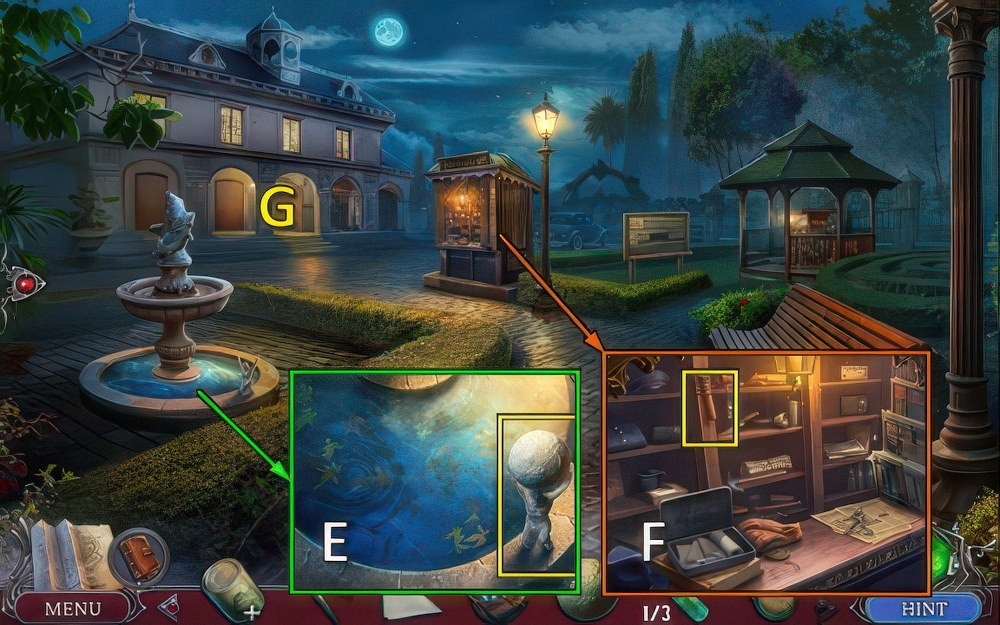
- Use OLIVE OIL, remove (E).
- Take LOCK DIAL (F).
- Place LADDER and BELTS (G).
- Take GEAR 1/3 with KNIFE, remove flowers.
- Use napkin, receive WET NAPKIN.
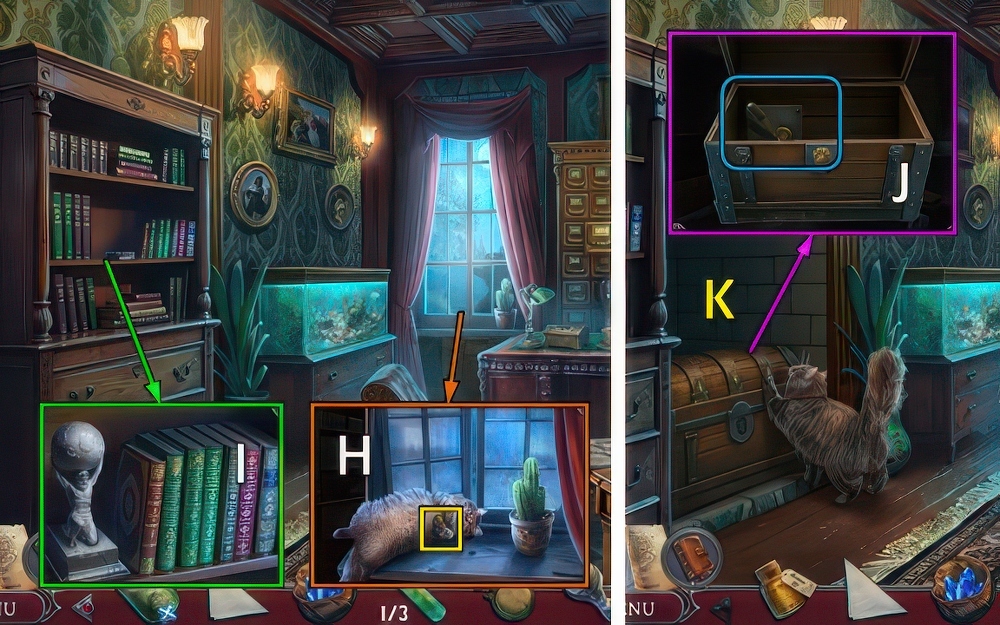
- Take FEATHERS (H).
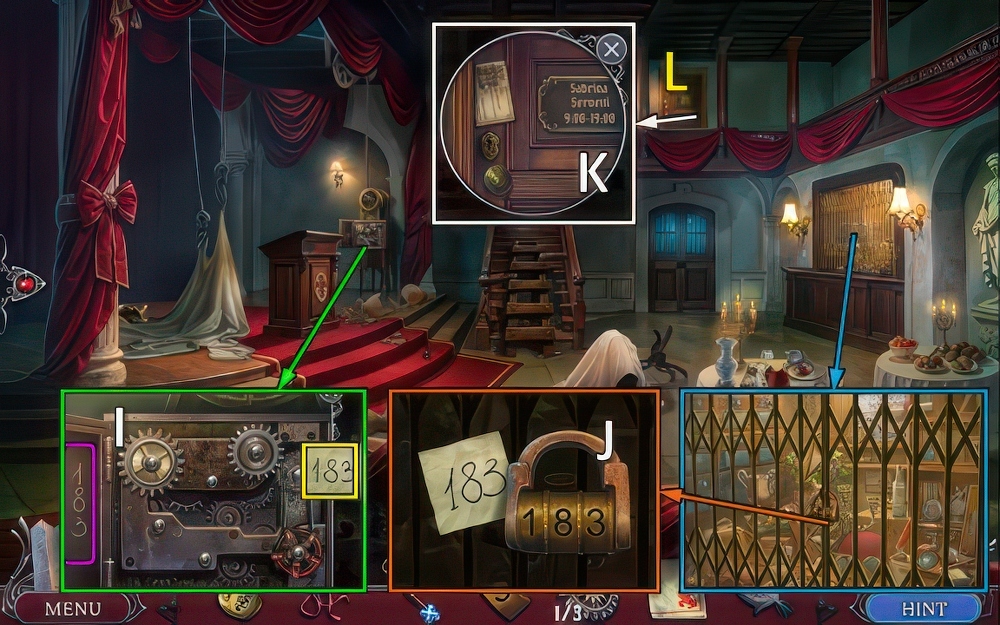
- Open, use WET NAPKIN.
- Take PASSWORD (I).
- Place LOCK DIAL and PASSWORD, enter 1-8-3 for puzzle (J).
- Receive OFFICE KEY.
- Take LOCKPICK, use OFFICE KEY (K).
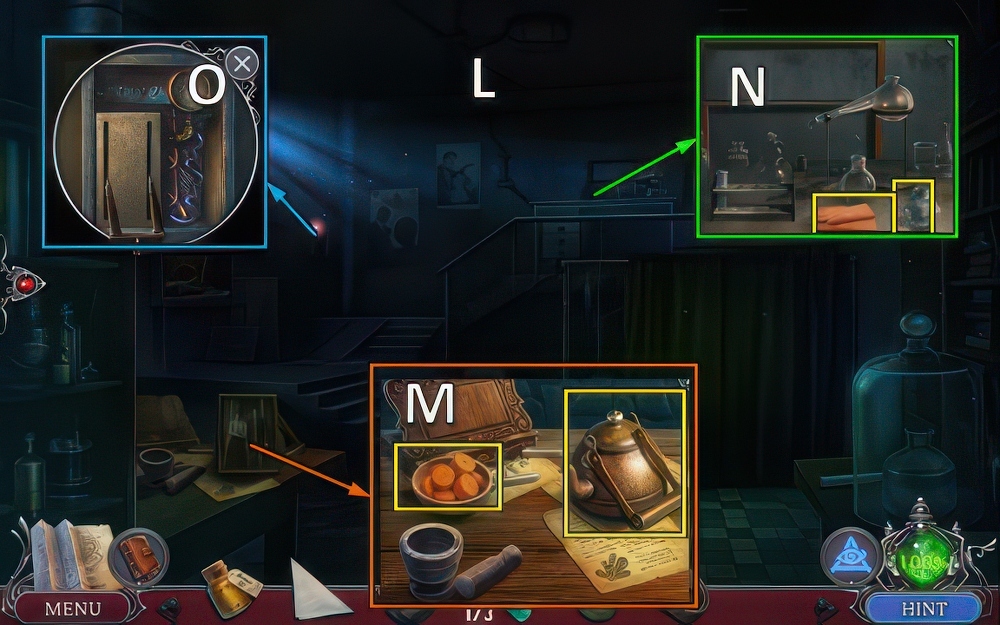
- Go (L).
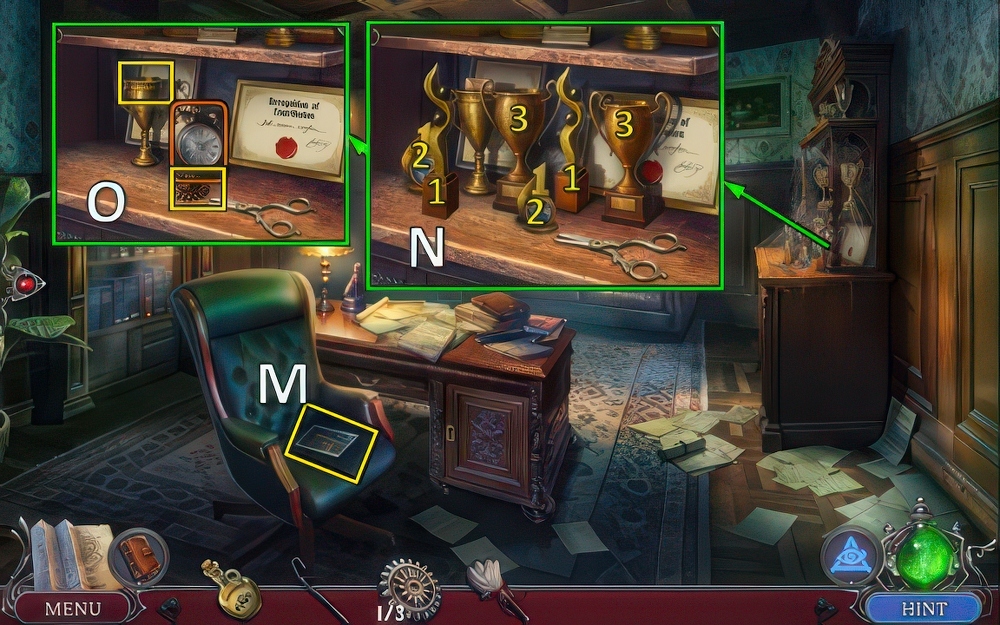
- Turn, take WOLF FIGURES 1/3 and INVITATION TO SANATORIUM (M).
- RIBBON and FEATHERS on CANE, create and take FEATHER DUSTER.
- Use FEATHER DUSTER, find pairs (N).
- Take WOLF FIGURE 2/3.
- Shake clock.
- Use OLIVE OIL, take GEARS 2/3 (O).

- Use LOCKPICK (W).
- Solution (P): Qx1-Sx7-Tx6-Ux5-Vx4.
- Take BROKEN PENCIL (W).
- Walk down.
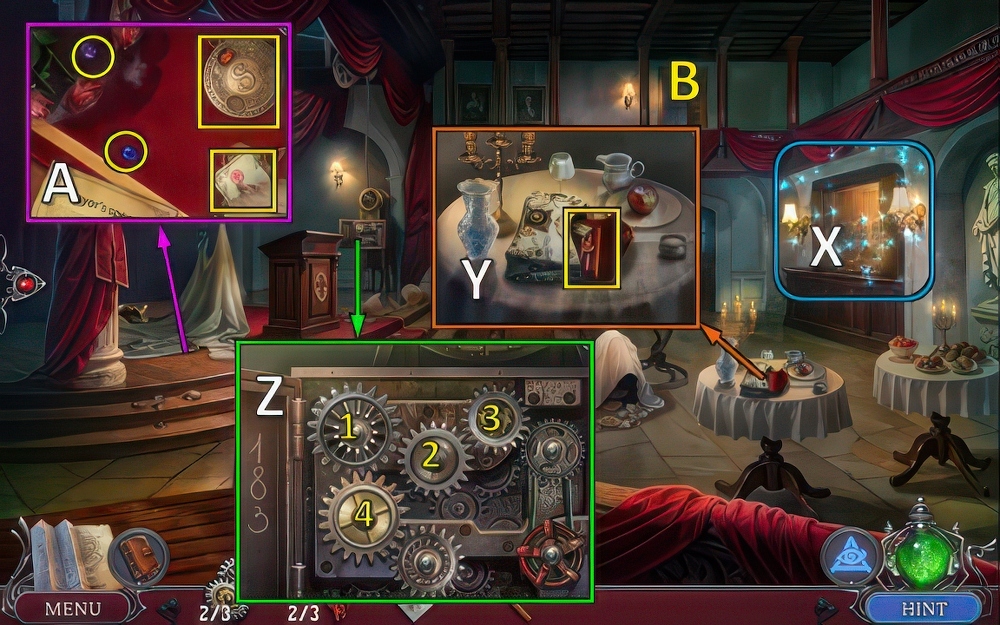
- Play puzzle (X), receive GEARS 3/3.
- Use BROKEN PENCIL, take PENCIL (Y).
- Replace GEARS (Z), swap (3-4)-(2-4)-(1-4).
- Move items, find gems and chain.
- Take TORN PASS 1/2 and SABRINA’S MEDALLION (A).
- Go (B).
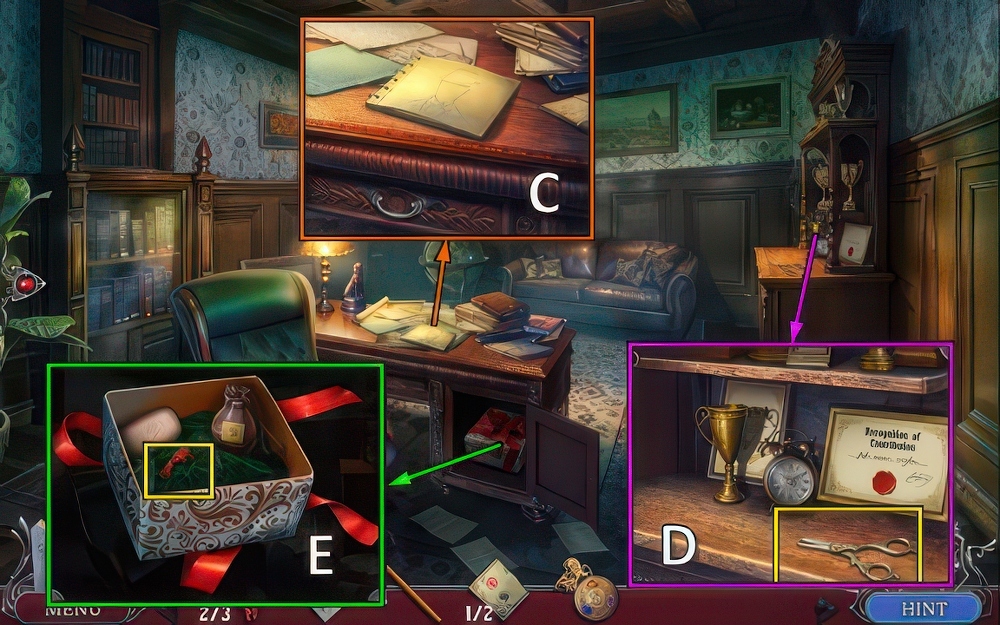
- Use PENCIL, take drawing and BOLT (C).
- Place BOLT, take SCISSORS (D).
- Use SCISSORS, take WOLF FIGURES 3/3 (E).
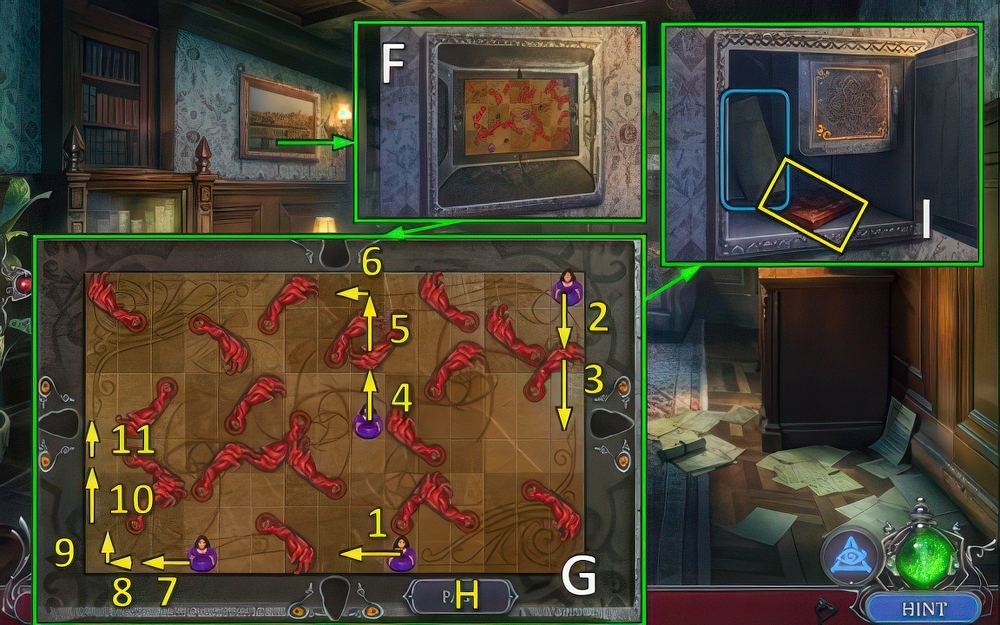
- Move painting, place WOLF FIGURES (F).
- Solution (G): 1-H-2-3-H-H-4-5-6-H-7-8-9-H-10-11.
- Take SABRINA’S DIARY.
- INVITATION TO SANATORIUM on map, take MAP OF FLORENCE (I).
- Walk down.
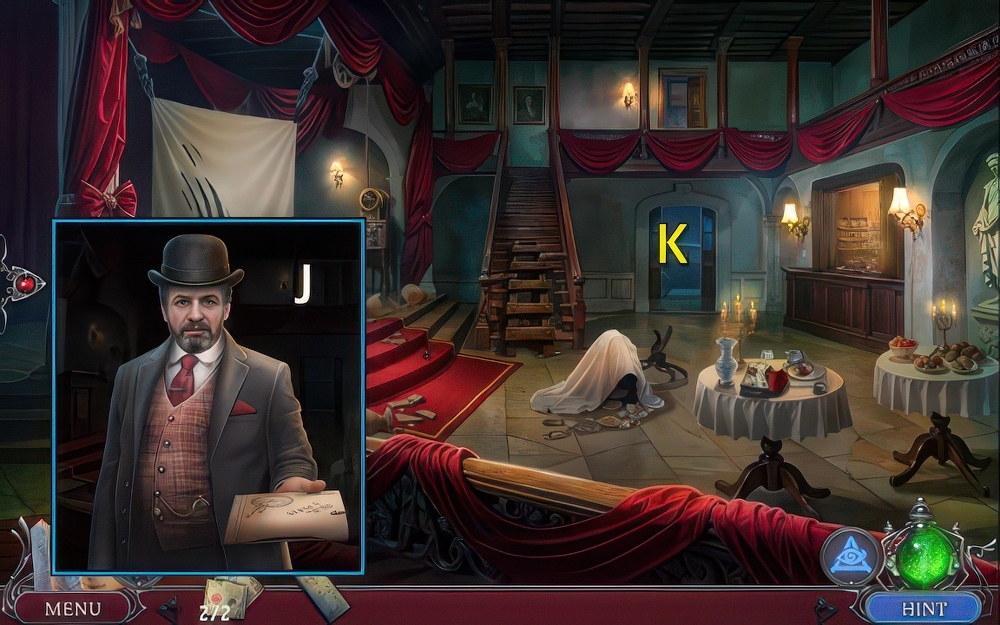
- SABRINA’S MEDALLION on SABRINA’S DIARY for mini-puzzle, receive TORN PASS 2/2.
- Play mini-puzzle (J).
- Use MAP OF FLORENCE, go (K).
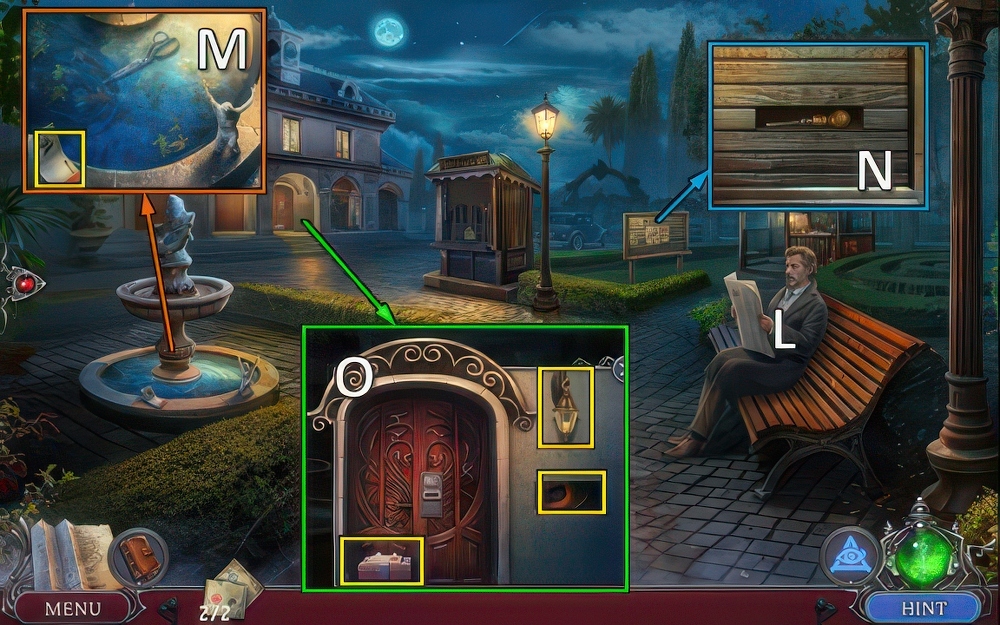
- Talk (L).
- Take MATCHES (M).
- Move posters, take SCREWDRIVER (N).
- Take BULB ATOMIZER and AROMATIC OIL.
- Use MATCHES, take LANTERN.
- Use SCREWDRIVER, take MAGNET (O).
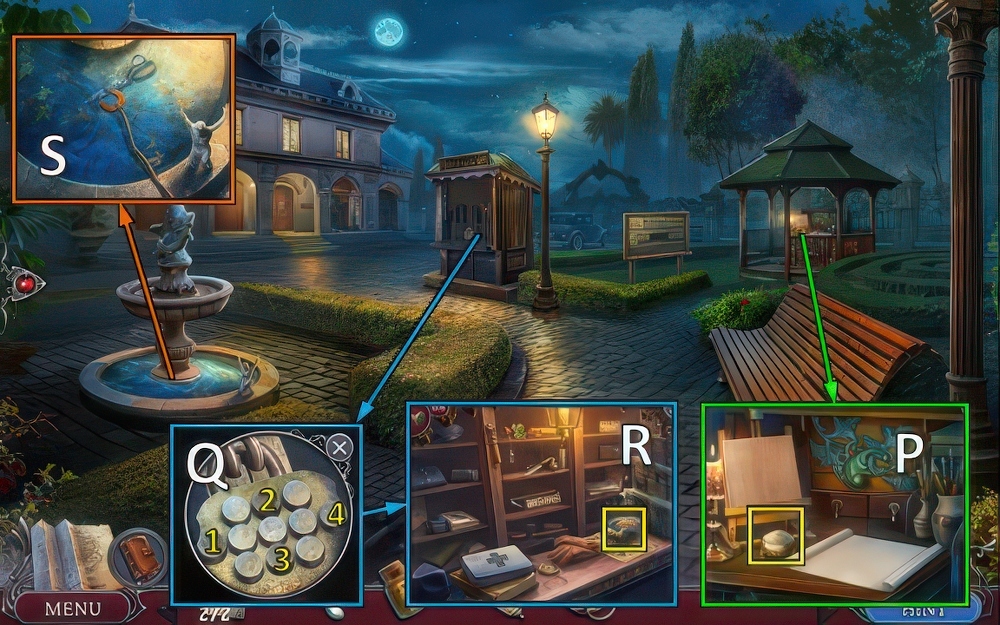
- Take POWDER (P).
- Use POWDER and BULB ATOMIZER, select 1-2-3-4 (Q).
- Use LANTERN for mini-puzzle, receive STAMPS.
- Take BOWL (R).
- Take SCISSORS with MAGNET.
- Use BOWL (S), receive BOWL OF WATER.
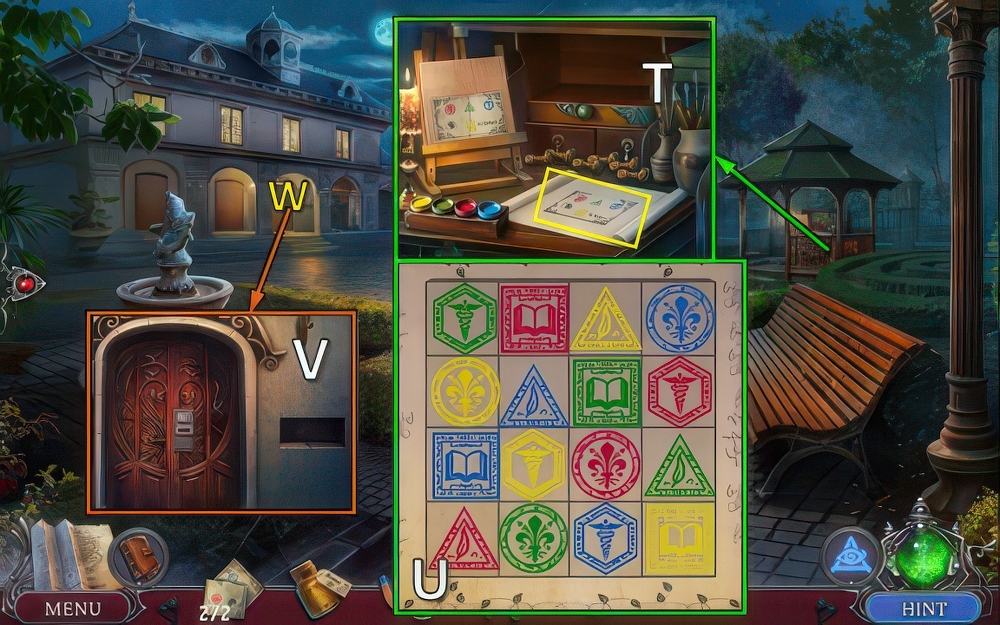
- Open, move paint.
- Place STAMPS, BROKEN PASS and BOWL OF WATER (T).
- Solution (U).
- Use SCISSORS, take PASS (T).
- Use PASS (V).
- Go (W).
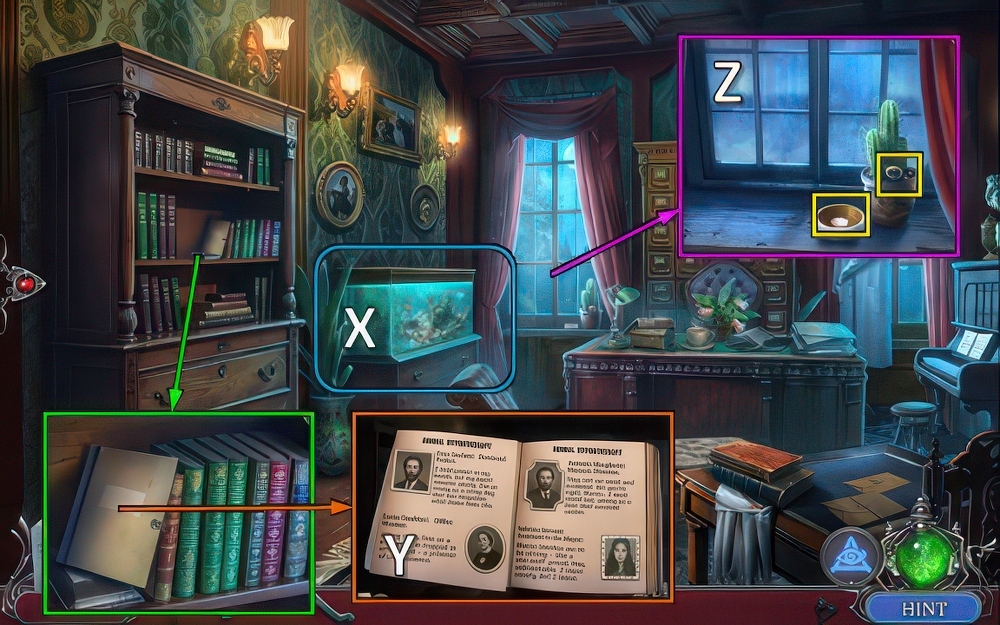
- Play puzzle (X), receive HANDLE.
- Place pictures, take TWEEZERS (Y).
- Take CAT BOWL, take DESK KEY with TWEEZERS (Z).
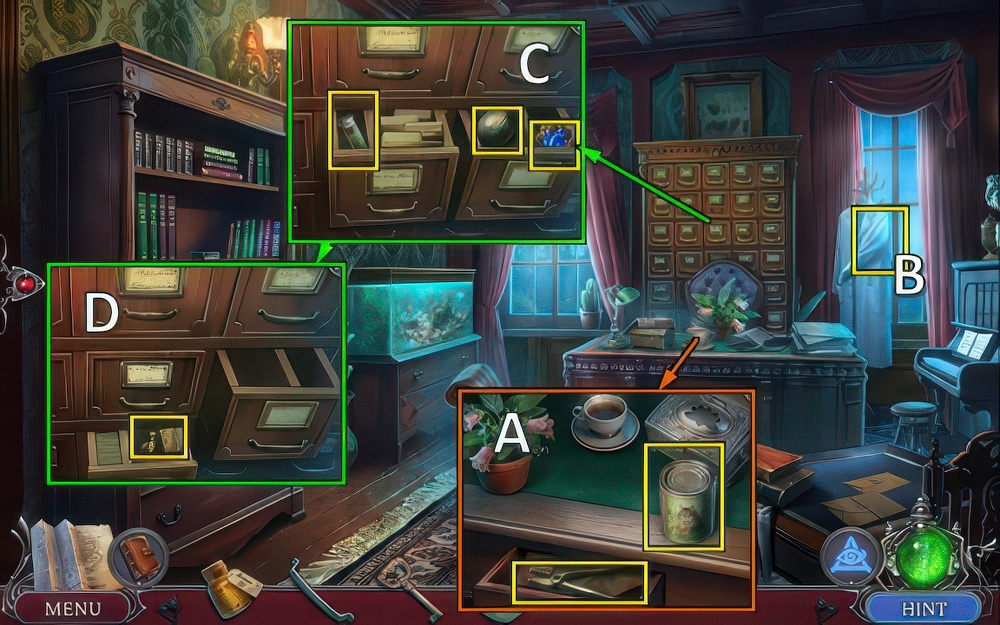
- Move paper, use DESK KEY.
- Take CAN and PLIERS (A).
- Take NAPKIN (B).
- Use HANDLE, open drawer.
- Take BLUE CRYSTALS, EARTH STATUETTE and VIAL OF INGREDIENTS 1/3 (C).
- Open drawer, take LIGHTER (D).
- Walk down.
- Place EARTH STATUETTE, take ATLAS (E).
- Use PLIERS, receive CAN OPENER (F).
- Go (G).
- CAT BOWL and CAN OPENER on CAN, open can.
- Take CAT FOOD.
- Open window.
- Offer CAT FOOD.
- Take PAW MEDALLION, rub cat’s tummy (H).
- Place ATLAS (I).
- Place PAW MEDALLION.
- Move items, take LEATHER BELT.
- Pull lever (J).
- Go (K).
- Use LIGHTER (L).
- Take SWITCH HANDLE and A PLATE OF CARROTS (M).
- Take RUBBER GLOVES and SALINE SOLUTION (N).
- Pull switch, use SWITCH HANDLE and RUBBER GLOVES (O).
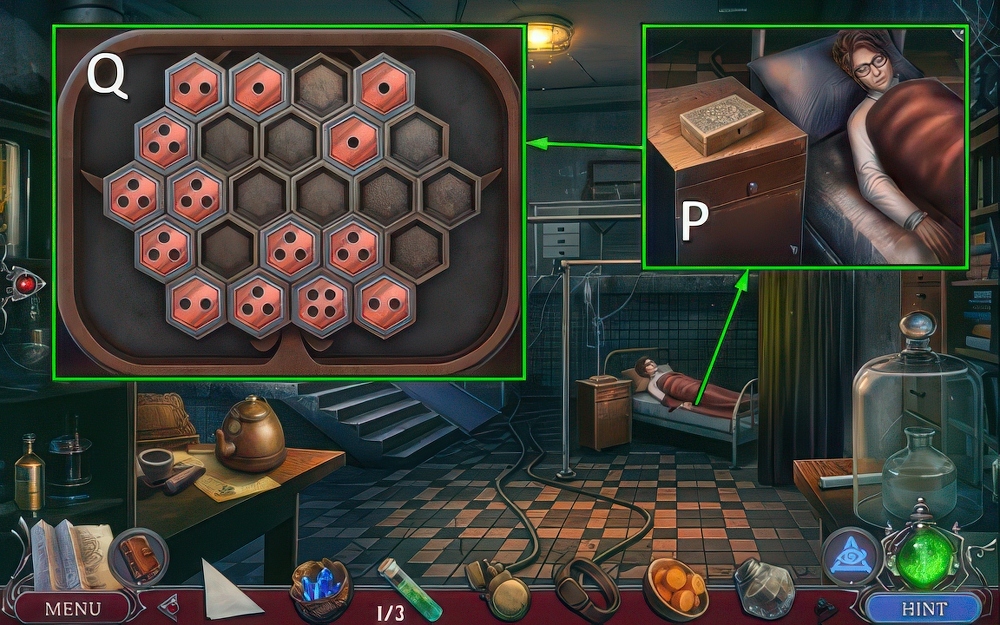
- Use LEATHER BELT (P).
- Solution (Q).
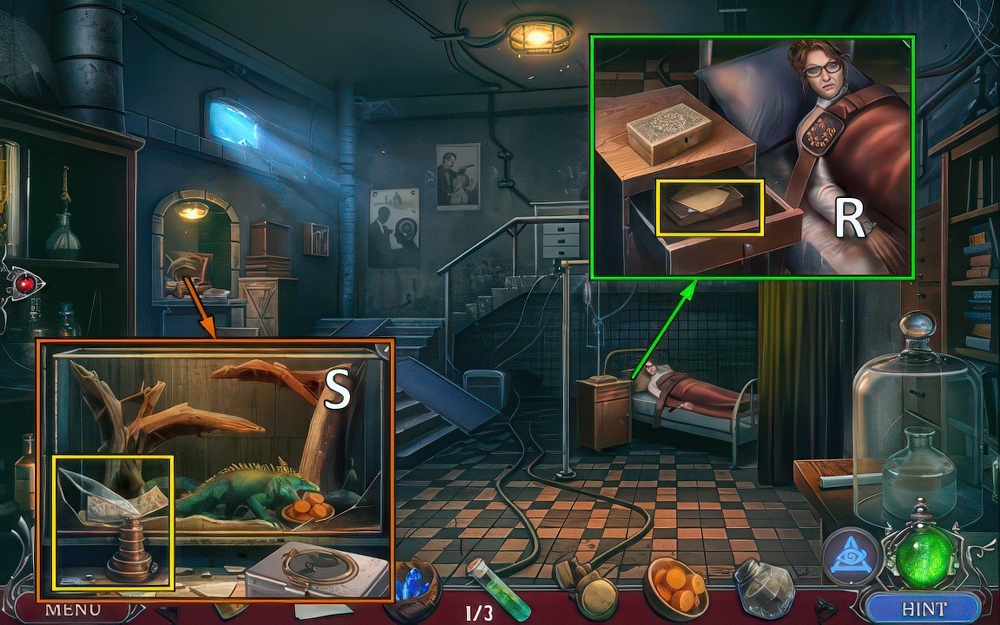
- Open, take SYRINGE NEEDLE and FLOWER SHAPE (R).
- Offer A PLATE OF CARROTS, use NAPKIN.
- Take GAS BURNER, SHARP GLASS and VACCINE FORMULA (S).
- Walk down.
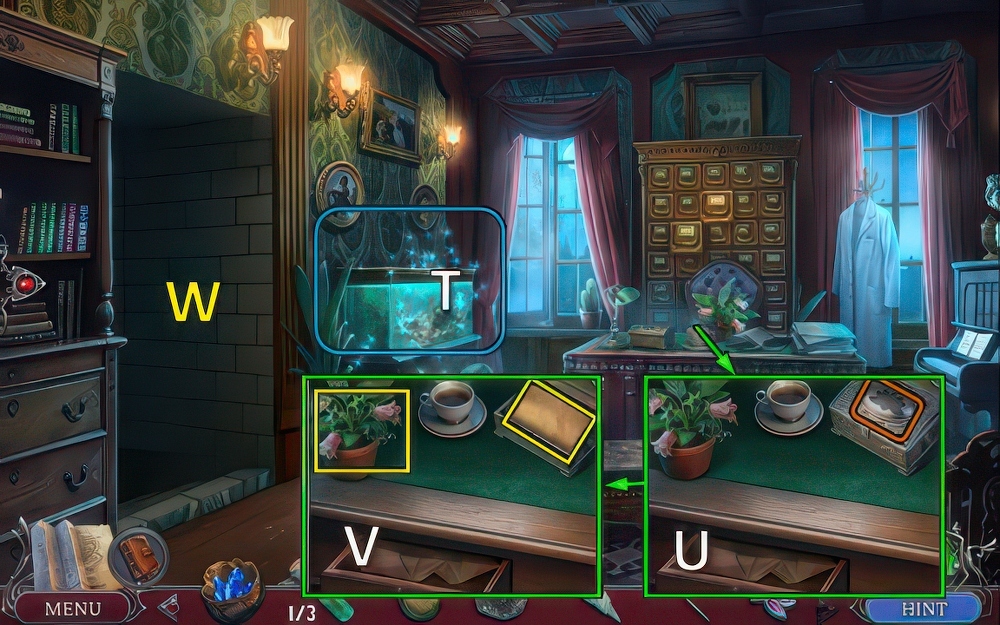
- Play puzzle (T), receive BOX KEY.
- Place FLOWER SHAPE (U).
- Take RECIPE, take FLOWERS with SHARP GLASS (V).
- Go (W).
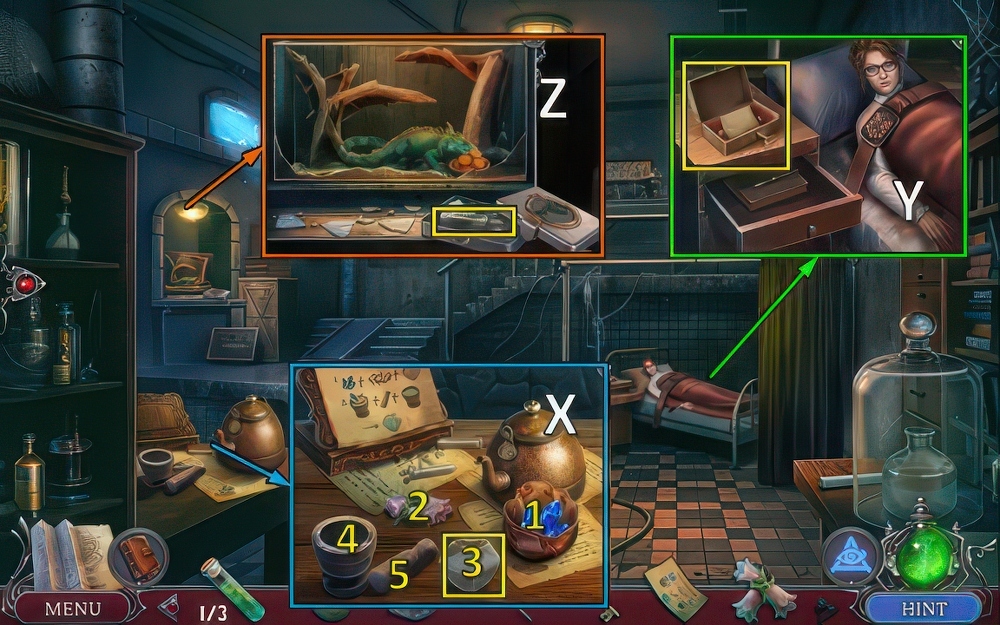
- Place RECIPE, BLUE CRYSTALS, FLOWERS and SALINE SOLUTION.
- Put 1, 2 and 3 in 4, use 5.
- Pour 4 in 3.
- Take VIAL OF INGREDIENTS 2/3 (X).
- Use BOX KEY, take MEDICAL TOKEN and VIAL OF INGREDIENTS 3/3 (Y).
- Use MEDICAL TOKEN, take SYRINGE (Z).
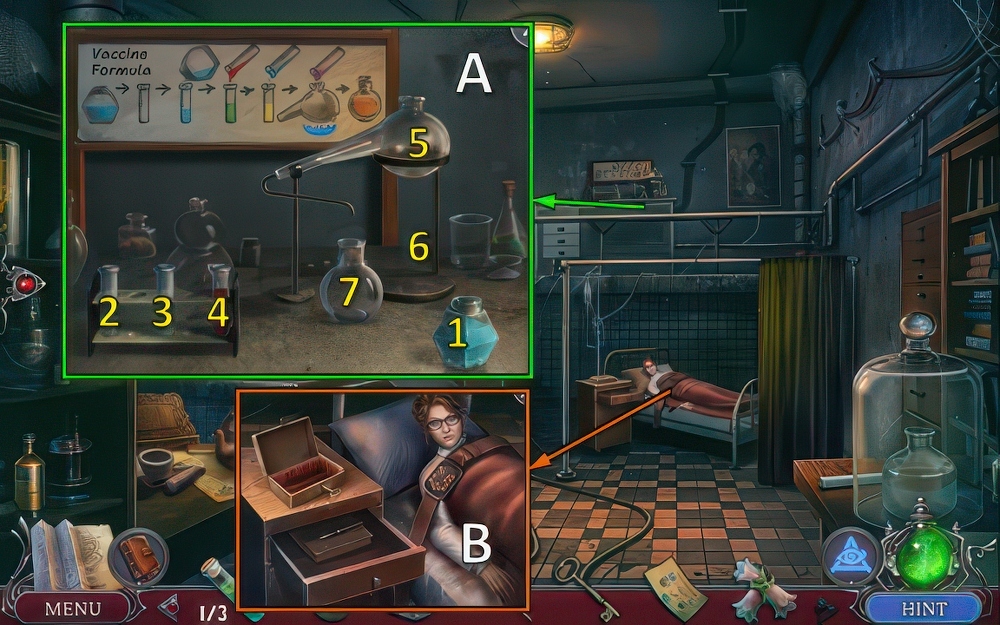
- Place VACCINE FORMULA, VACCINE INGREDIENTS and GAS BURNER (A).
- Use 1 on 2, 4 on 3, 2 on 3, 3 on 5.
- Use LIGHTER (6), take VACCINE (7).
- SYRINGE NEEDLE and VACCINE on SYRINGE, assemble and take VACCINE SYRINGE.
- Use VACCINE SYRINGE (B).
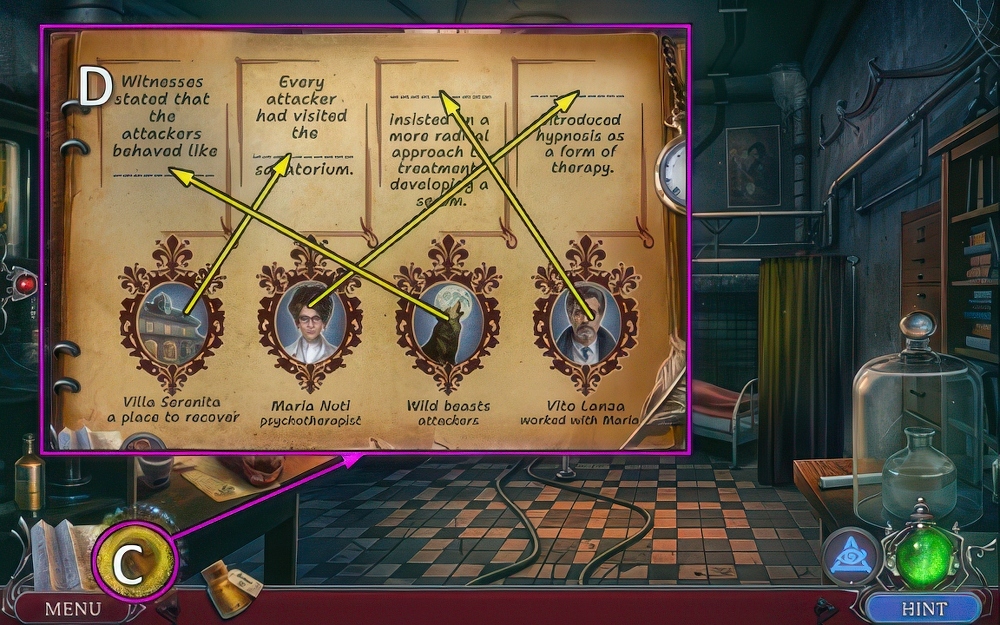
- Inspect Evidence (C).
- Solution (D).
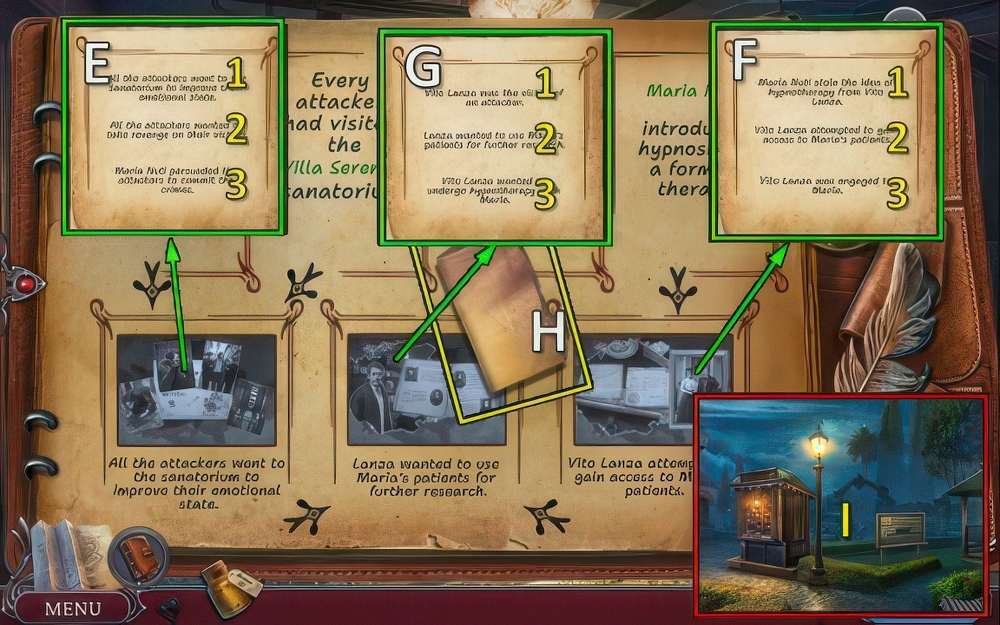
- Select 1 (E).
- Select 2 (F).
- Select 2 (G).
- Take VITO’S ADDRESS (H).
- Walk down twice.
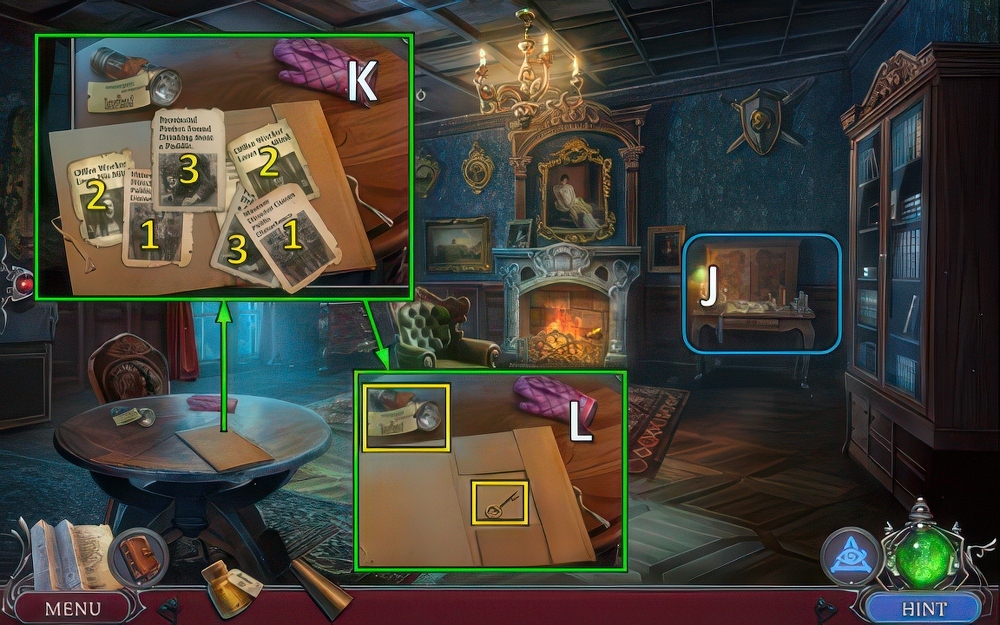
- Use VITO’S ADDRESS, go (I).
- Play puzzle (J), receive EXTINGUISHER NOZZLE.
- Find pairs (K).
- Take WARDROBE KEY.
- Use AROMATIC OIL, take BATTERY (L).
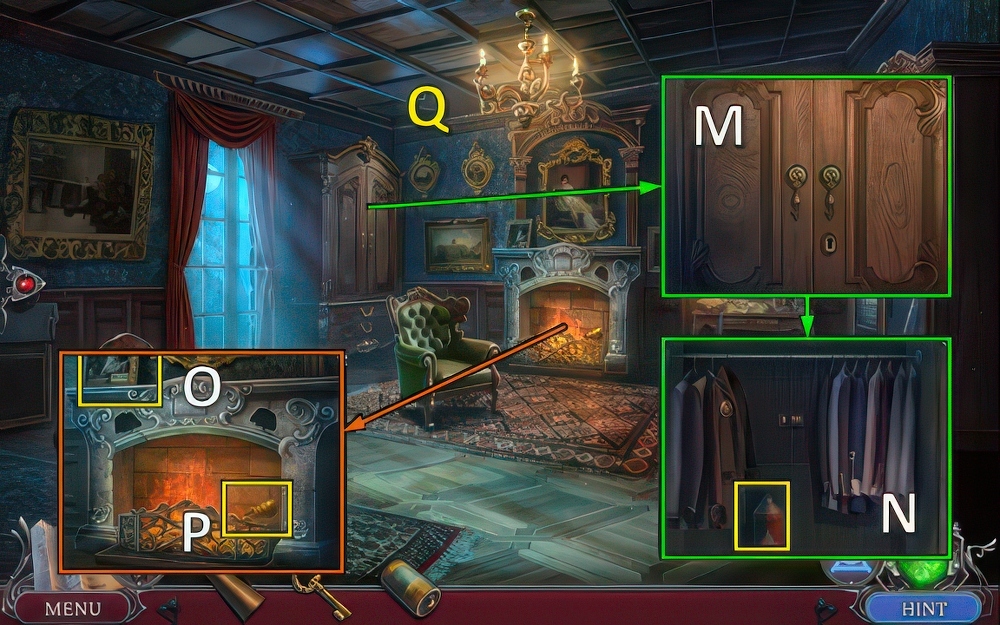
- Use WARDROBE KEY (M), take EXTINGUISHER TANK (N).
- Take DATE PASSWORD, select picture and take EXTINGUISHER HANDLE (O).
- EXTINGUISHER HANDLE and EXTINGUISHER NOZZLE on EXTINGUISHER TANK, assemble and take EXTINGUISHER.
- Use EXTINGUISHER, take POKER (P).
- Use POKER, go (Q).
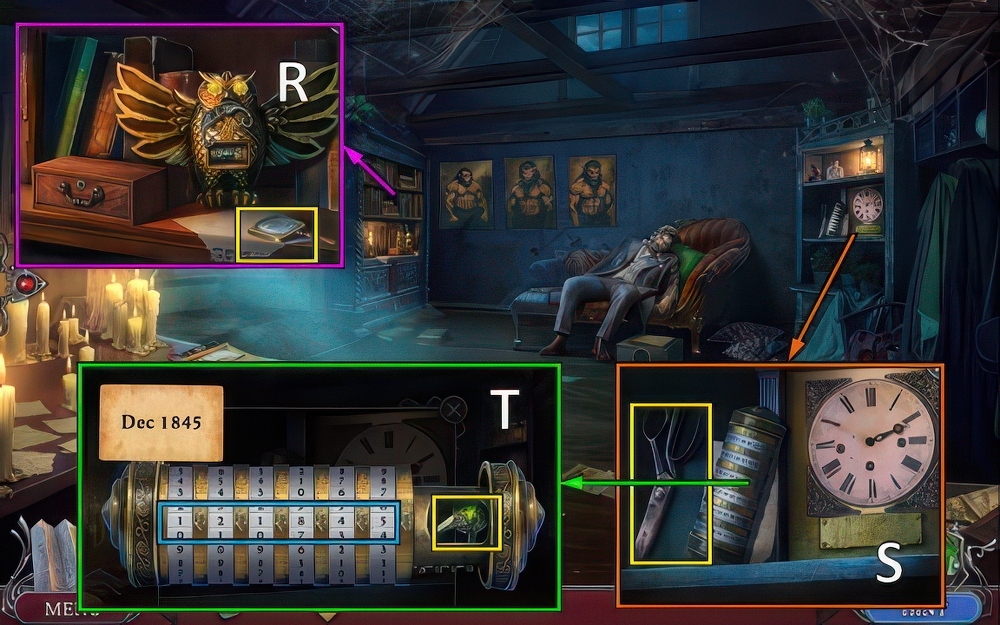
- Take MAGNIFYING GLASS (R).
- Take SCISSORS (S).
- Place DATE PASSWORD.
- Enter 1-2-1-8-4-5.
- Take RING (T).

- Restore image, use MAGNIFYING GLASS.
- Take CODE NOTE.
- Use RING, take CLOCK HAND (U).
- Place CLOCK HAND, move hands to 11:15.
- Take BOX KEY (V).
- Use BOX KEY, take DECORATIONS.
- Replace BATTERY, take TABLE HANDLE (W).
- Walk down.
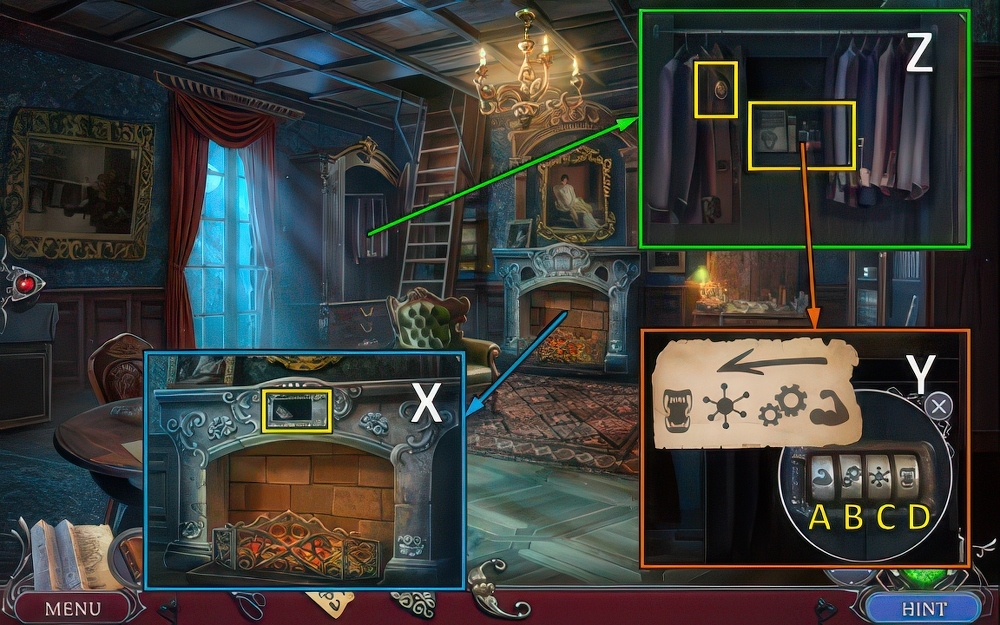
- Place DECORATIONS, take WHEEL (X).
- Place WHEEL and CODE NOTE (Y), turn A-C-Dx2.
- Take VITO’S DIARY.
- Take DIARY TOKEN with SCISSORS (Z).
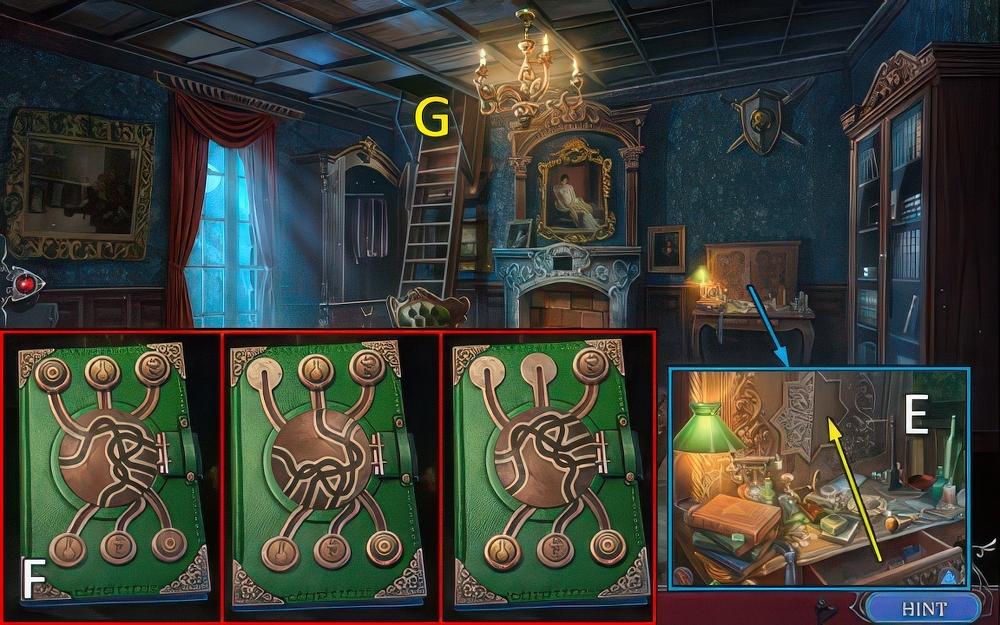
- Place TABLE HANDLE, move inlay for puzzle (E).
- Receive AMMONIA.
- DIARY TOKEN on VITO’S DIARY, solution (F).
- Take BOX TOKEN.
- Go (G).
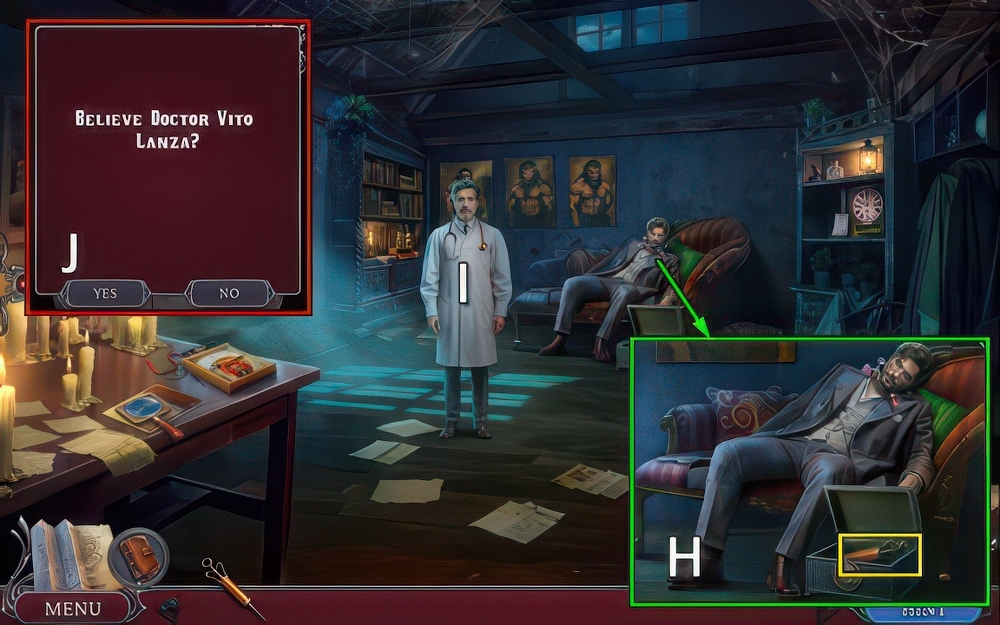
- Place BOX TOKEN, take VACCINE.
- Use AMMONIA (H).
- Talk (I).
- Choose yes or no (J).
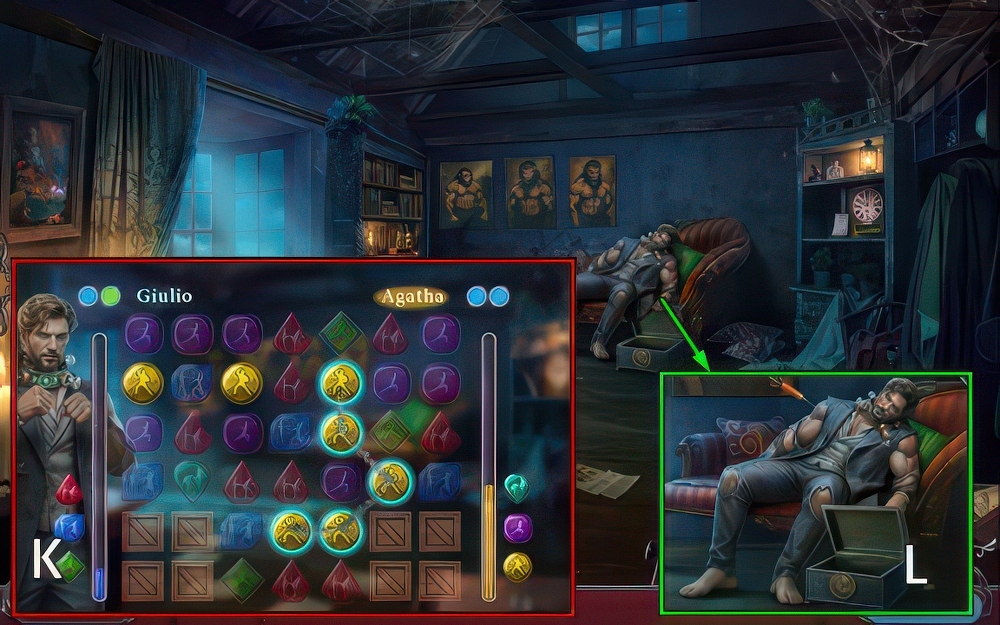
- Defeat Giulio (K).
- Puzzle solution is random.
- Use VACCINE (L).
Congratulations! You have completed the game Dark City 11: Florence.