Dark City 11: Florence – Two historians die shortly after discovering a long-lost manuscript by Leonardo da Vinci, their colleague realizes that there is more to these deaths than just an accident. Detective Agatha travels to Florence at the invitation of Lorenzo Bardi, curator of the Uffizi Gallery. The city is preparing for the sensational unveiling of the great inventor’s authentic manuscript, but the grand event turns into a series of crimes. Bardi asks Agatha to investigate the circumstances surrounding the historians’ deaths, but he himself soon becomes the victim of an attack. Now the detective must figure out who wanted to stop the research into da Vinci’s legacy and what secrets the discovered manuscript holds. The clues lead Agatha to the secret Order of da Vinci, whose members have for many years guarded the secret of an extraordinary invention called Vitruvius. To reach it, she must find special medallions that belonged to the order’s guardians. During her investigation, Agatha meets jeweler Marco Velluti and engineer Cesare Spighi, a great admirer of Leonardo’s work. Spighi finds himself drawn into a dangerous situation: he is kidnapped after a failed attempt to pick a complex lock, and the search for the engineer leads the detective to Camille Golgi, a professor at the University of Florence. Gradually, a family tragedy emerges behind the crimes, one that began with an attempt to find a cure for a deadly disease. Camilla and her brother Giulio had devoted their entire lives to this cause, but turning to the Guardians of Vitruvius led to events whose consequences changed their fates. Now Agatha must uncover the true intentions of the conspirators, discover what da Vinci’s invention is capable of, and stop the experiments that threaten other people. If you’re stuck on a puzzle or don’t know where to find items, you can check out the walkthrough for Dark City 11: Florence on our website to get to the bottom of things.
Dark City 11: Florence – Walkthrough
Here you can see the complete walkthrough for Dark City 11: Florence, namely all chapters, including the bonus chapter, in pictures.
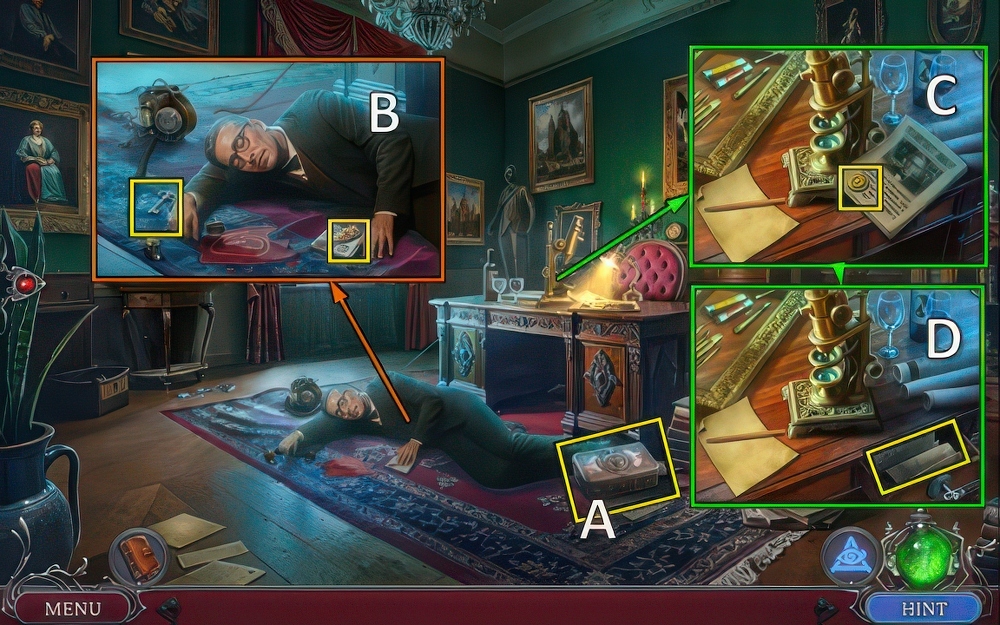
- Take FIRST AID KIT (A).
- AMMONIA from FIRST AID KIT.
- Use AMMONIA, take BROOCH and DESK KEY (B).
- Take GOLD COIN 1/3 and paper (C).
- Use DESK KEY, take map and KNIFE (D).
- Use BROOCH.
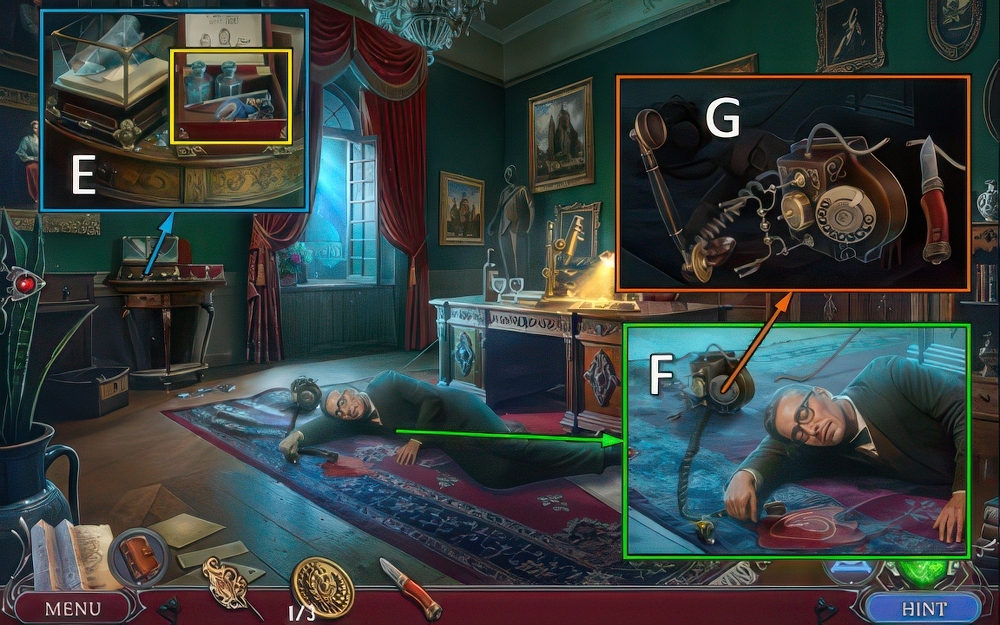
- Move note, take GLUE and TAPE (E).
- Move receiver (F).
- Use KNIFE and TAPE, make call (G).
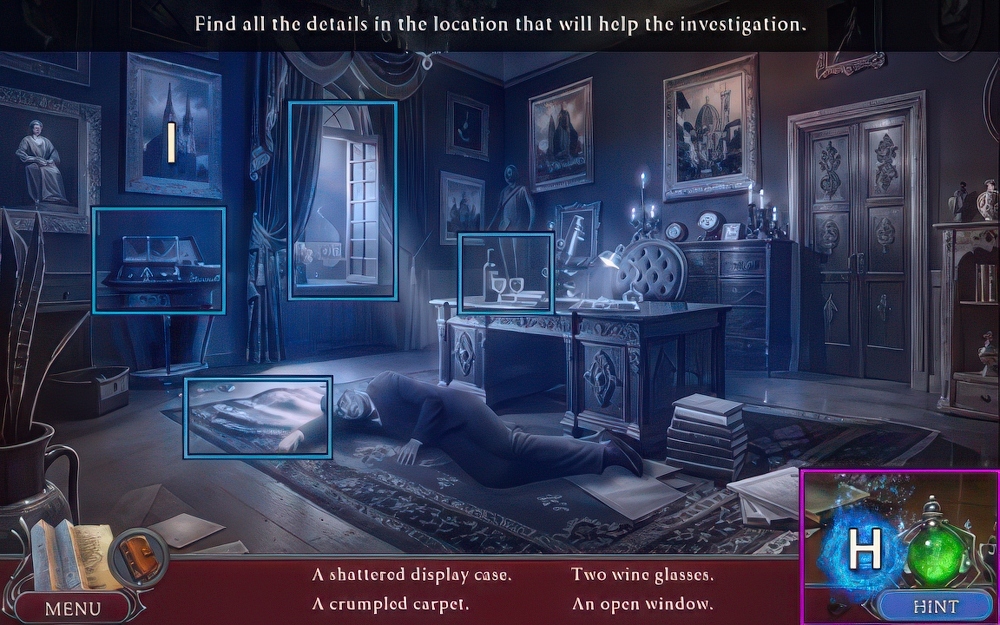
- Select eye (H).
- Find clues (I).
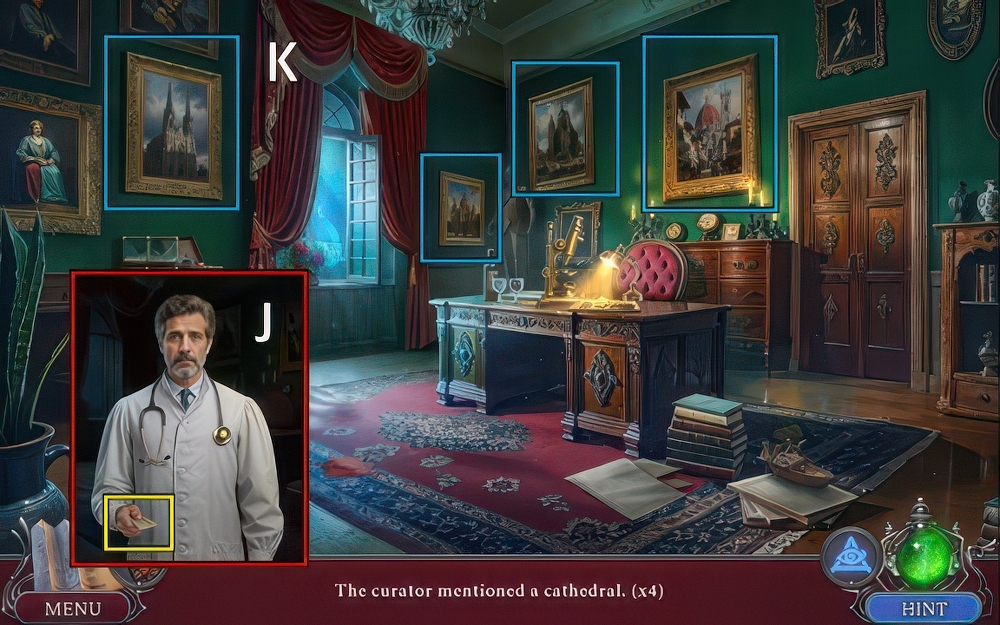
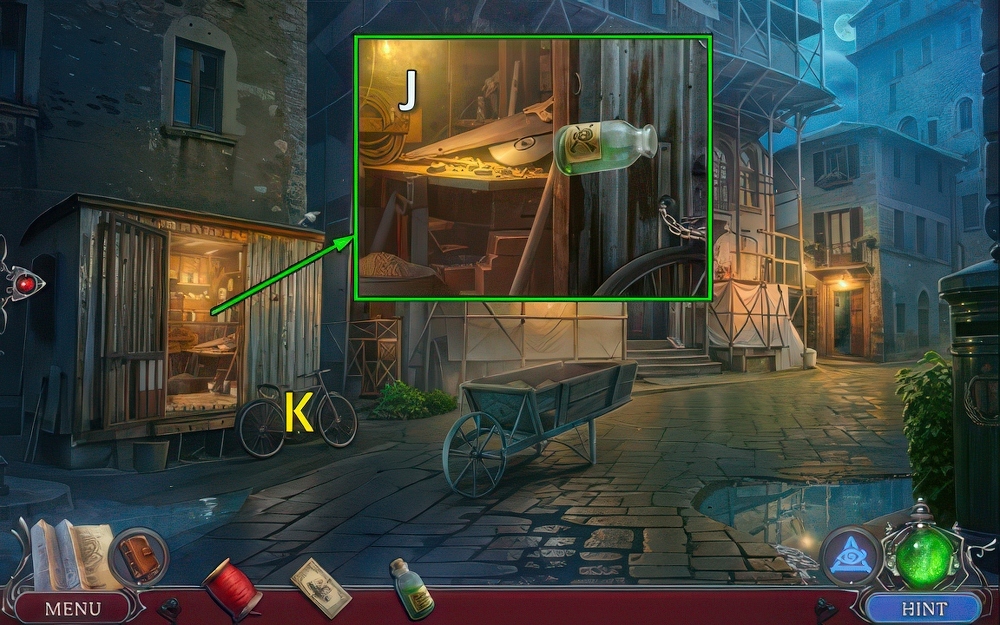
- Take SAFE CODE (J).
- Find clues (K).
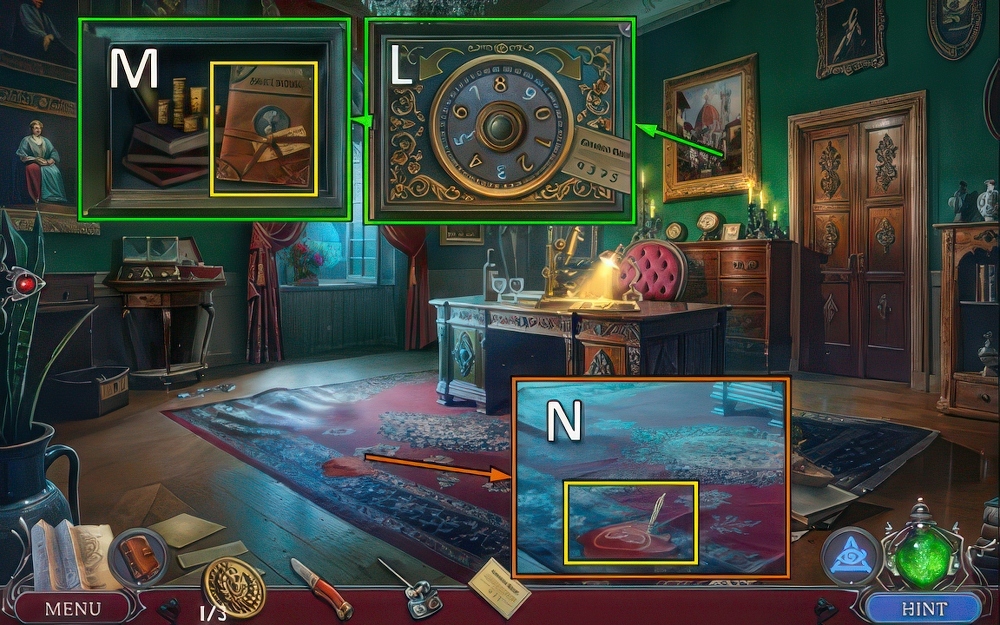
- Remove painting, place SAFE CODE.
- Enter 9-3-7-5 (L).
- Take POLICE REPORT, TWEEZERS and STRONG SOLVENT (M).
- Play puzzle in POLICE REPORT, receive MYSTERIOUS NOTE 1/3.
- Take EVIDENCE 2/3 with TWEEZERS (N).
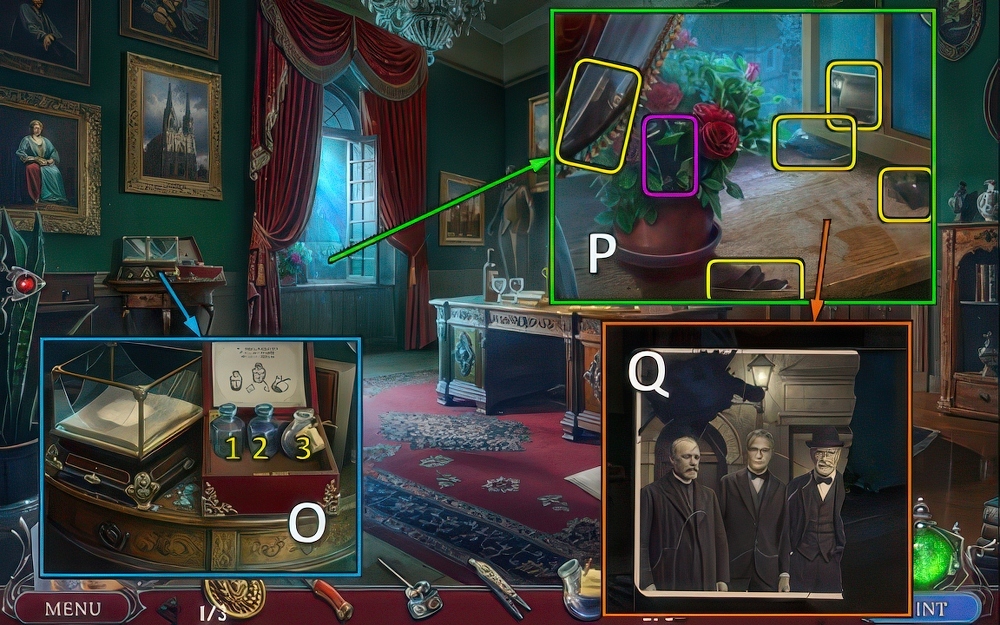
- Place STRONG SOLVENT (O), select 1-3-2.
- Receive SOLVENT.
- Inspect.
- Select pieces x5.
- Move pot, use TWEEZERS.
- Use GLUE (P).
- Restore and take PHOTO (Q).
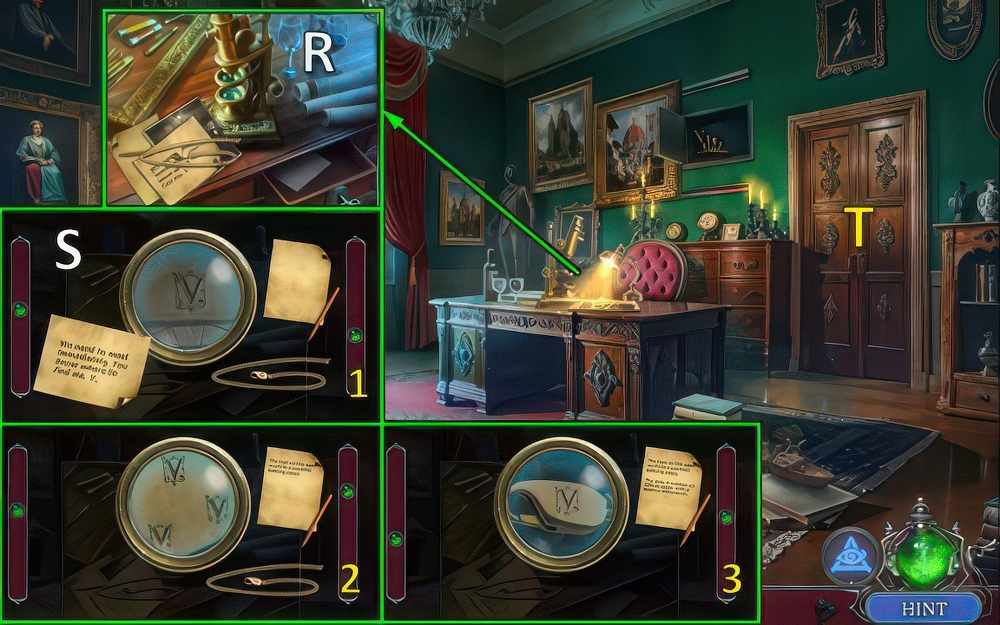
- SOLVENT on PHOTO, take EVIDENCE 3/3.
- Place EVIDENCE (R).
- Solution (S).
- Receive PENCIL 1/2.
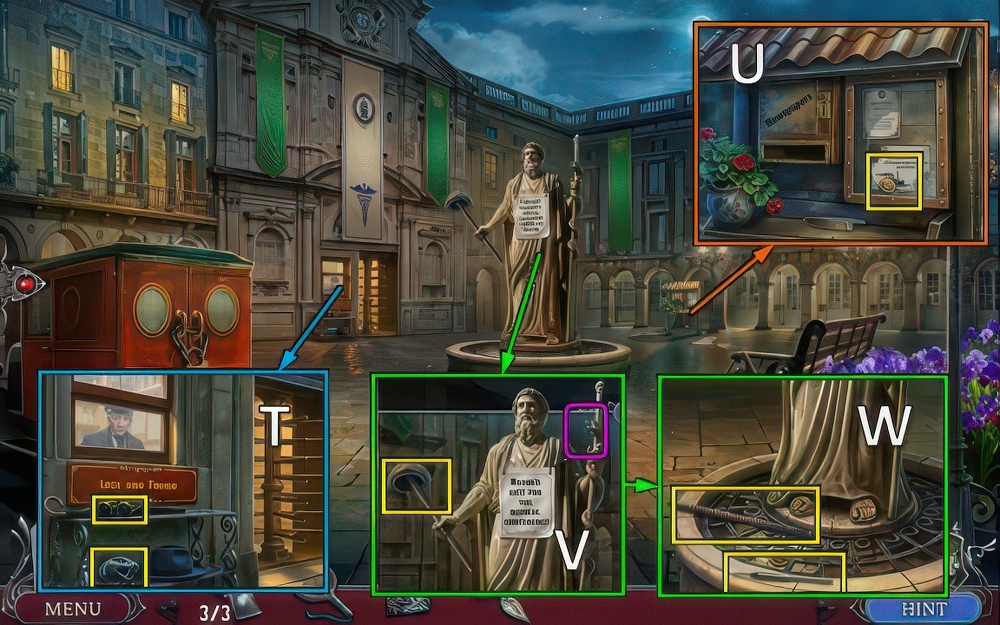
- Go (T).
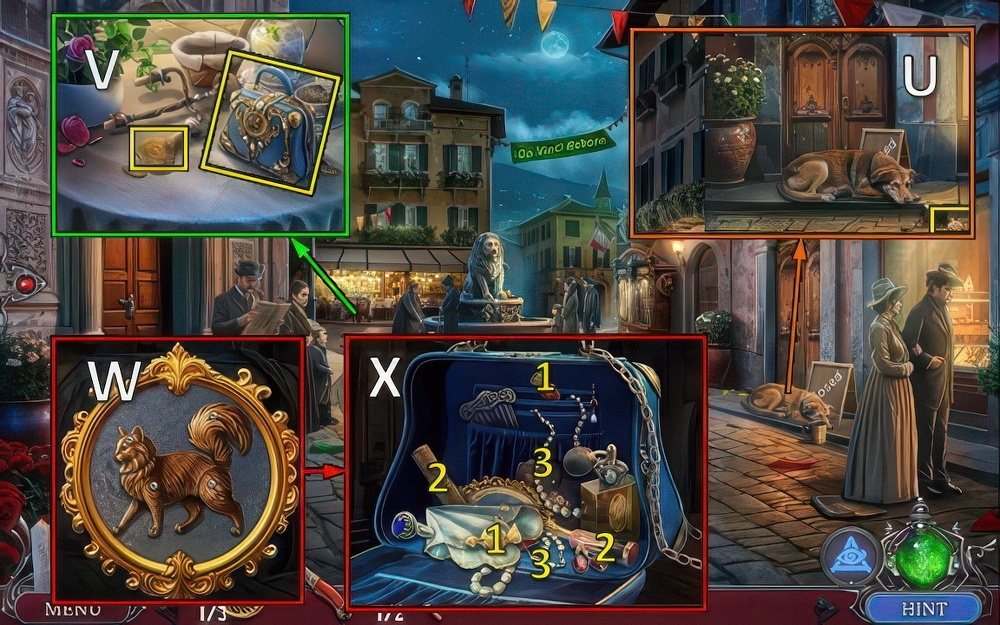
- Take GOLD COIN 2/3 (U).
- Move paper, take PURSE.
- Use KNIFE, take GOLD COIN 3/3 (V).
- Access PURSE, restore cat (W).
- Find pairs, take THREAD and MIRROR (X).
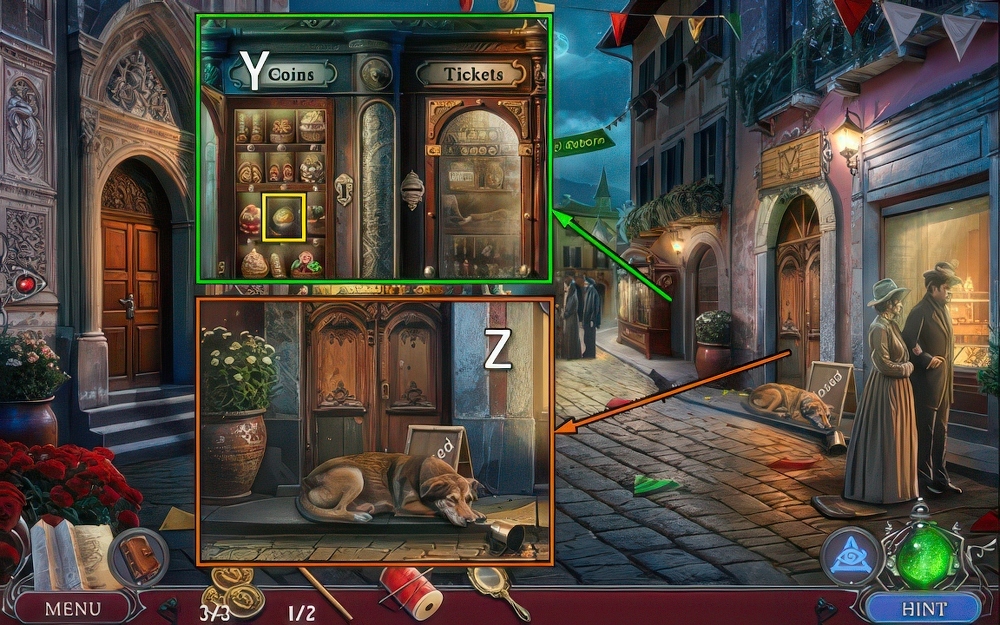
- Use GOLD COINS, take CUPCAKE (Y).
- Offer CUPCAKE, open.
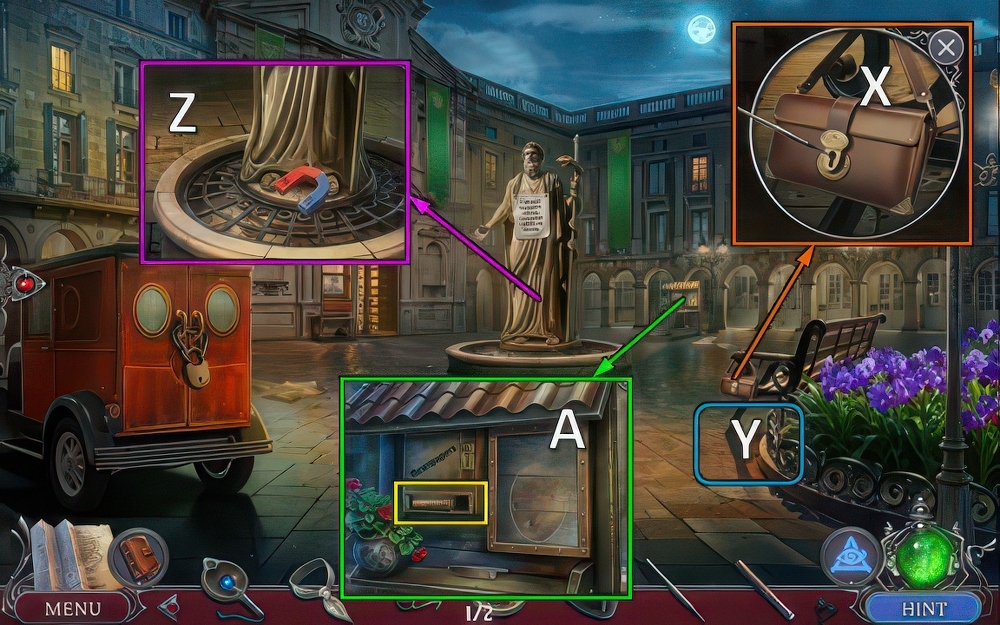
- Use MIRROR (Z).
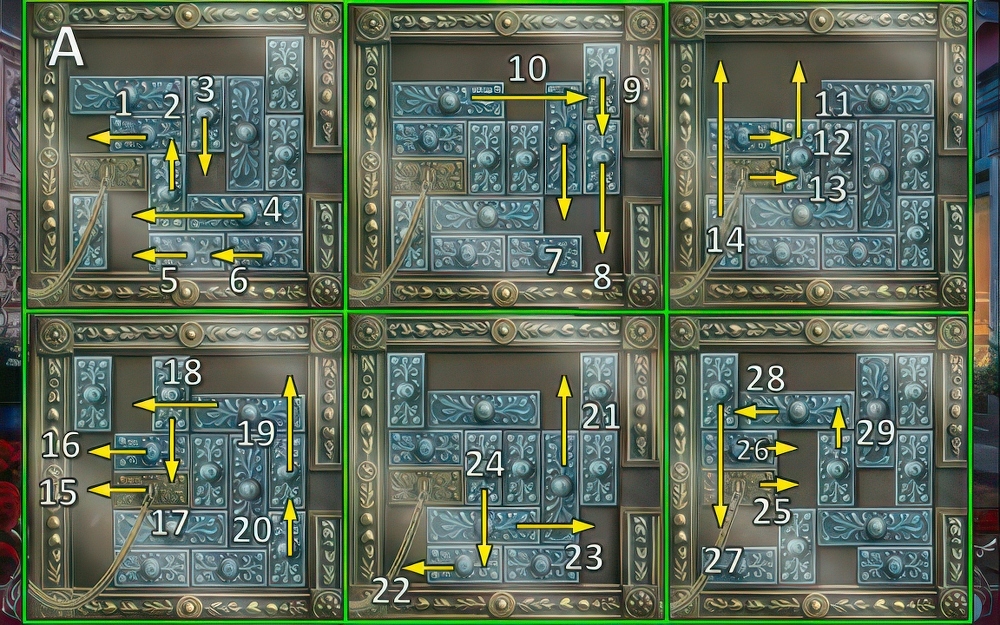
- Casual solution (A).
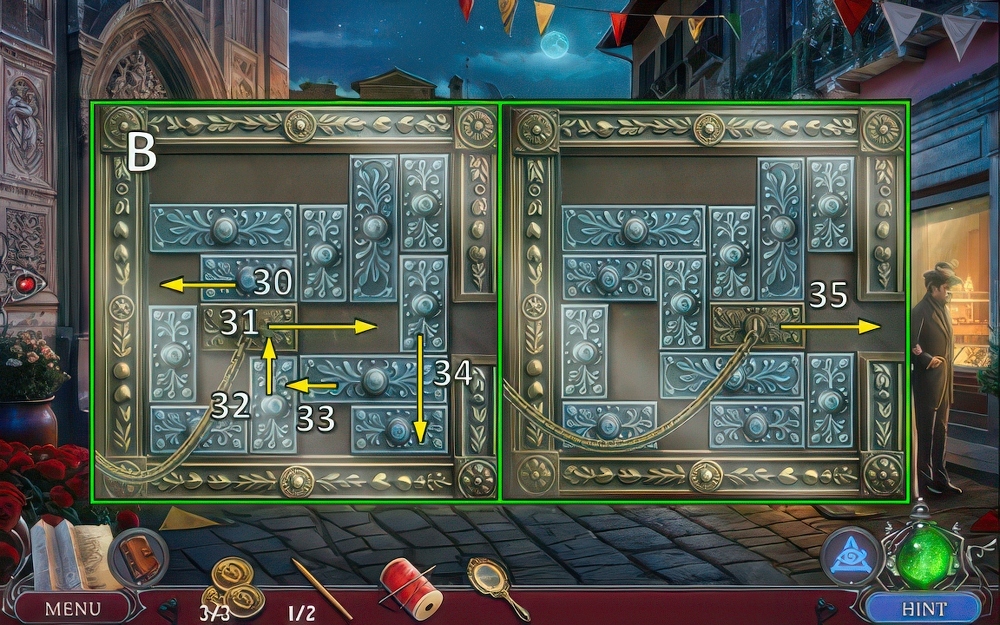
- Casual solution (B).
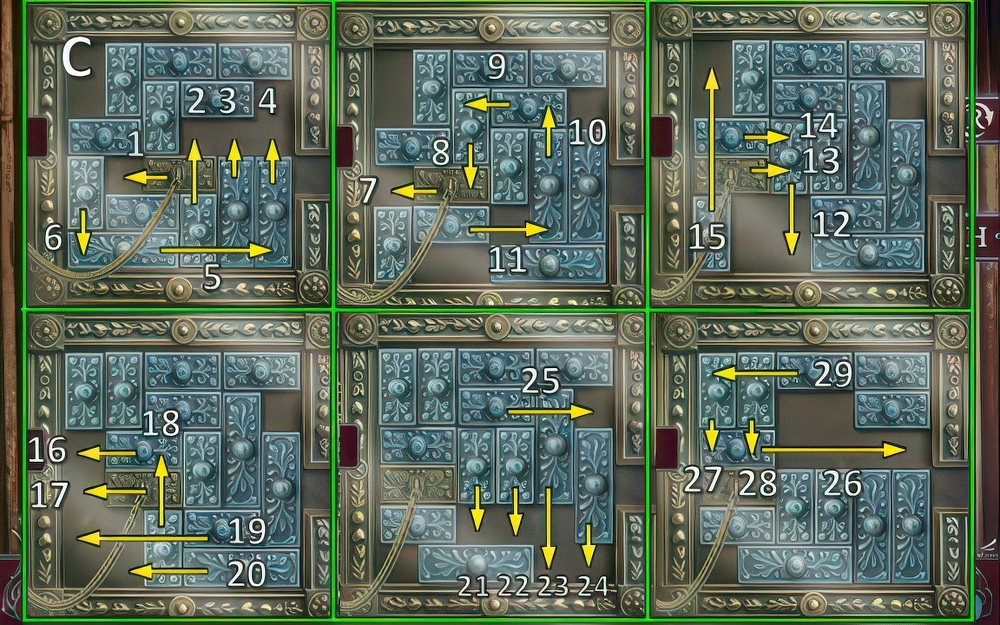
- Hard solution (C).
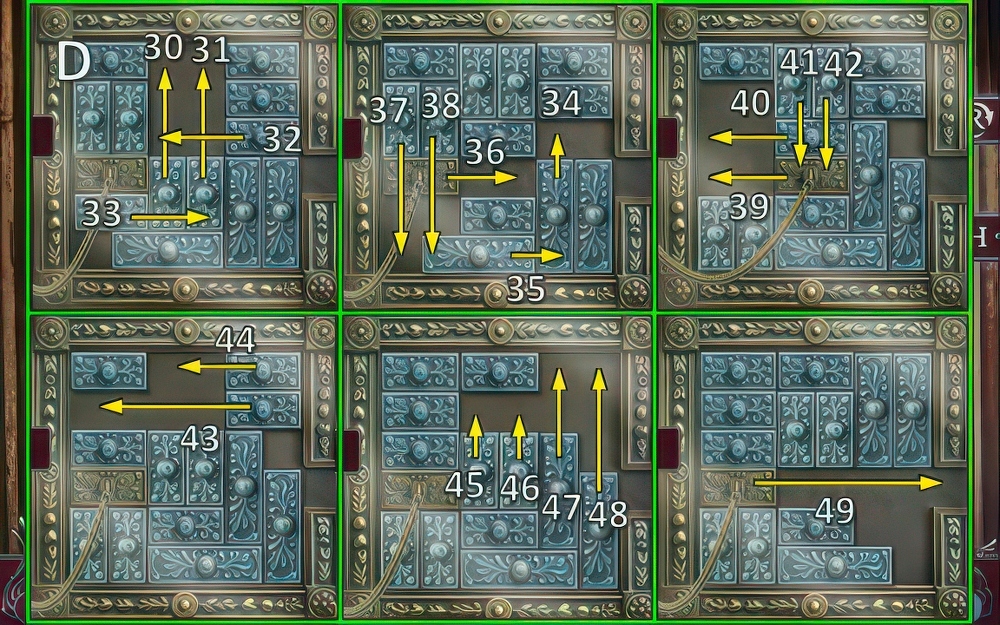
- Hard solution (D).
- Go right.
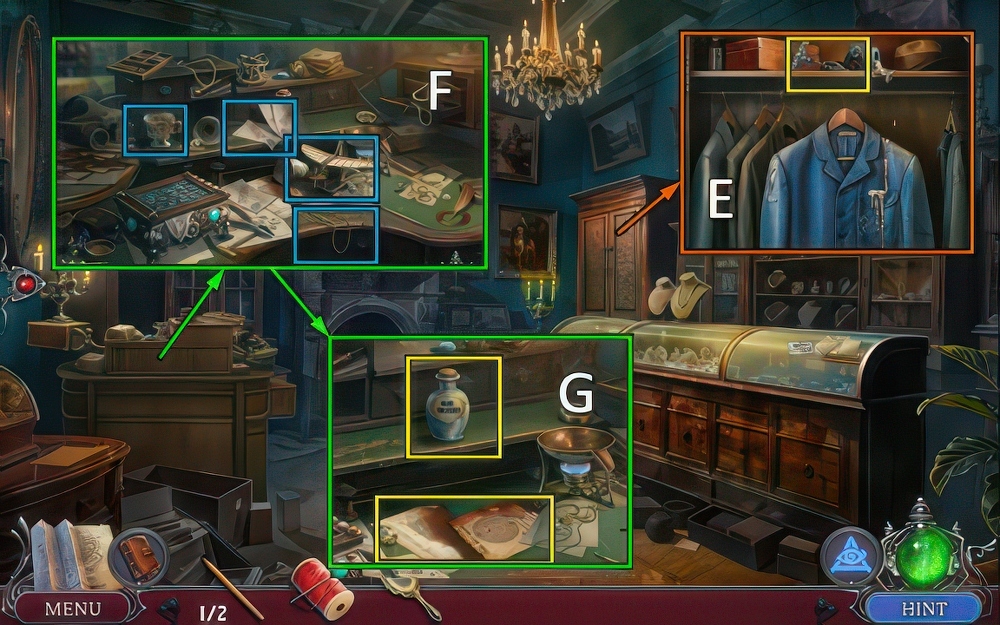
- Open, take CORKSCREW (E).
- Find clues (F).
- Take STAINED DOCUMENTS.
- Use CORKSCREW, take GLUE SOLVENT (G).

- Use GLUE SOLVENT, inspect all items in book (H).
- Take BOX PIN 1/2 (I).
- Move paper, take BOX PIN 2/2 (J).
- Take CERTIFICATE 1/2 (K).
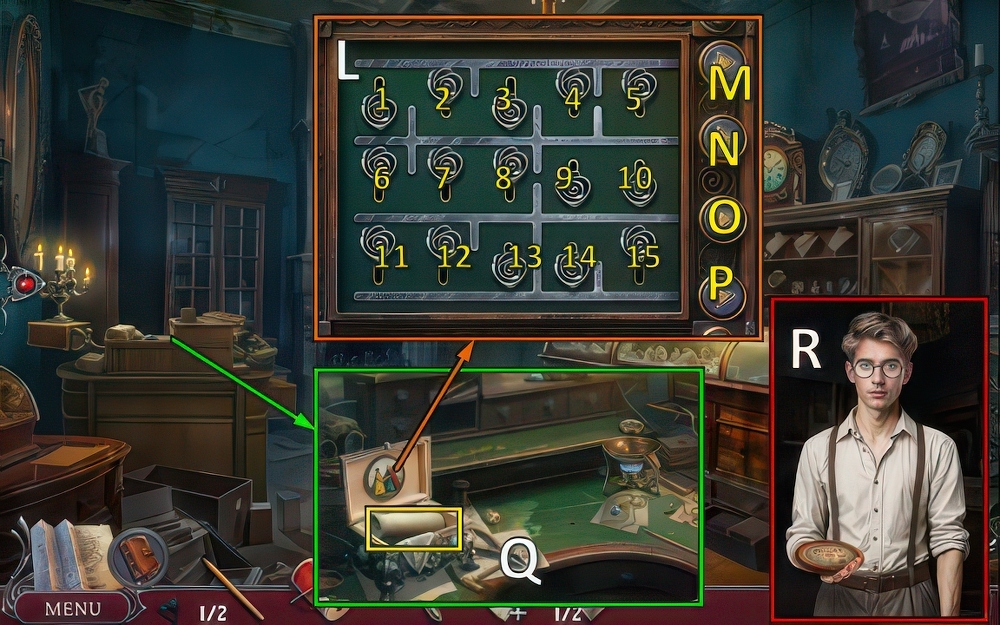
- Place BOX PIN (L).
- Solution: 2-3-4-5-M, 1-4-5-6-8-10-N, 6-8-9-12-13-O, 11-12-13-P.
- Take note and HANDKERCHIEF (Q).
- HANDKERCHIEF on STAINED DOCUMENTS, take CLEAN DOCUMENTS.
- Take CERTIFICATES 2/2 (R).
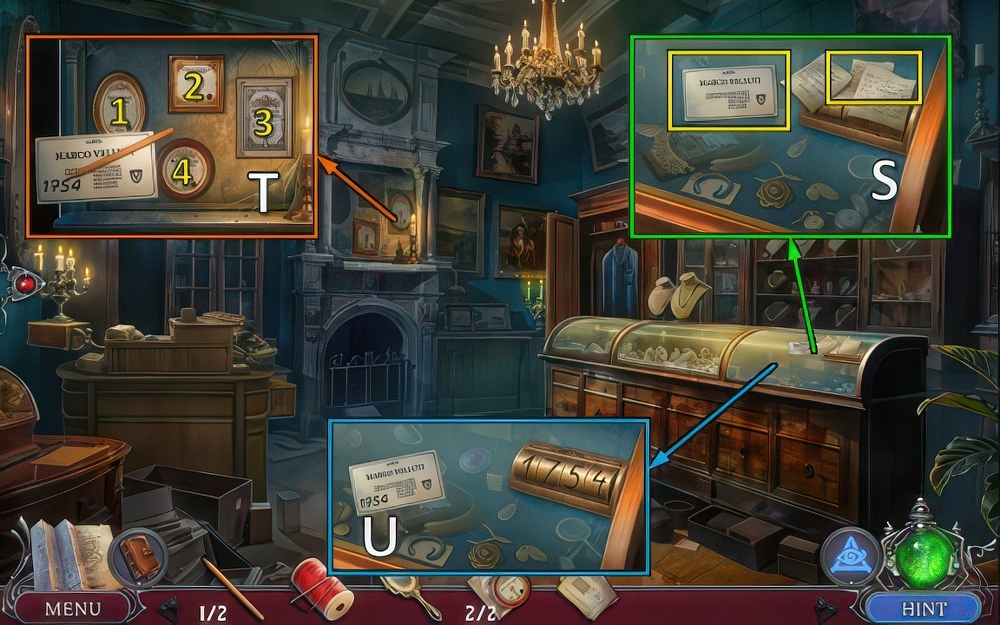
- Take PENCIL AND CARD 2/2.
- Move notes, take CLOCK KEY (S).
- Place CERTIFICATES (T), swap (1-3)-(2-4).
- Use PENCIL AND CARD, inspect all certificates.
- Take BUSINESS CARD HINT and PENCIL.
- Place BUSINESS CARD HINT (U), enter 1-7-5-4 for puzzle.
- Receive DECODER PARTS.
- BROKEN GEAR from DECODER PARTS.
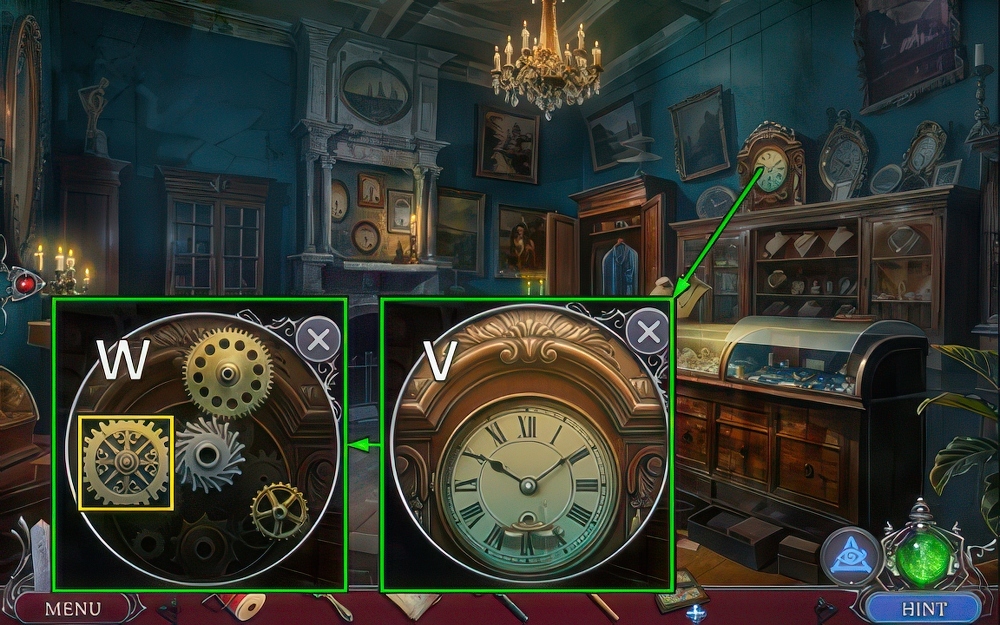
- Use CLOCK KEY (V).
- Place BROKEN GEAR, find and take GOLD GEAR (W).
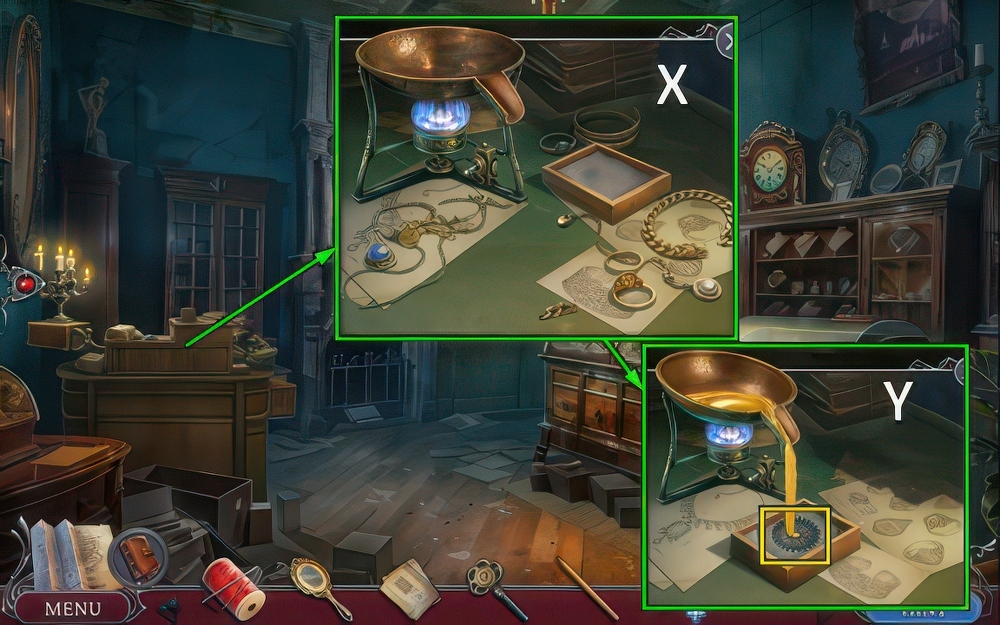
- Move gold x10 and mold, place GOLD GEAR (X).
- Take GOLD GEAR 1/3.
- Pour metal and take GOLD GEARS 2/3.
- Repeat for GOLD GEARS 3/3 (Y).
- GOLD GEARS on DECODER PARTS.
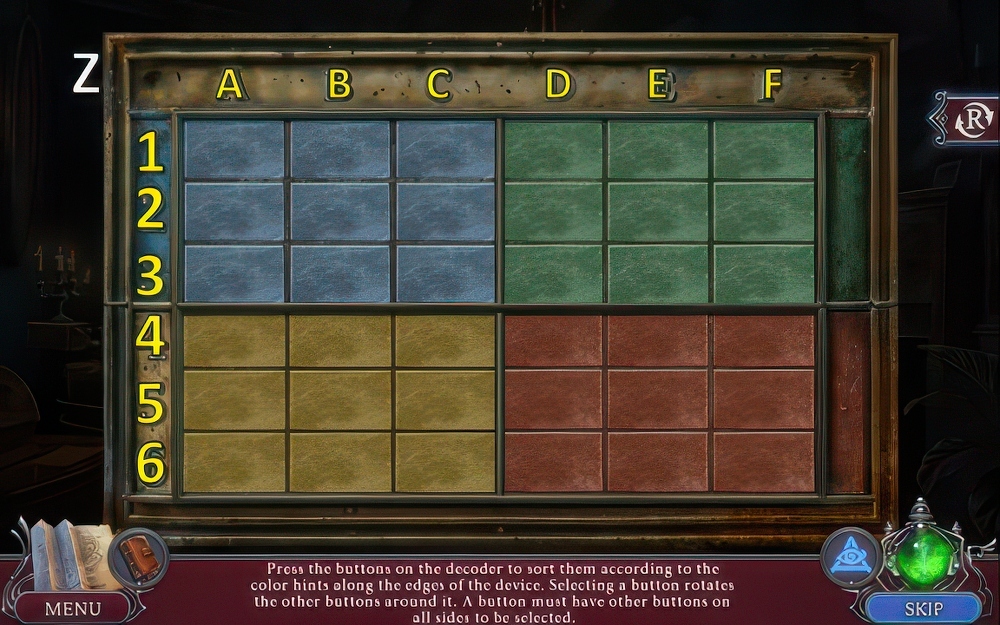
- Solution (Z): E2x3-B2-C2-B2x5-B4-B2-B4x2-C2x5-E2x3-C2x3-E3x2-E5x3-E3-D4x2-C5x3-C4-C3x2-C5x4-C4x6.
- E5x3-B5x3-C5x2-B5x2-C5-E5-C5-E3x2-E2-E5x3-E3x4-B5x2-E5x3-C5-B5x2-E5x5-E4x5.
- D5-B5x6-E5-D5x2-E5x2-D5.
- Place CLEAN DOCUMENTS.
- Select B1-A1-E1-C3-D5-E1-D5.
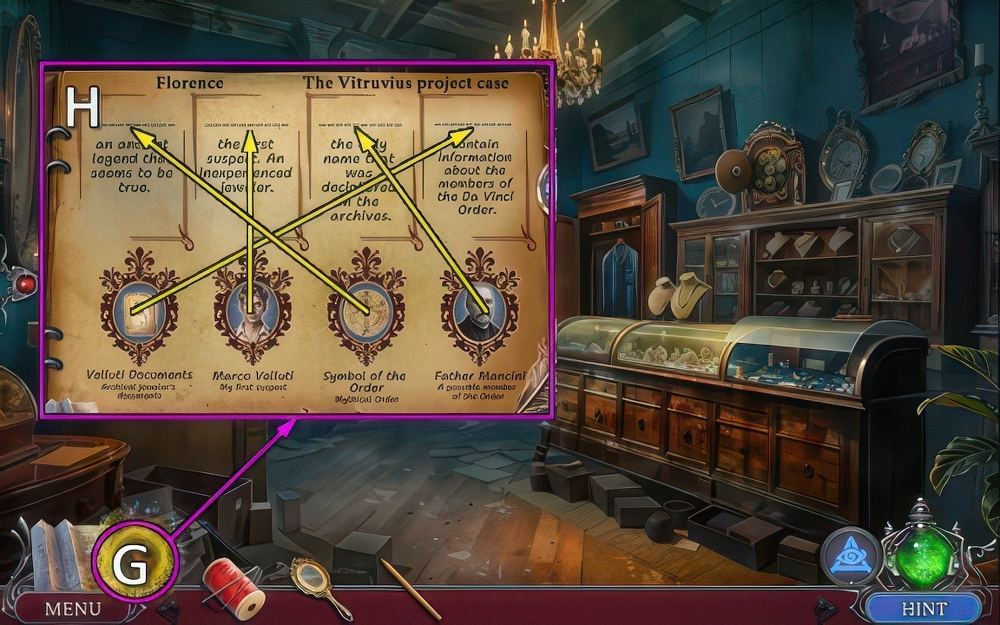
- Review evidence (G).
- Solution (H).

- Select 3 (I).
- Select 2 (J).
- Select 1 (K).
- Take LOCKPICK (L).
- Walk down.
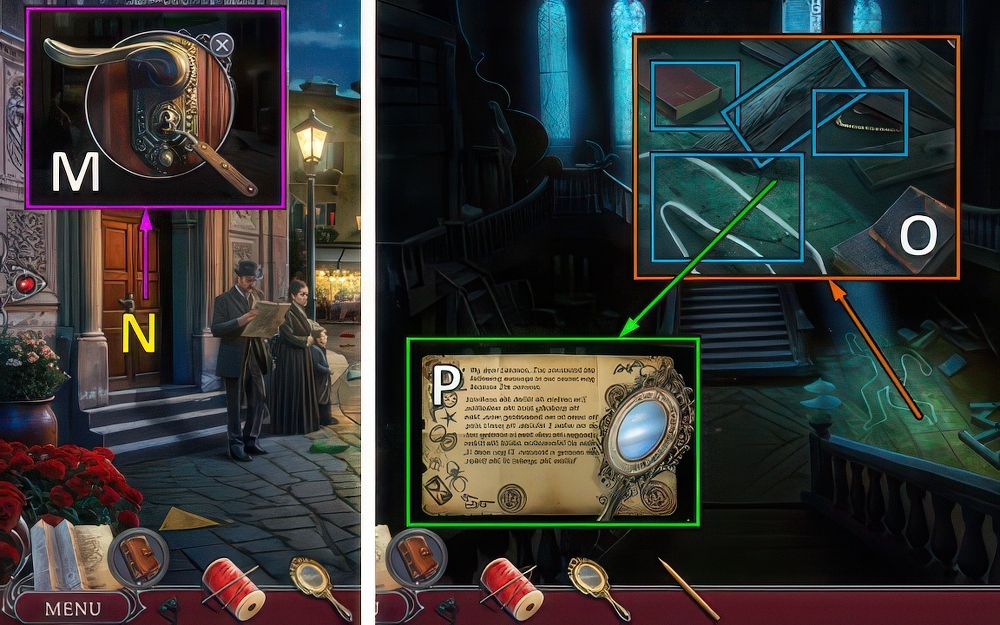
- Use LOCKPICK, open (M).
- Go (N).
- Find clues (O).
- Place MIRROR for mini-puzzle (P).
- Take LIGHTER.
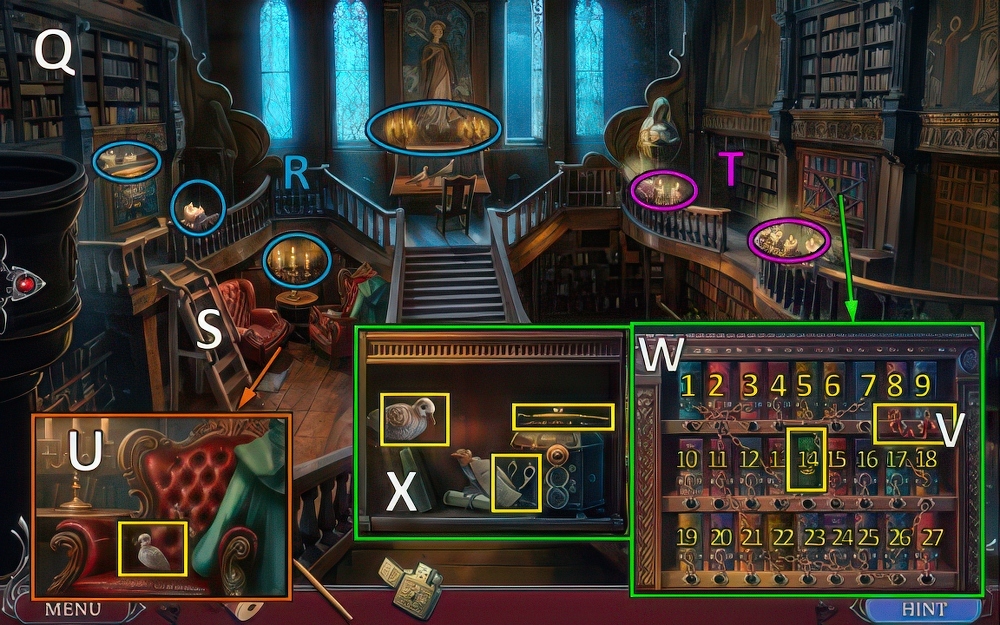
- Use LIGHTER (Q).
- Light candles (R).
- Move ladder (S).
- Light more candles (T).
- Move items, take BABY PIGEON 1/2 (U).
- Take RED RIBBON (V).
- Solution (W): (3-1)-(7-5)-(13-2)-(18-7)-(13-11)-(15-13)-(18-15)-(18-22)-(18-26).
- Take book (14).
- Take BABY PIGEONS 2/2, note and SCRAPER.
- Take SCISSORS (X).
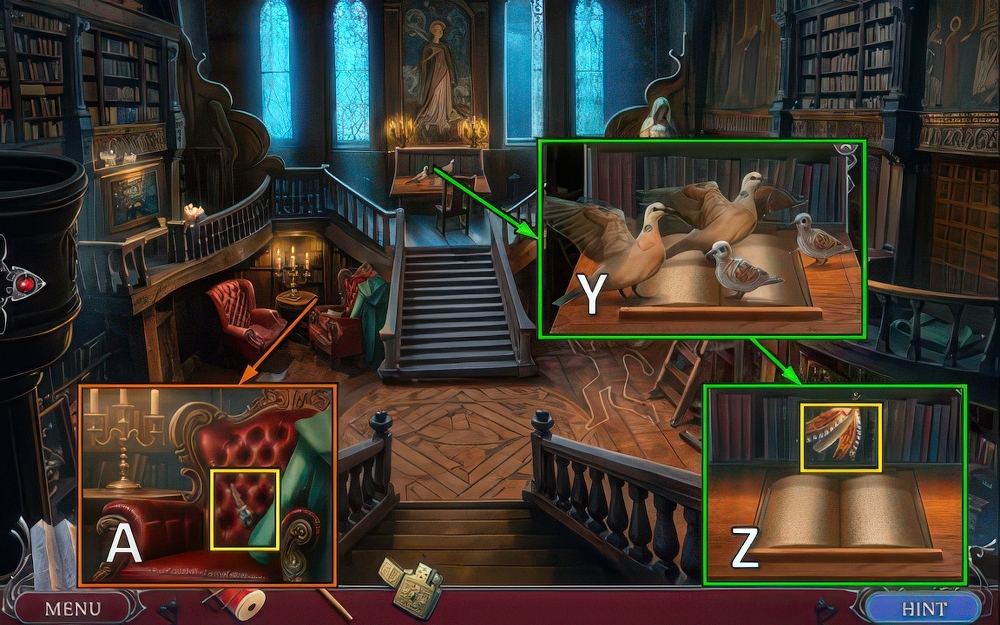
- Release BABY PIGEONS (Y).
- Move feathers, use RED RIBBON.
- Take DUSTER (Z).
- Use SCISSORS, take COMBINATION DIAL 1/2 (A).
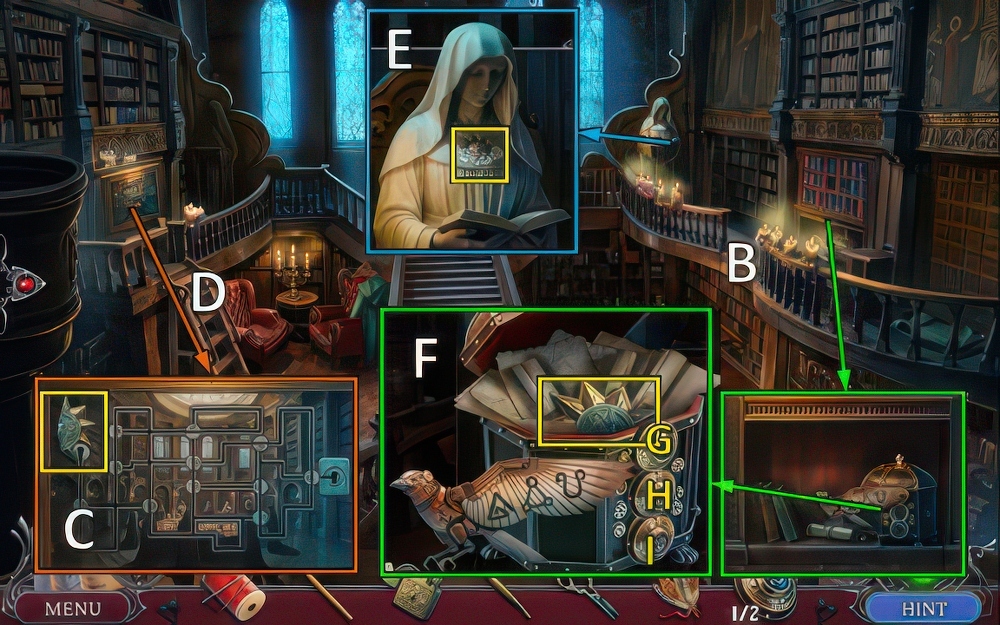
- Move ladder (B).
- Take STAR PART 1/2 (C).
- Move ladder (D).
- Use SCRAPER and DUSTER, take COMBINATION DIALS 2/2 (E).
- Place COMBINATION DIALS, open wing (F).
- Select Gx6-Hx8-Ix3.
- Take STAR PARTS 2/2.
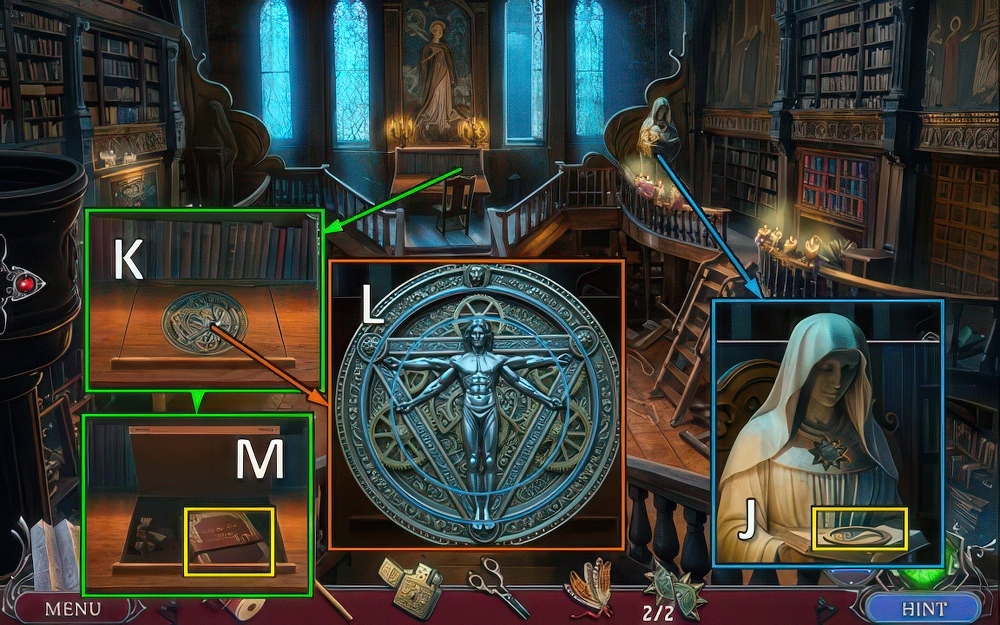
- Place STAR PARTS, take SYMBOL RING (J).
- Place SYMBOL RING (K).
- Solution (L).
- Take DIARY (M).

- Access DIARY.
- Solutions (N).
- Take PICTURE KEY.
- Move ladder (O).
- Use PICTURE KEY (P).
- Solution: S-R-Qx2-R-S-R-Q-T-Sx2-T-Q-R-Q-R-Q-R-S-T-S-T-Q-R-S-R.
- Take FILM REEL 1/2 (U).

- Select eye (V).
- Find clues (W).
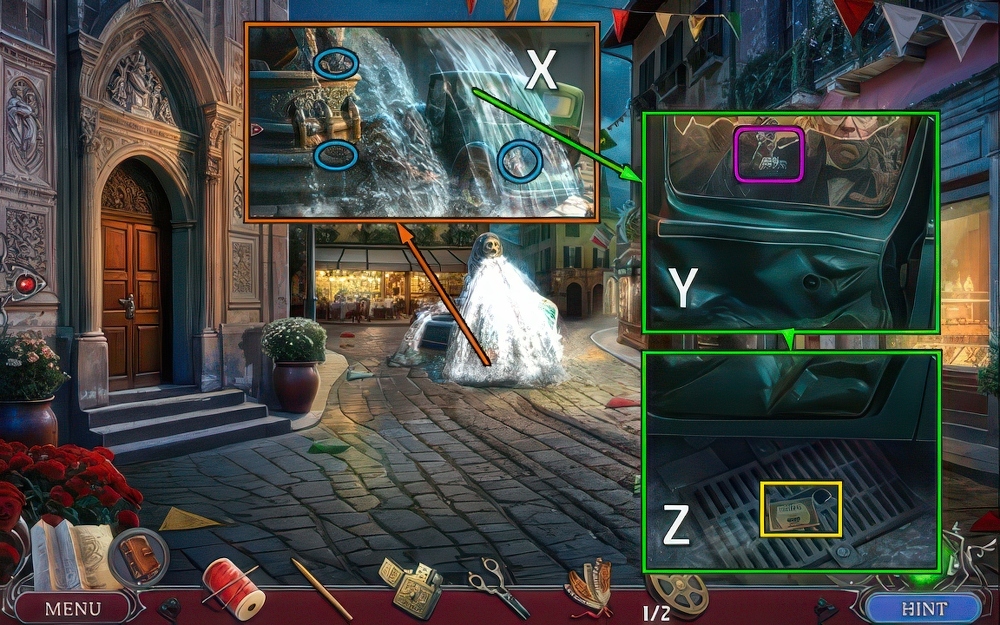
- Find and turn valves x3 (X).
- Take keys (Y).
- Move leaves, take TICKET (Z).
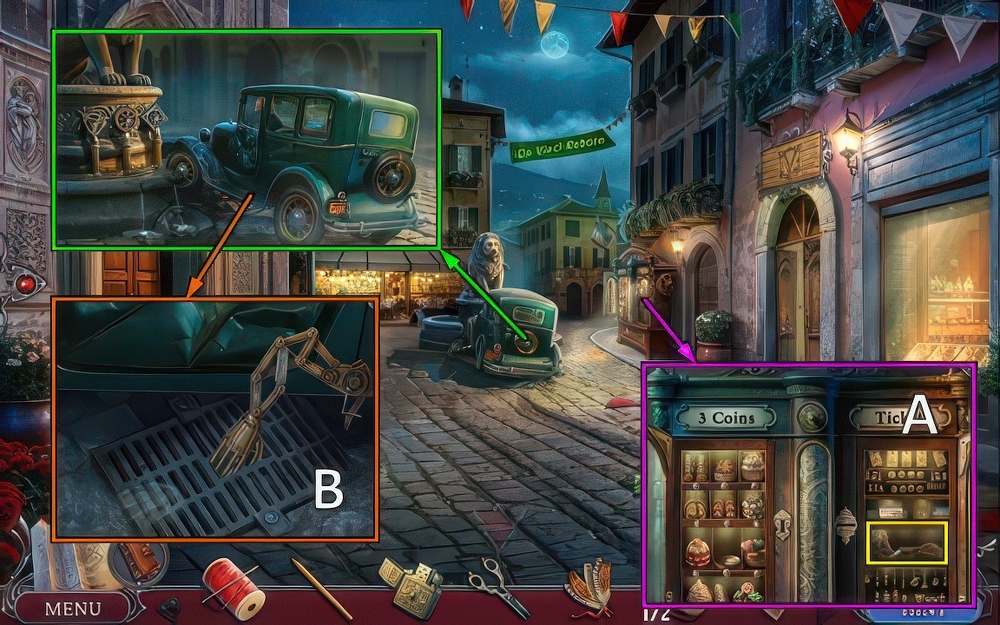
- Use TICKET, take HAND (A).
- Take CAR KEYS with HAND (B).
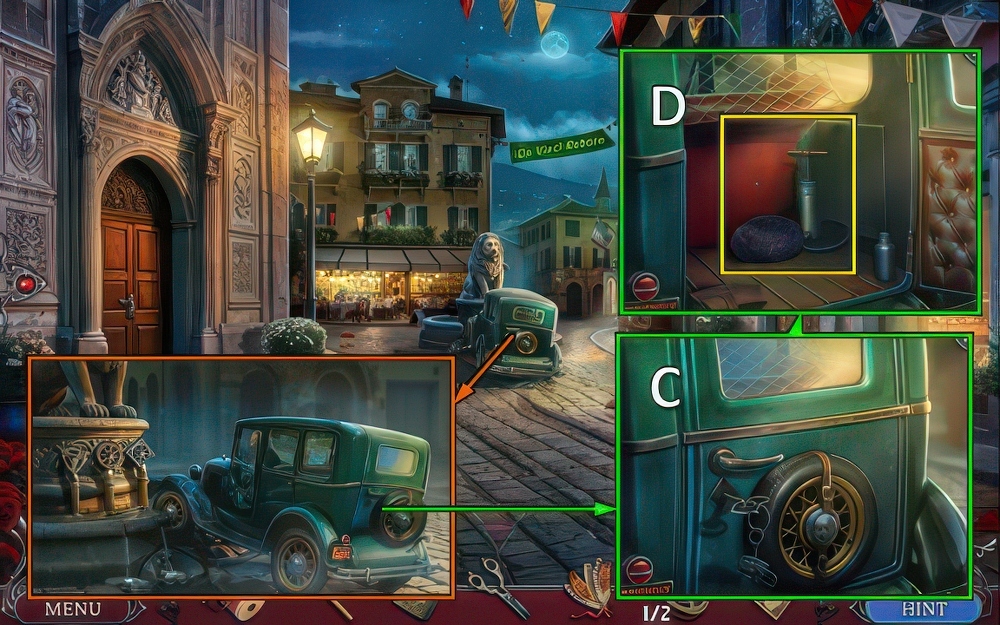
- Use CAR KEYS (C).
- Move items, take PUMP AND FOOTBALL (D).

- Use PUMP AND FOOTBALL (E).
- Offer PENCIL, take SKETCH (F).
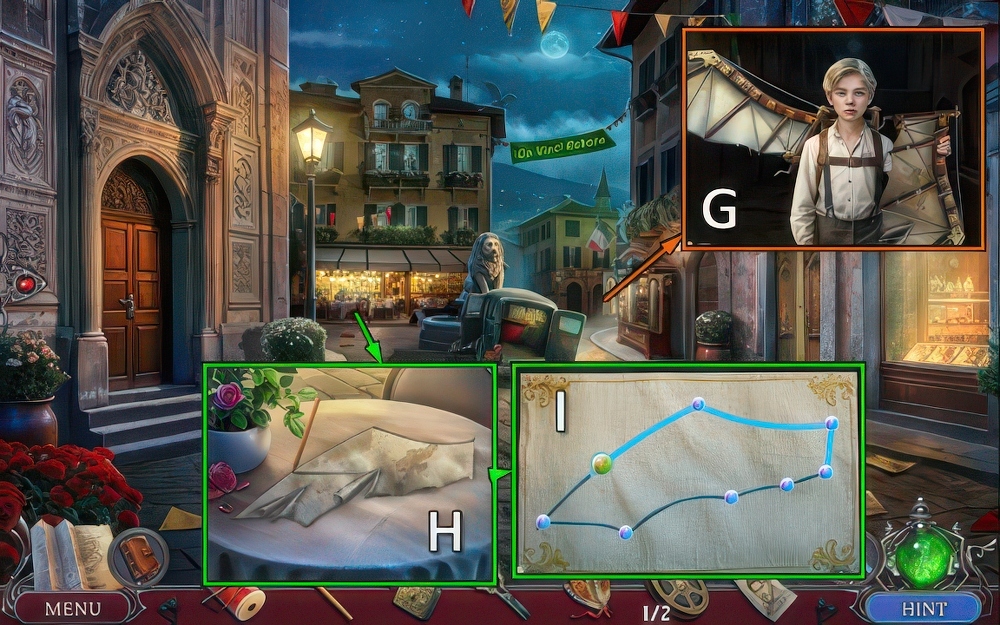
- Take ORNITHOPTER WING (G).
- SCISSORS on ORNITHOPTER WING, take OLD WING.
- Clear table, place OLD WING.
- Use PENCIL (H).
- Use SCISSORS.
- Drag green ball around wing.
- Take NEW WING (I).
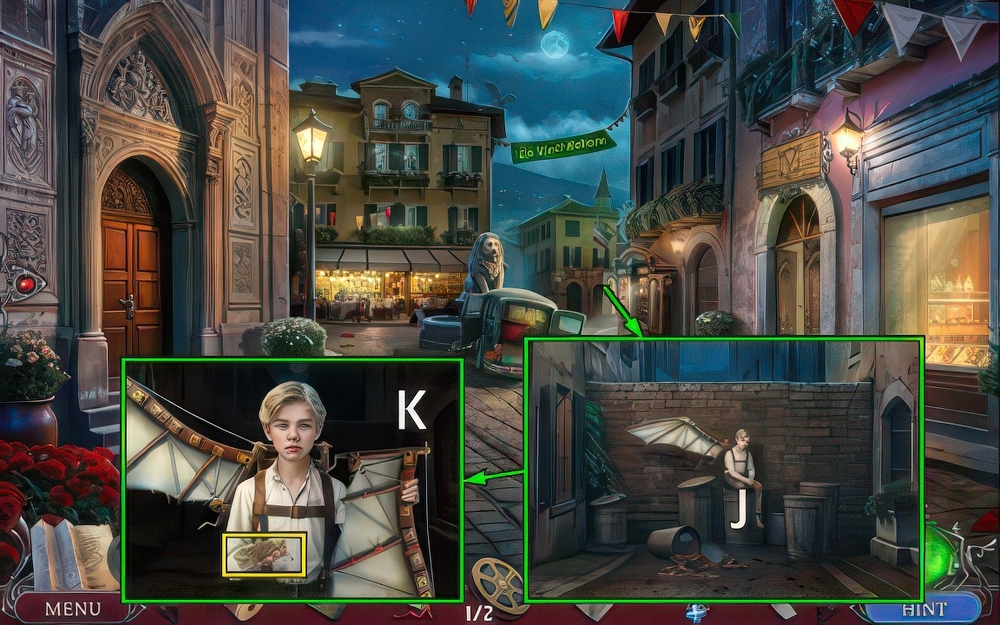
- NEW WING and THREAD on ORNITHOPTER WING, take NEW ORNITHOPTER WING.
- Offer NEW ORNITHOPTER WING (J).
- Take map (K).
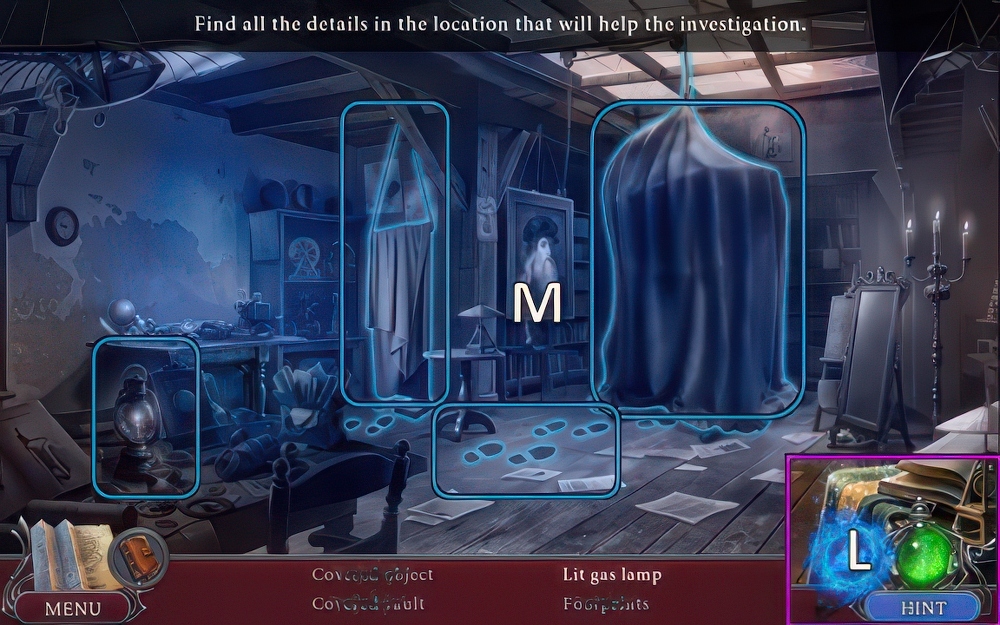
- Select eye (L).
- Find clues (M).
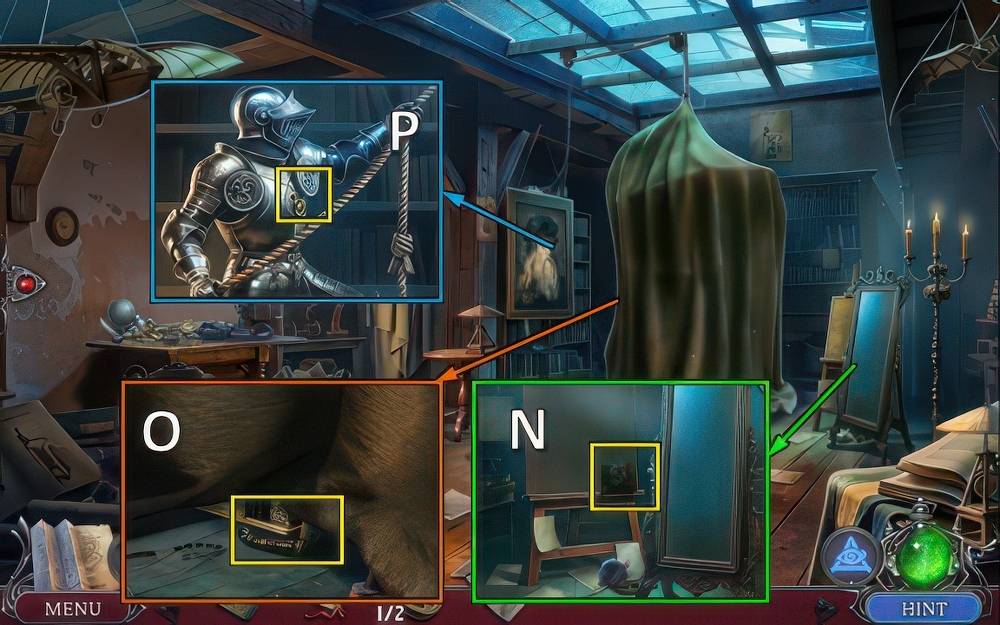
- Move mirror, take WALLET (N).
- Take CAT PART (O).
- Move painting, use DUSTER.
- Take LAMP KNOB (P).
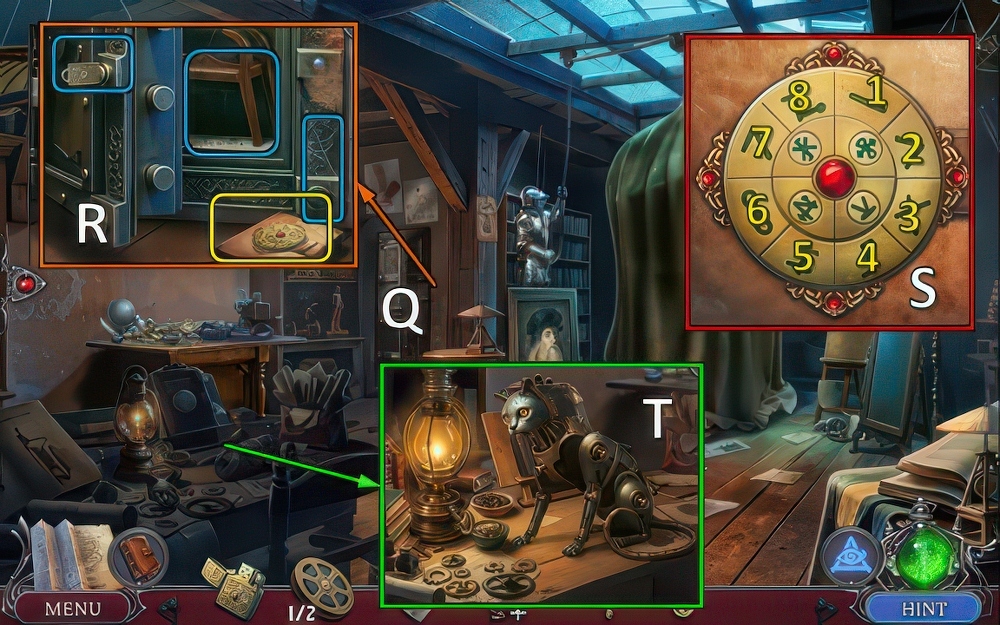
- Remove drape (Q).
- Find clues, take FOLIO (R).
- Access FOLIO (S).
- Solution: (1-2)-(3-4)-(5-6)-(7-8).
- Take AWL WITH S.
- AWL WITH S on WALLET, take INITIALS 1/3, BAG TOKEN 1/2 and COIN.
- Use LAMP KNOB.
- Place CAT PART.
- Move cat.
- Use COIN, take CAT (T).
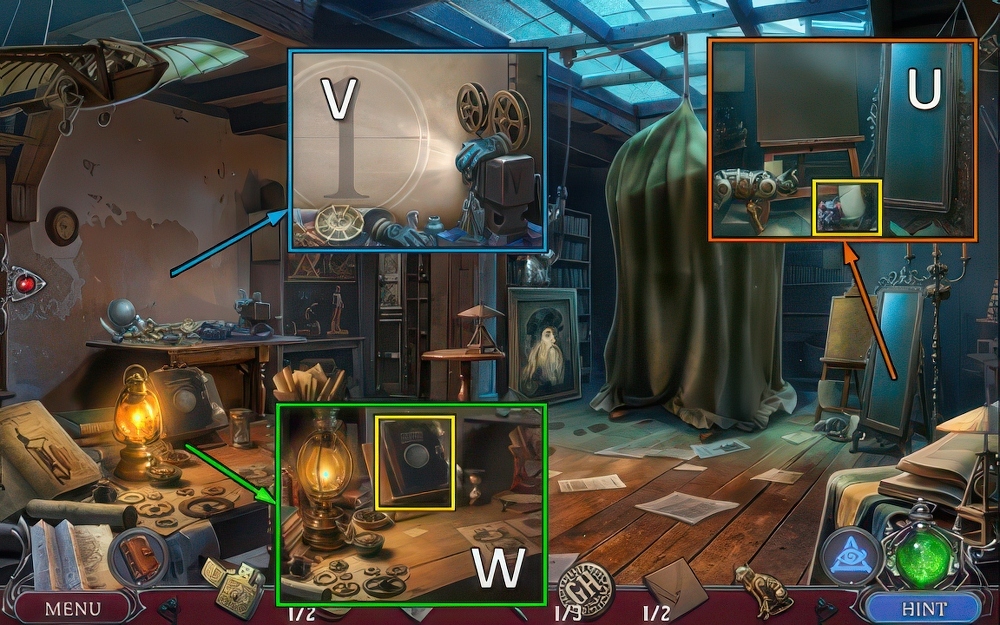
- Release CAT, find pairs.
- Take note and FILM REELS 2/2 (U).
- Place FILM REELS for puzzle (V), receive THE ORDER’S SYMBOL.
- Place THE ORDER’S SYMBOL (W), take INITIALS 2/3, KEY and BOOK.

- Use KEY (X).
- Take INITIALS 3/3 and STATUE KEY 1/2.
- Place BOOK (Y).
- Place SKETCH.
- Find differences (Z).
- Place AWL WITH S and INITIALS.
- Move letters.
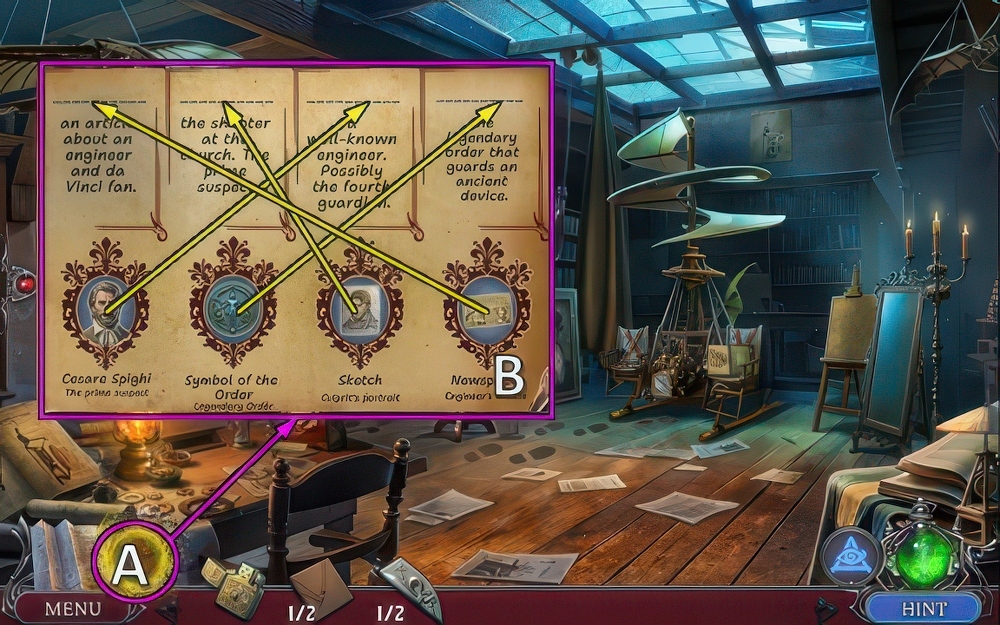
- Review evidence (A).
- Solution (B).
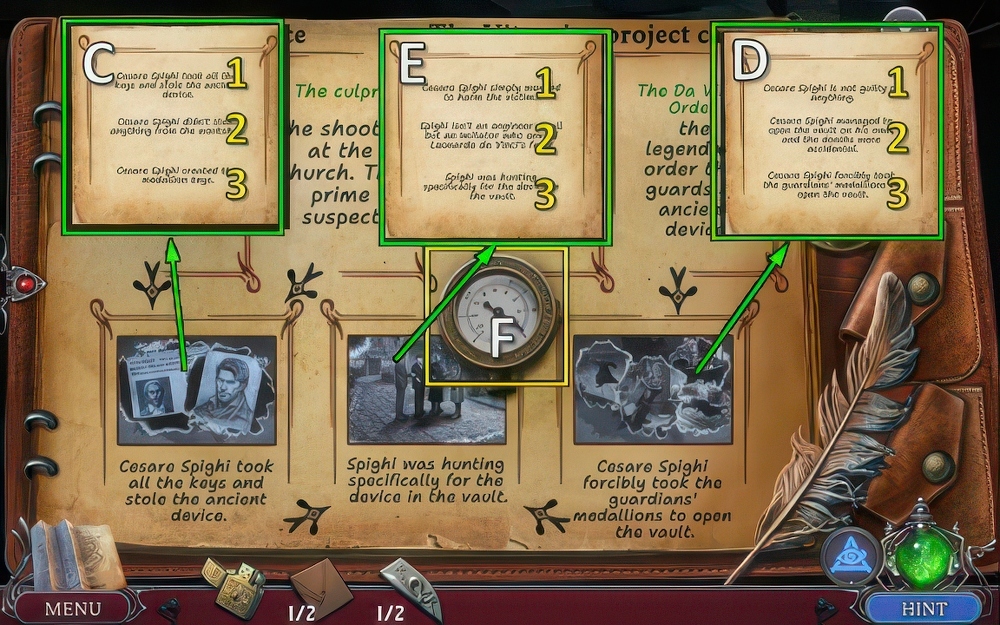
- Select 1 (C).
- Select 3 (D).
- Select 3 (E).
- Take GAUGE (F).
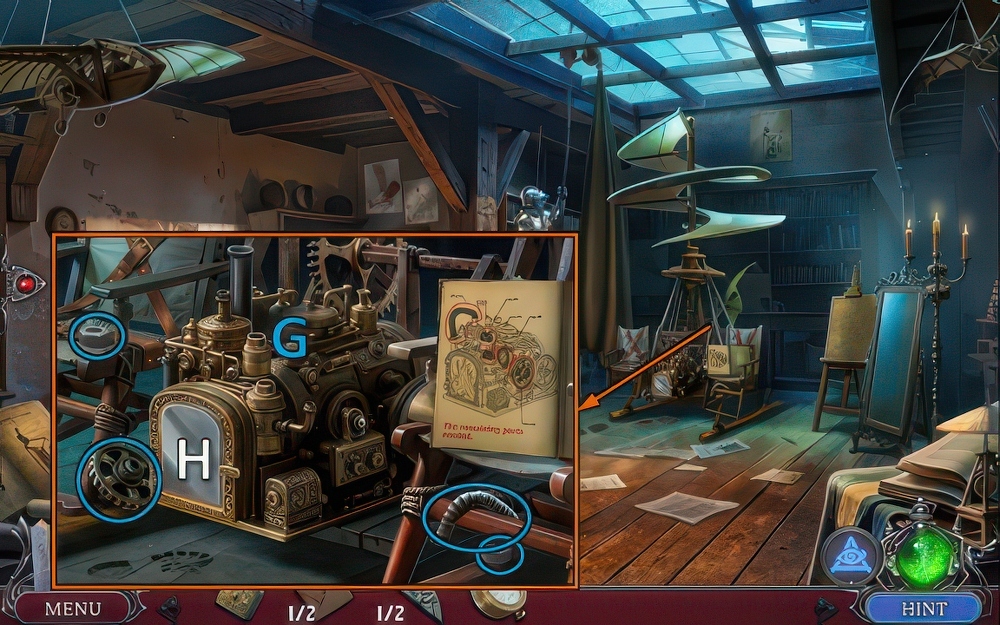
- Find items, place GAUGE (G).
- Open, use LIGHTER (H).
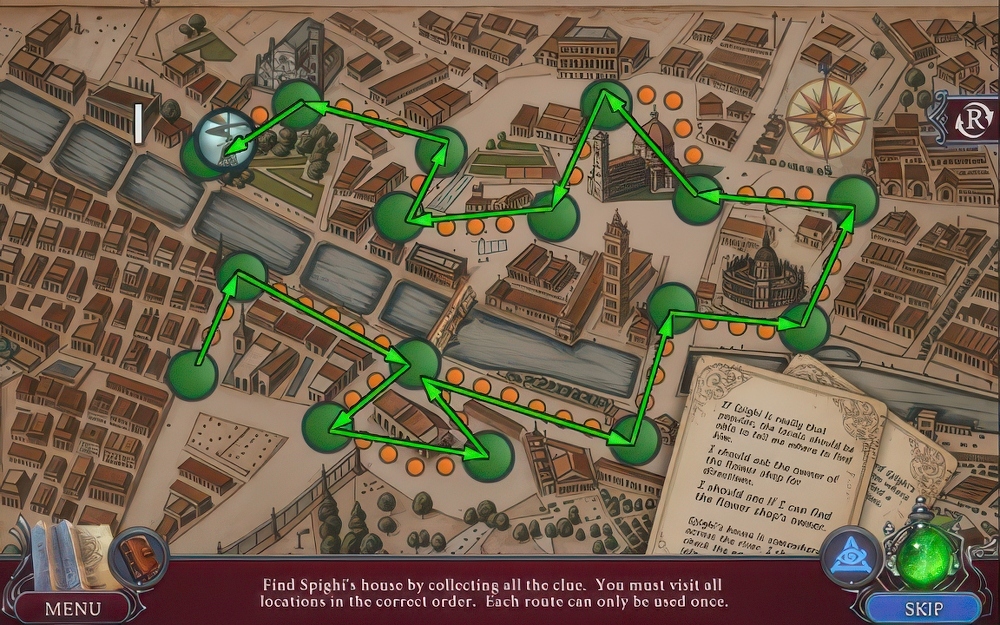
- Solution (I).
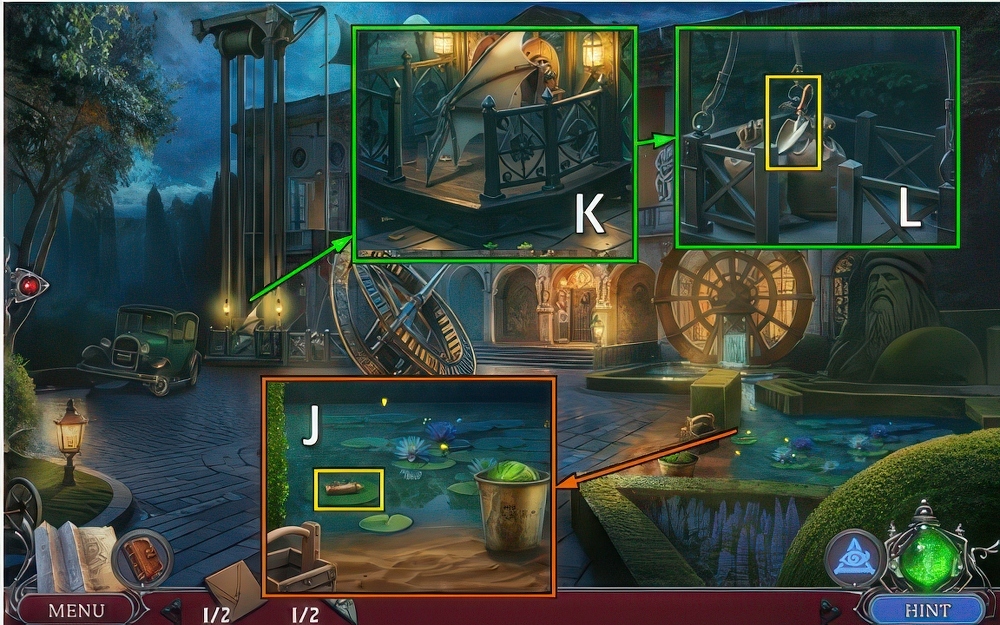
- Take SHOVEL HANDLE.
- Try to take token x2 (J).
- Remove items (K).
- Place SHOVEL HANDLE, take GARDEN SHOVEL (L).
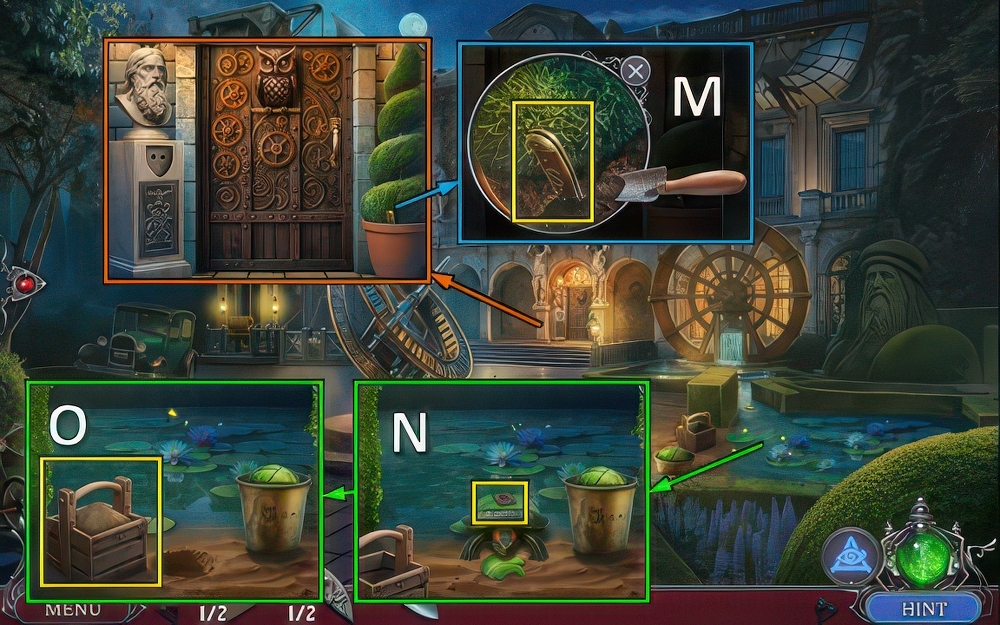
- Use GARDEN SHOVEL, take KNIFE (M).
- Use KNIFE, take BAG TILES 2/2 (N).
- Use GARDEN SHOVEL, take BOX OF SAND (O).
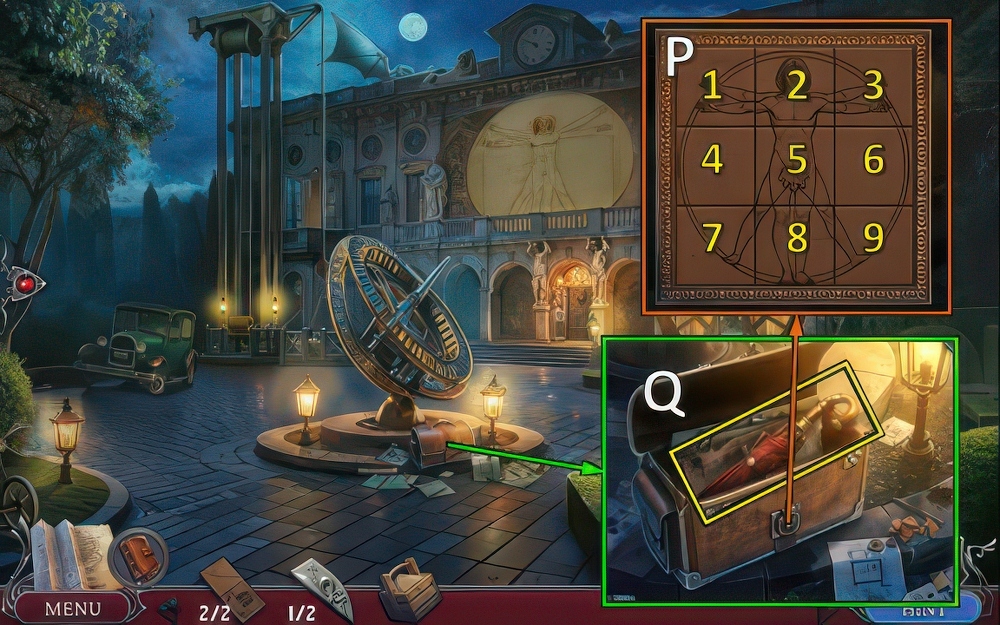
- Place BAG TILES (P).
- Solution: (1-9)-(2-6)-(3-8)-(5-7)-(7-8)-(8-9).
- Take UMBRELLA.
- Move items and take STATUE INLAYS 2/2 (Q).
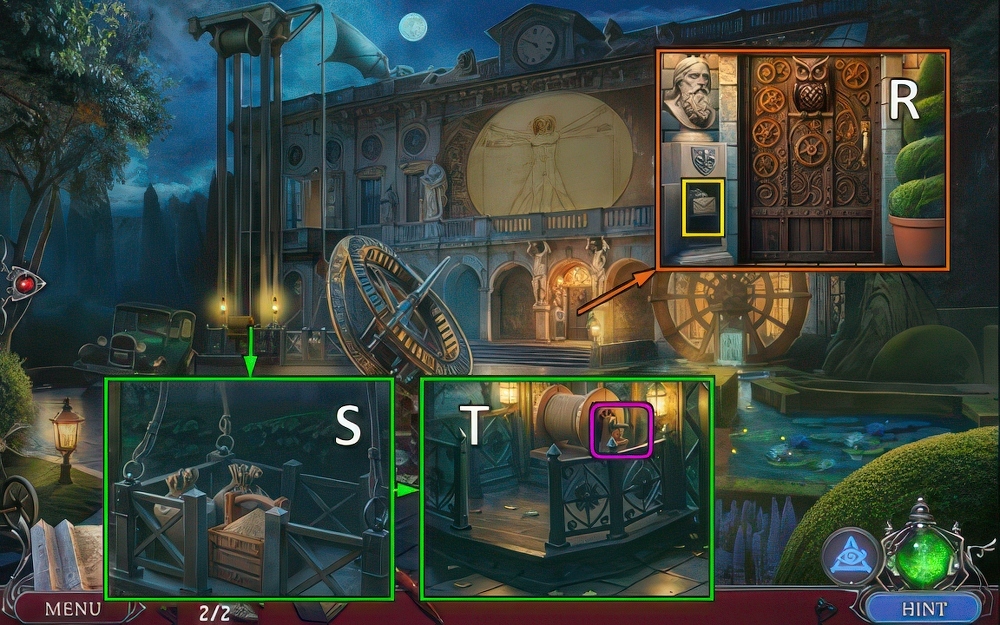
- Place STATUE INLAYS, take notes, LIGHTNING INLAY and HANDLE (R).
- Place BOX OF SAND (S), place and use HANDLE (T).

- Use UMBRELLA, take LEVER HANDLE (U).
- Take GEAR 1/3, replace LEVER HANDLE.
- Solution (V).
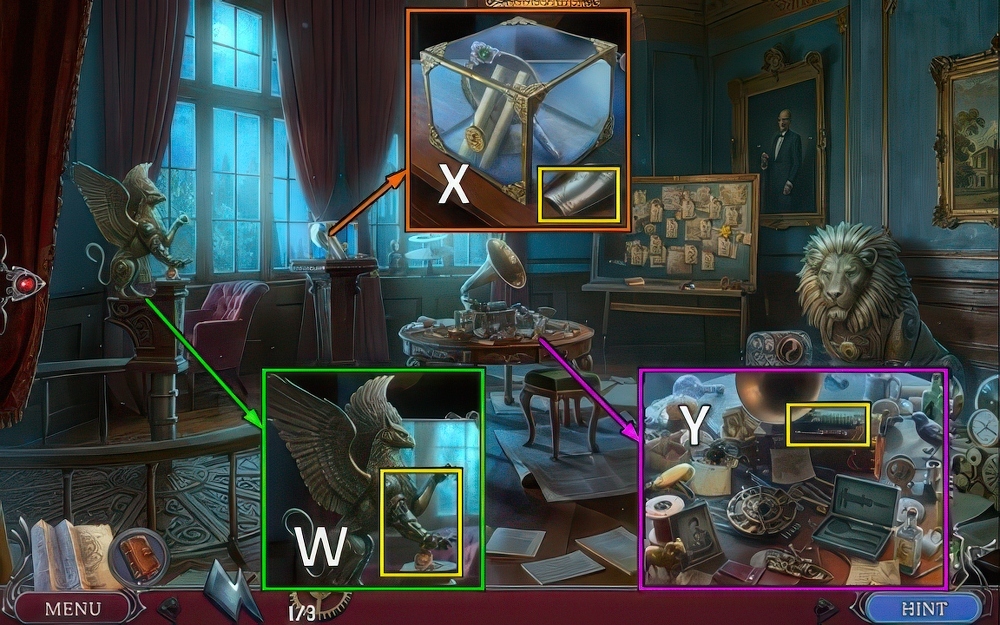
- Take BROKEN GRIFFIN CLAW and LION EMBLEM (W).
- Take CLAW DETAIL (X).
- Take SPRING (Y).
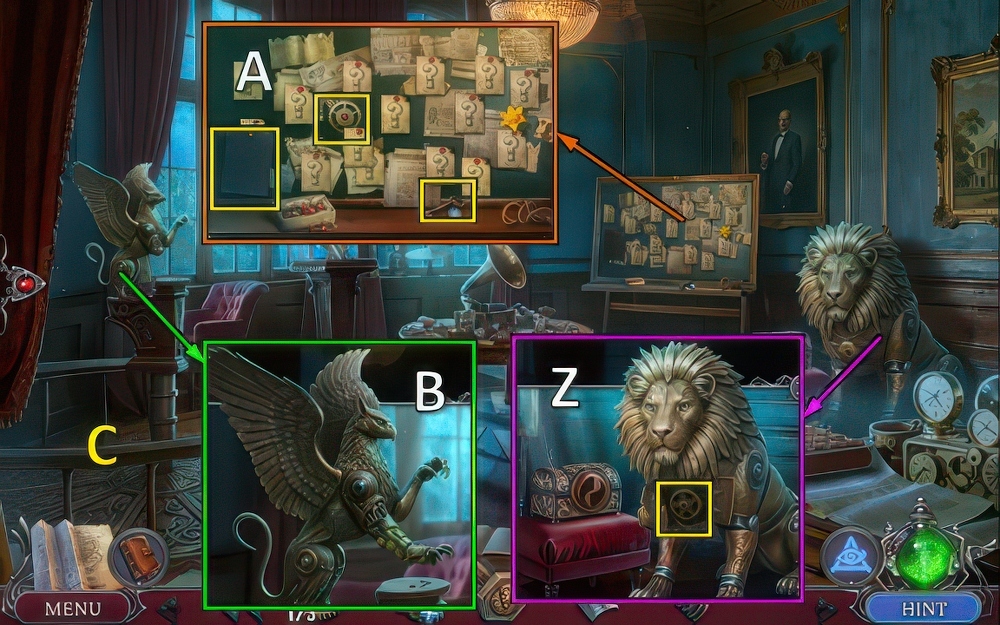
- Use LION EMBLEM, take GEARS 2/3 (Z).
- Take SHOWCASE KEY, GEARS 3/3 and CARBON PAPER (A).
- CLAW DETAIL, GEARS and SPRING on BROKEN GRIFFIN CLAW.
- Restore and take GRIFFIN CLAW.
- Place GRIFFIN CLAW (B).
- Go (C).

- Take PATCH (D).
- Take HANDKERCHIEF, MAGNIFYING GLASS and PAINTBRUSH (E).
- Find clues, take EVIDENCE 1/3 (F).

- Open, take PHONOGRAPH CYLINDER.
- Take BROKEN GLASS with HANDKERCHIEF, take TABLE KNOB (G).
- Use TABLE KNOB, take CHALK and LIGHTBULB (H).
- MAGNIFYING GLASS, PAINTBRUSH, CARBON PAPER and CHALK on BROKEN GLASS, use 1-2-2-3-4.
- Receive EVIDENCE 2/3 and GLASS SHARDS (I).
- Walk down.
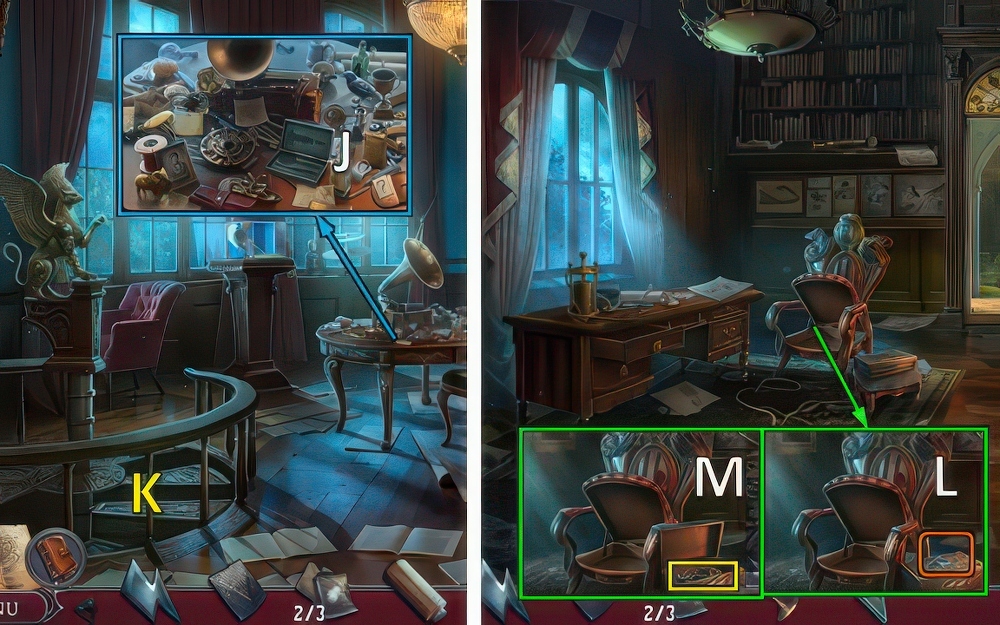
- Place PHONOGRAPH CYLINDER for puzzle (J), receive ELECTRICITY EMBLEM.
- Go (K).
- Place ELECTRICITY EMBLEM and LIGHTNING INLAY (L), take CABLE (M).
- Walk down.
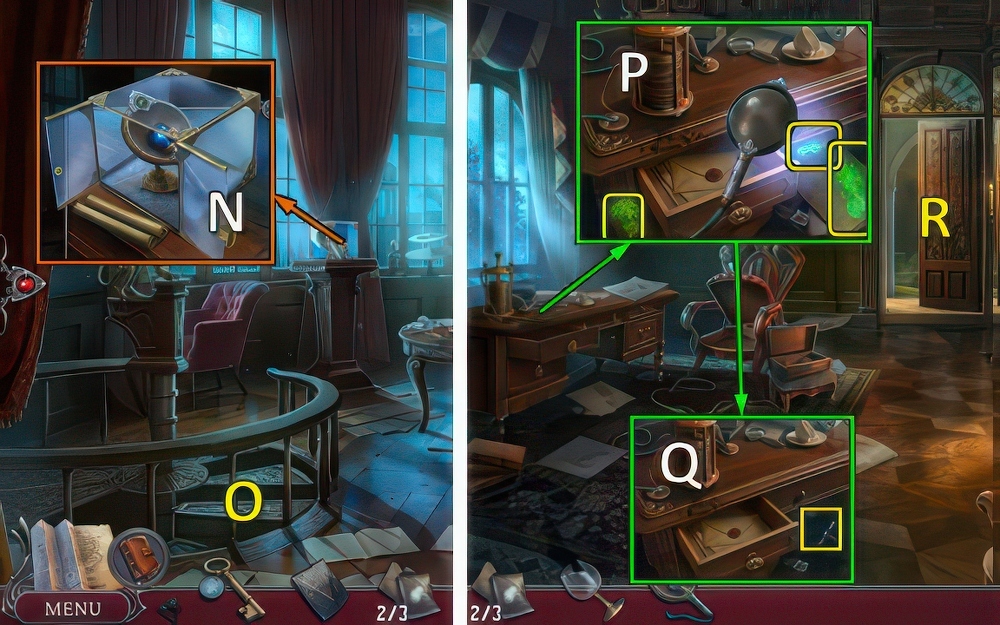
- Use SHOWCASE KEY, LIGHT BULB and CABLE, take UV LAMP (N).
- Go (O).
- Use UV LAMP, find spots.
- Take EVIDENCE 3/3 and UV LAMP (P).
- Move note, take SAFE KNOB 1/2 (Q).
- Go (R).
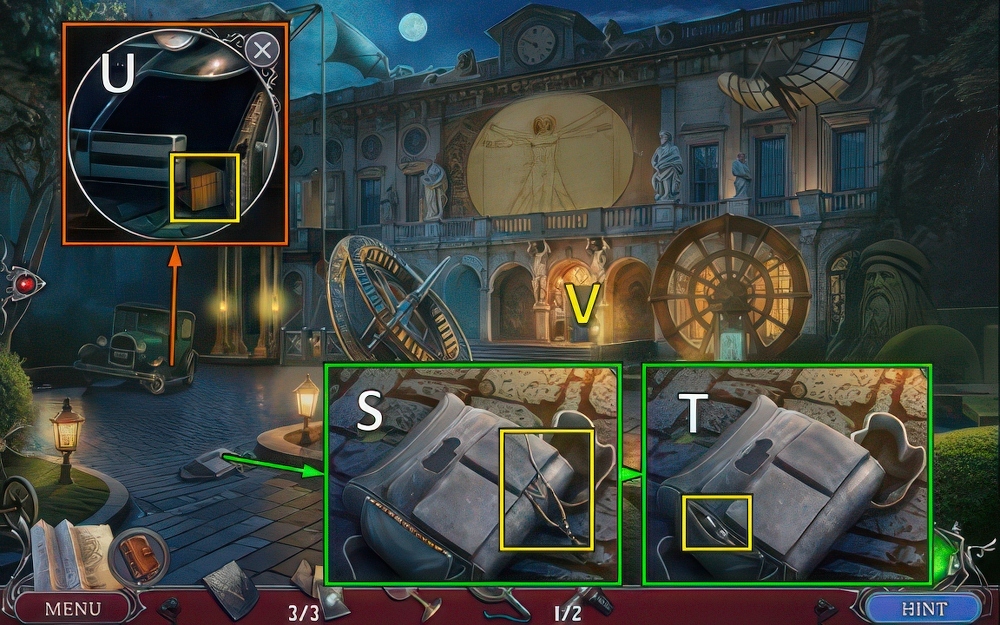
- Take STETHOSCOPE (S).
- Use GLASS SHARDS, take SAFE KNOBS 2/2 (T).
- Take CUBE (U).
- Go (V).
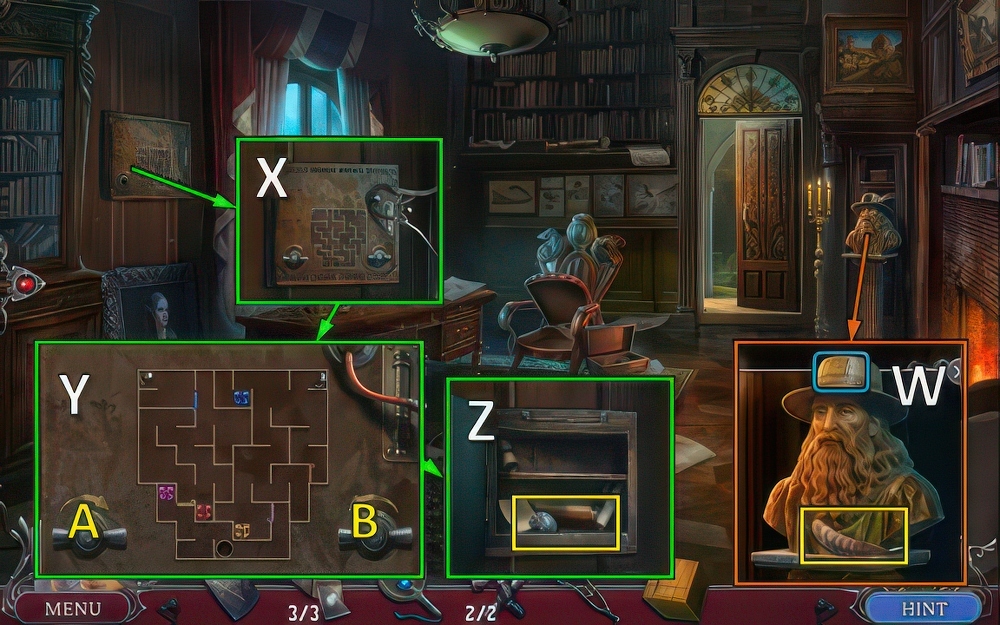
- Place CUBE, take FEATHER (W).
- Remove painting, place SAFE KNOBS and STETHOSCOPE (X).
- Solution (Y): B-A-Bx2-Ax3-B-Ax2-Bx2-A-Bx3-Ax3-B-A-Bx2-A-Bx2-A-B-A-B-Ax3-Bx2-Ax4-B-A-Bx3-A-B-A-Bx2.
- Take DIAMOND, ORDER and PHONOGRAPH CYLINDER (Z).
- Walk down.
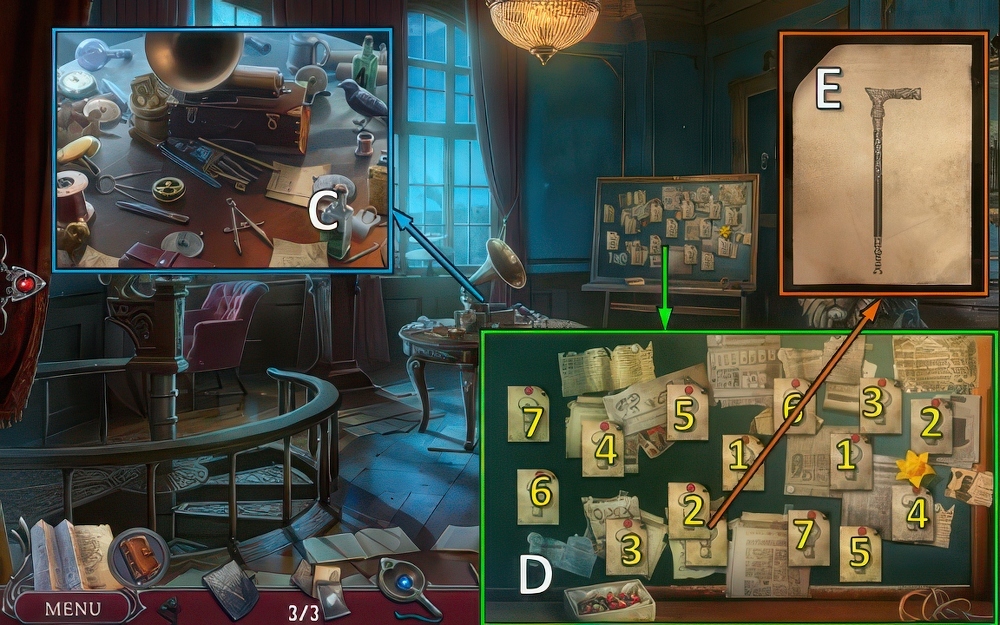
- Place PHONOGRAPH CYLINDER for puzzle (C), receive INK.
- Find pairs (D).
- Use INK and FEATHER (E).
- Place ORDER.
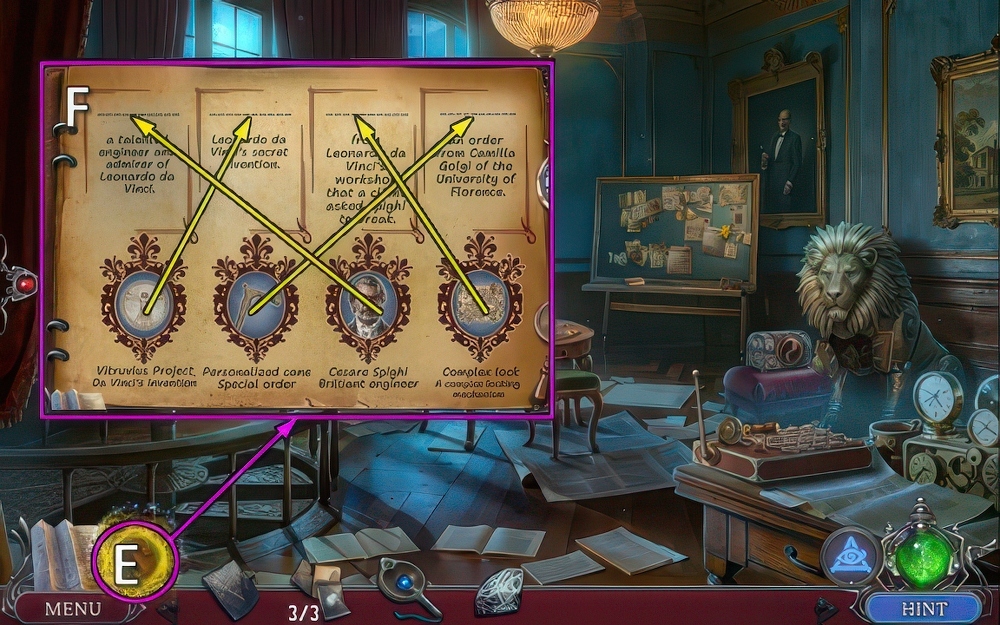
- Review evidence (E).
- Solution (F).
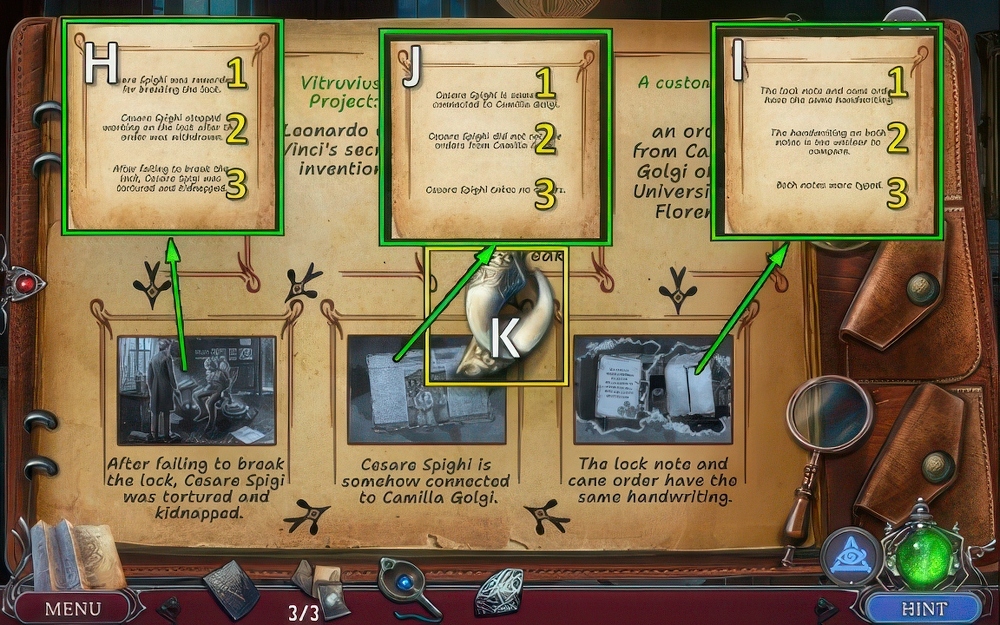
- Select 3 (H).
- Select 1 (I).
- Select 1 (J).
- Take FANG INLAY (K).
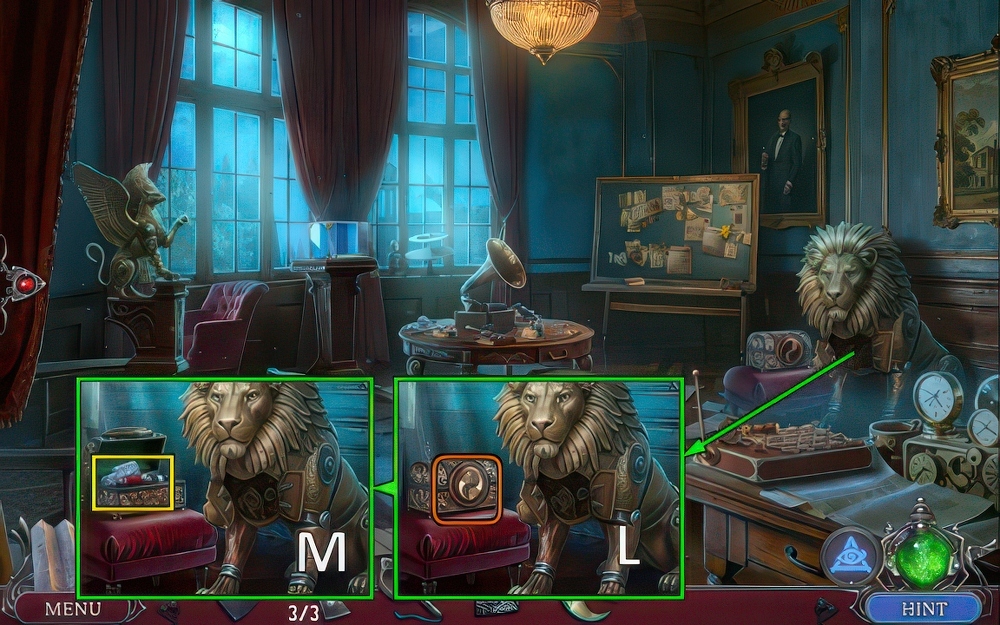
- Place FANG INLAY (L), take GLUE and CAR TOKEN (M).
- Go to In Front of Spighi’s Villa.
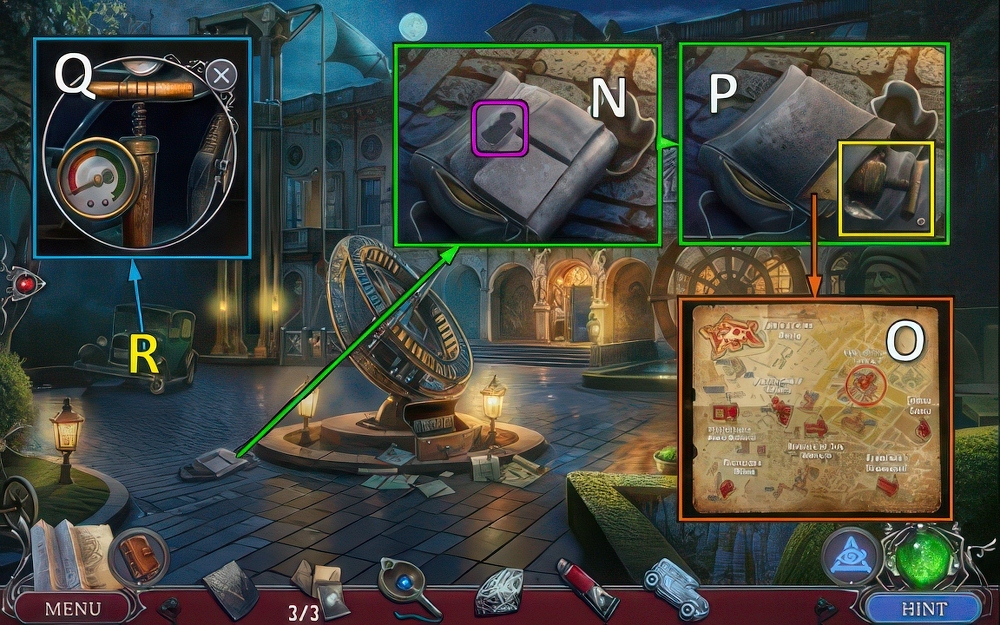
- Place CAR TOKEN (N), place items on map (O).
- Take MAP, TIE and PUMP (P).
- Place PUMP, GLUE and PATCH.
- Use pump x2 (Q).
- Use MAP, go (R).

- Solution (S).
- Take SUNGLASSES and SNAKE HEAD (T).
- Use DIAMOND, take COIN 1/2 and notes (U).
- Take CAP, place SNAKE HEAD (V).
- Take LOCKPICK and IRON ROD (W).
- Use LOCKPICK (X).
- Play puzzle (Y), receive MAGNET.
- Take COINS 2/2 with MAGNET (Z).
- Use COINS, take SUITCASE KEY (A).
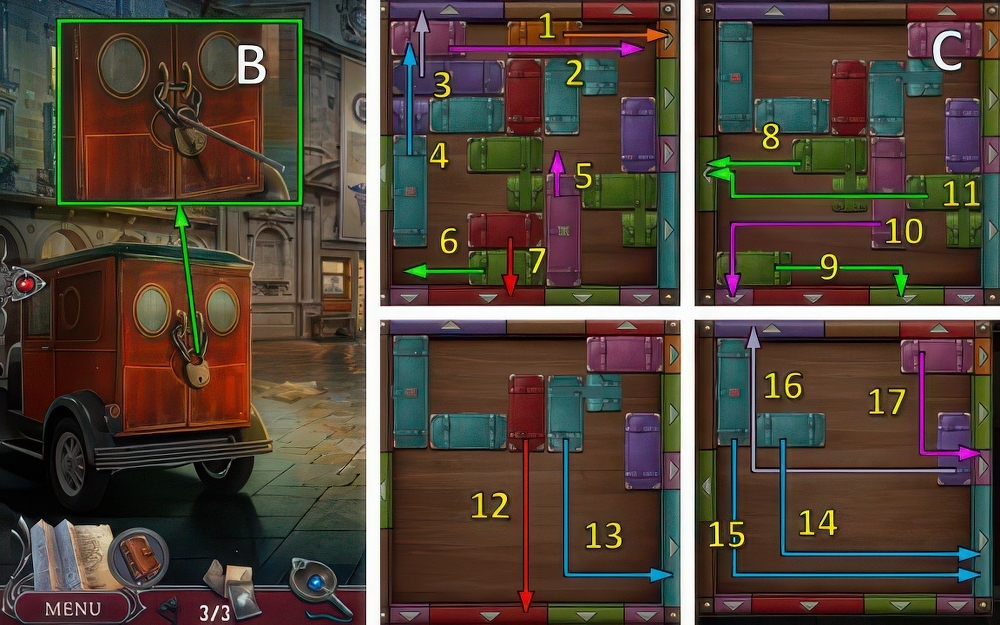
- Use IRON ROD (B).
- Solution (C).

- Use SUITCASE KEY (E), take DAMAGED PASS and UNIFORM (F).
- Place DAMAGED PASS for puzzle (G), receive PASS.
- TIE, CAP, SUNGLASSES and PASS on UNIFORM, put all items on.
- Go (H).
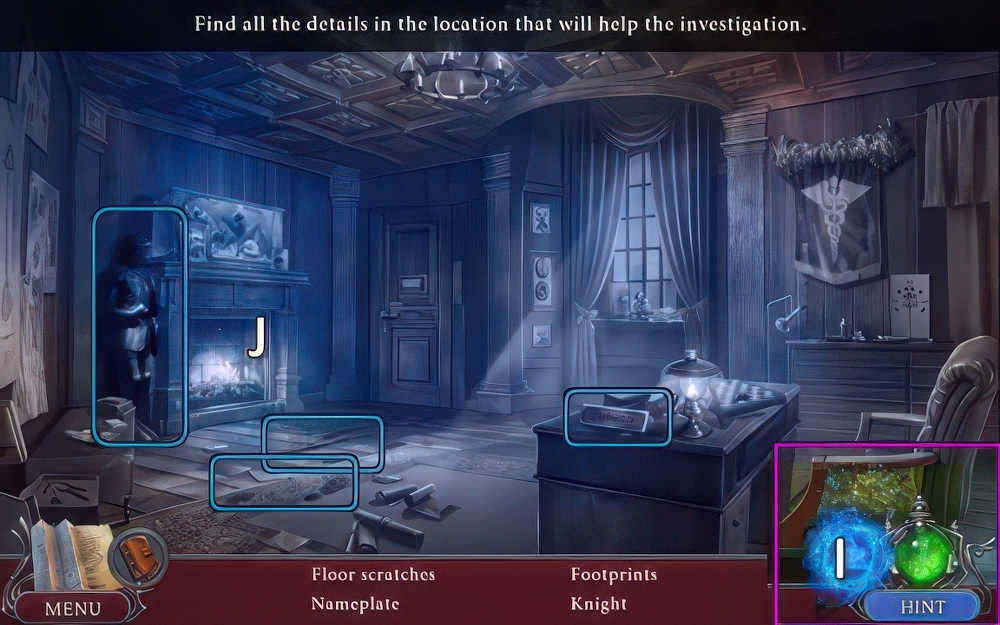
- Select eye (I).
- Find clues (J).
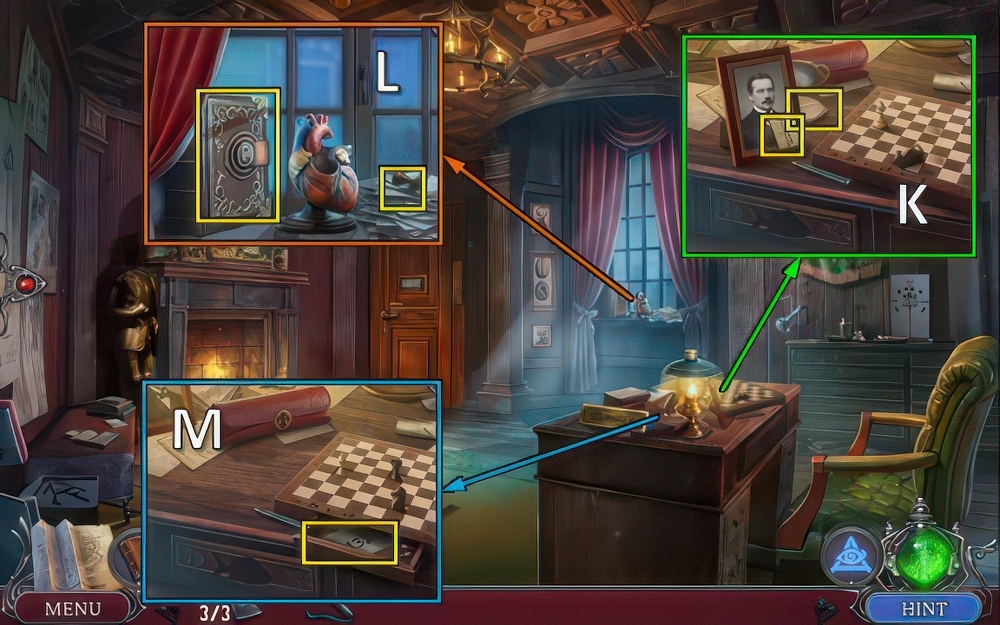
- Take BOOK INLAY.
- Take POWDER (K).
- Place BOOK INLAY, take FISH FIGURINE 1/2.
- Move note, take CHESS PIECE (L).
- Place CHESS PIECE, take COMBINATION (M).
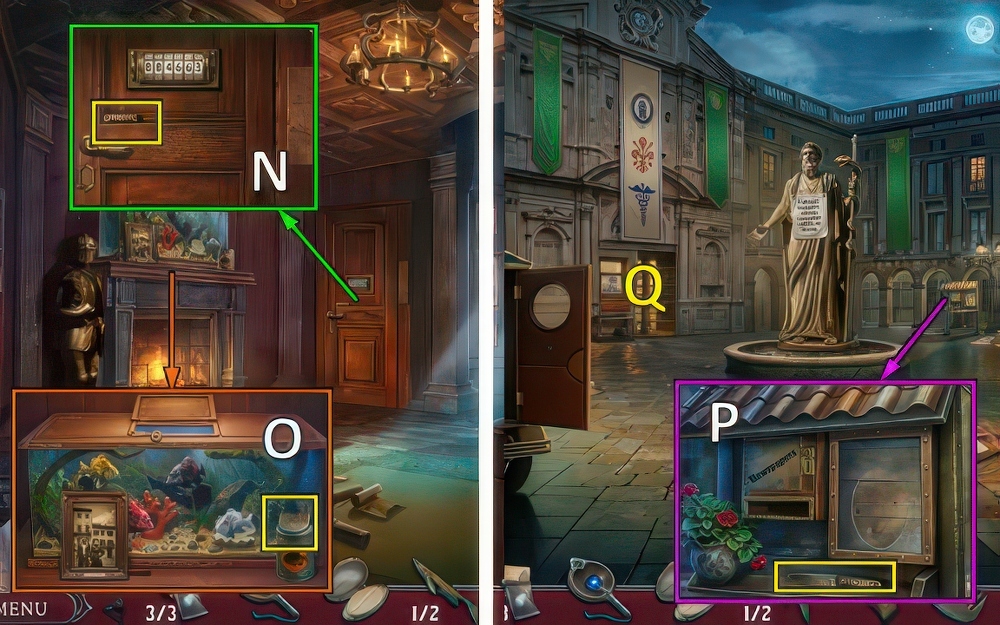
- Take KNIFE HANDLE (N).
- Take COMB, feed fish (O).
- Walk down.
- Place KNIFE HANDLE, take KNIFE (P).
- Go (Q).
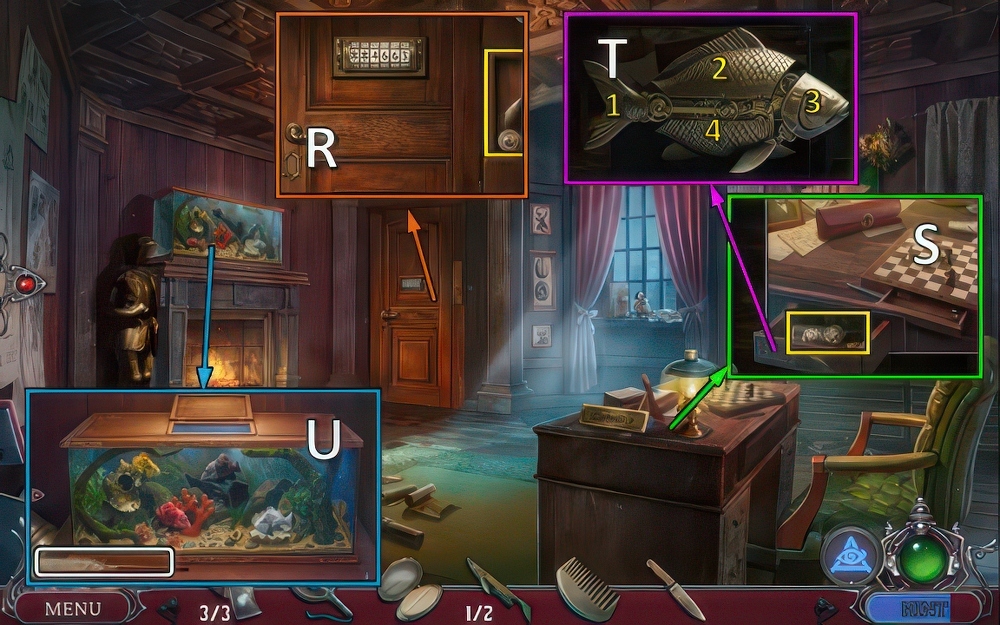
- Use KNIFE, take LEONARDO EMBLEM and FISH FIGURINES 2/2 (R).
- Place FISH FIGURINES (S).
- Select 2-3-1-4 (T).
- Take NET (S).
- Move picture, place NET.
- Use net (U).
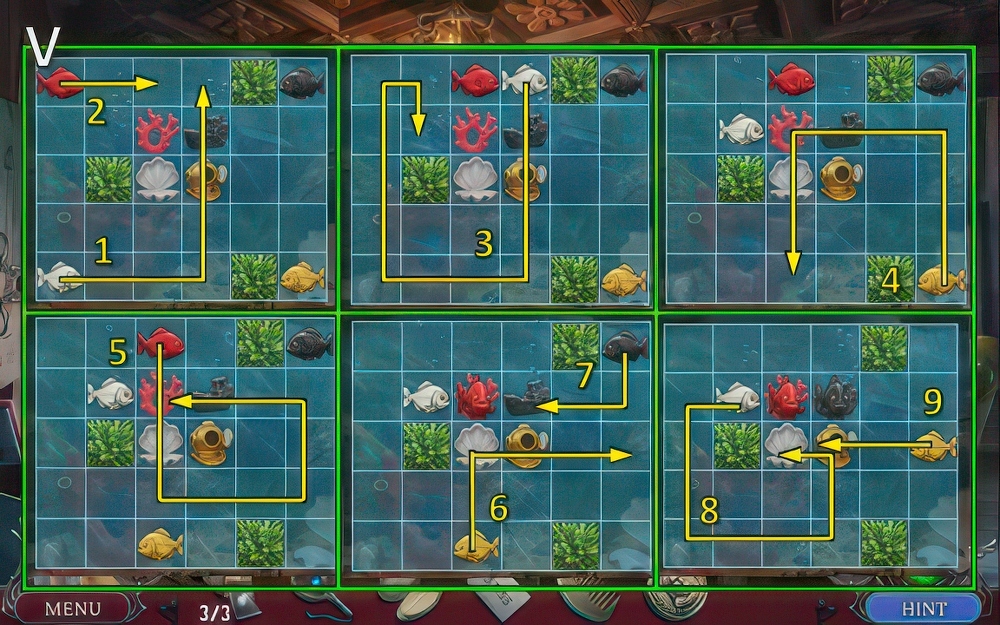
- Solution (V).
- Receive KEY.
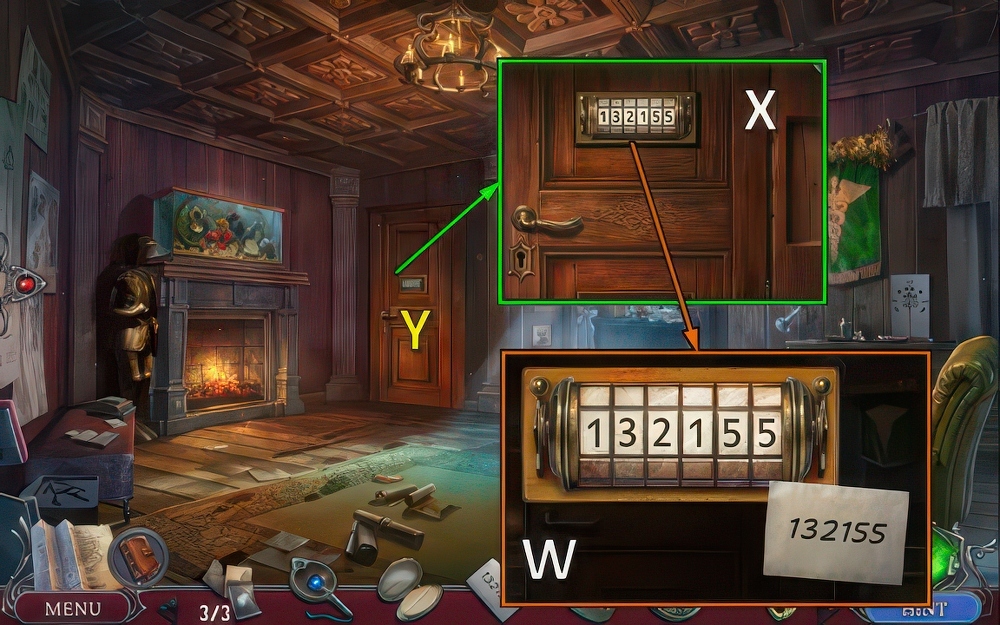
- Place COMBINATION (W), enter 1-3-2-1-5-5.
- Use KEY, open (X).
- Go (Y).
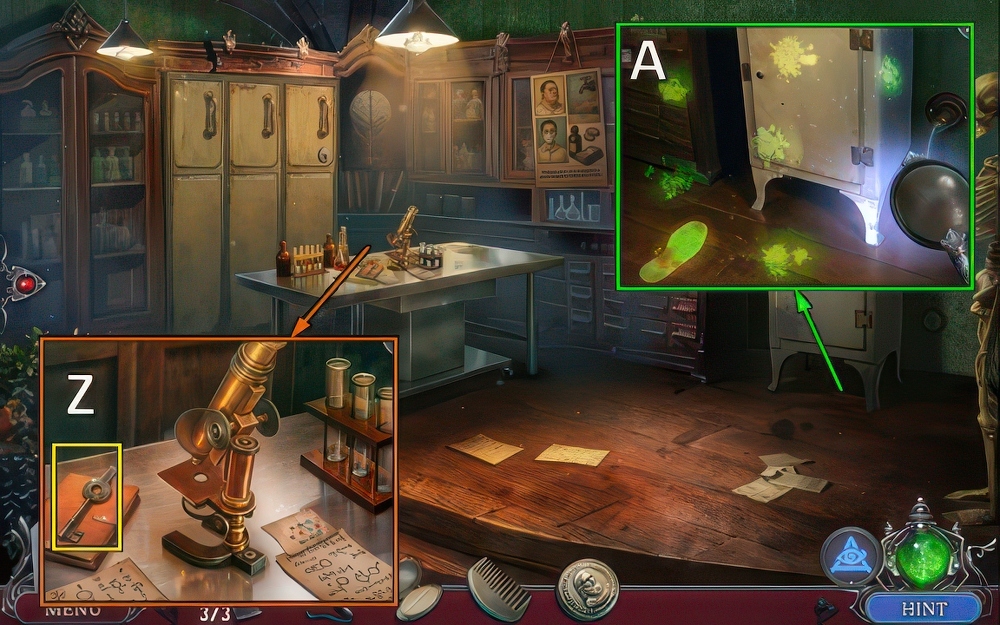
- Take FLASK KEY (Z).
- Use UV LAMP, find spots (A).

- Use FLASK KEY (B).
- Find tubes x3 (C), take HEART PART (D).
- Walk down.
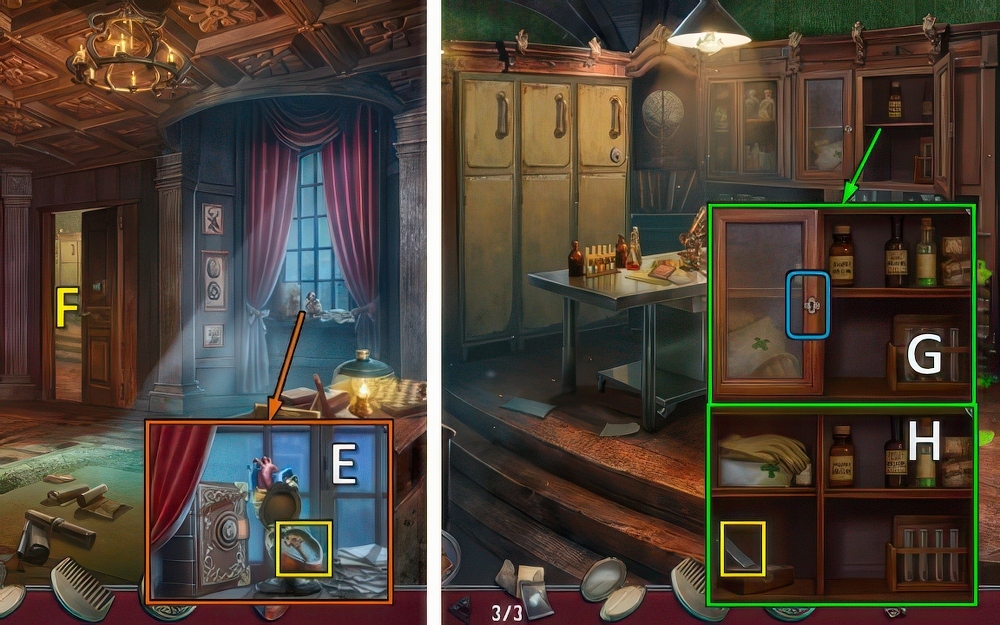
- Place HEART PART, take CROSS KEY (E).
- Go (F).
- Use CROSS KEY (G).
- Move items, take GLASS SLIDE (H).
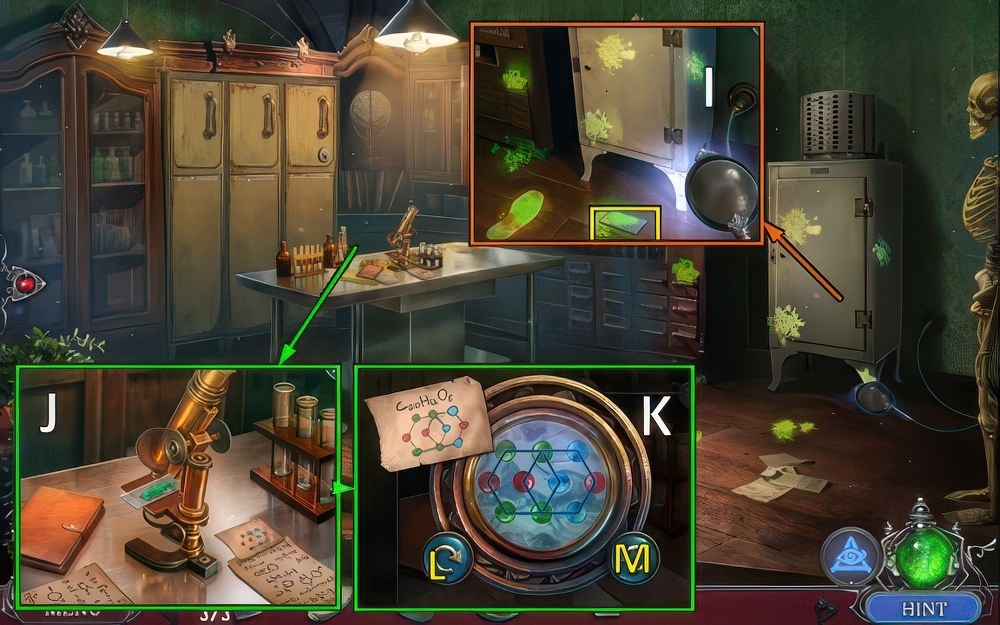
- Place GLASS SLIDE, take SAMPLE (I).
- Place SAMPLE (J).
- Solution (K): Lx3-M.
- Take FORMULA.
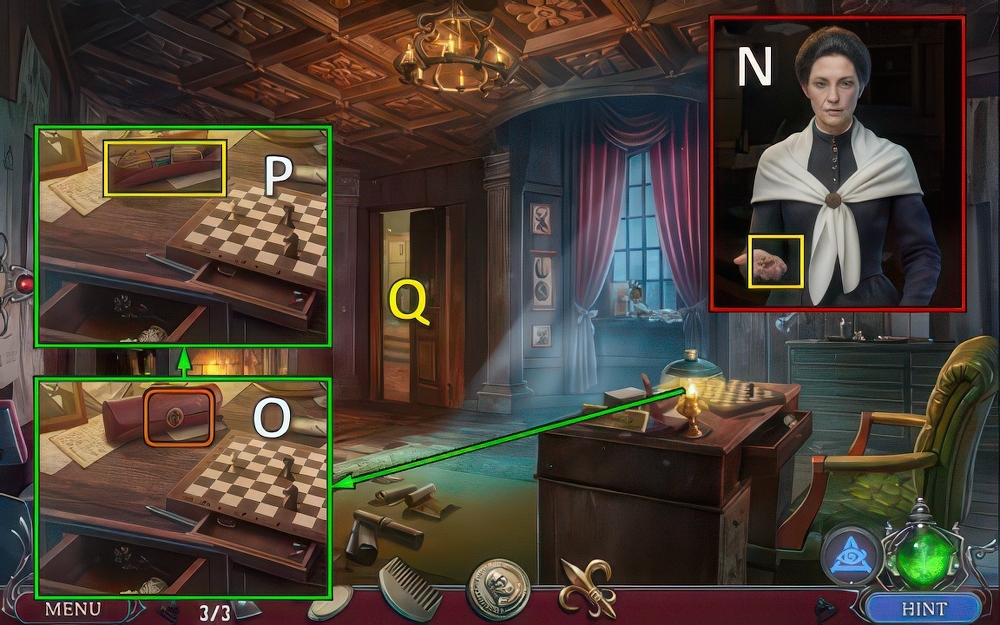
- Offer FORMULA, take FASTENER (N).
- Walk down.
- Use FASTENER (O), take GLASSES (P).
- Go (Q).
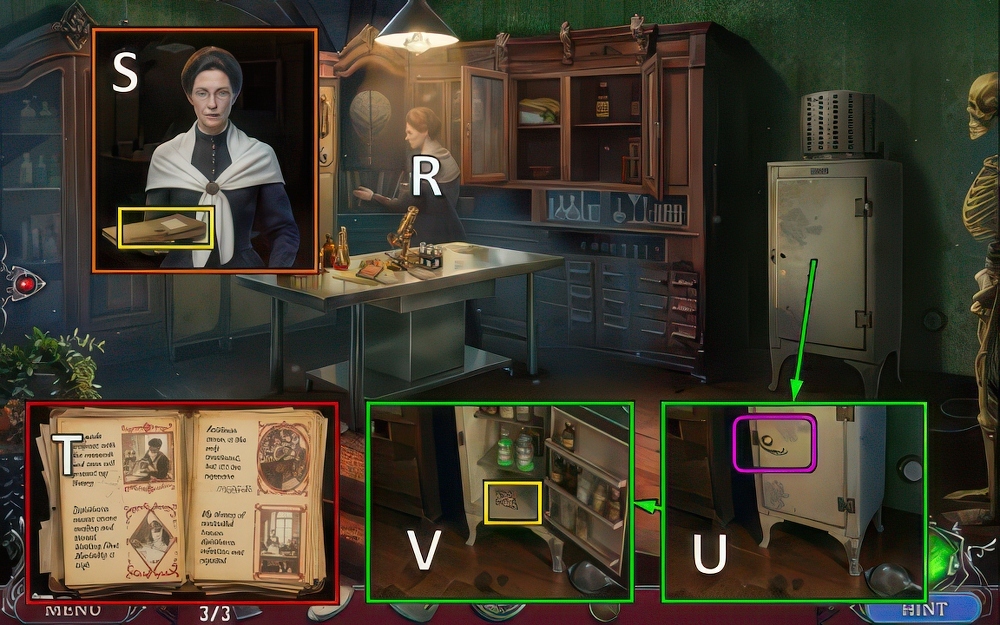
- Offer GLASSES (R).
- Take FOLDER (S).
- Place items in FOLDER (T), take REFRIGERATOR HANDLE.
- Place REFRIGERATOR HANDLE (U).
- Take notes and CADUCEUS (V).
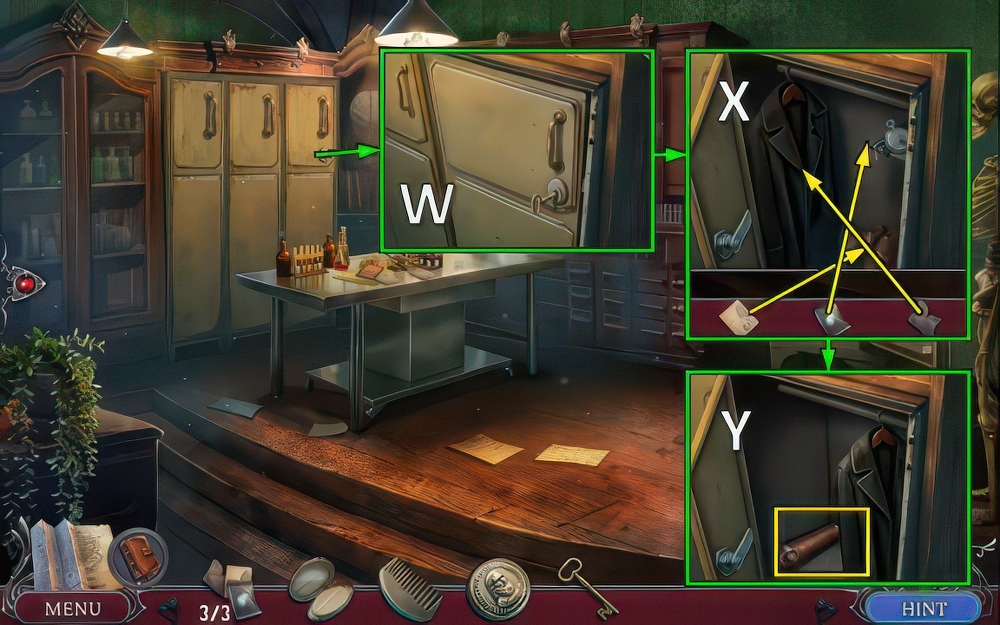
- CADUCEUS on FOLDER, take WARDROBE KEY.
- Use WARDROBE KEY (W).
- Place EVIDENCE, place items (X).
- Take TUBE (Y).
- LEONARDO EMBLEM on TUBE, take evidence.
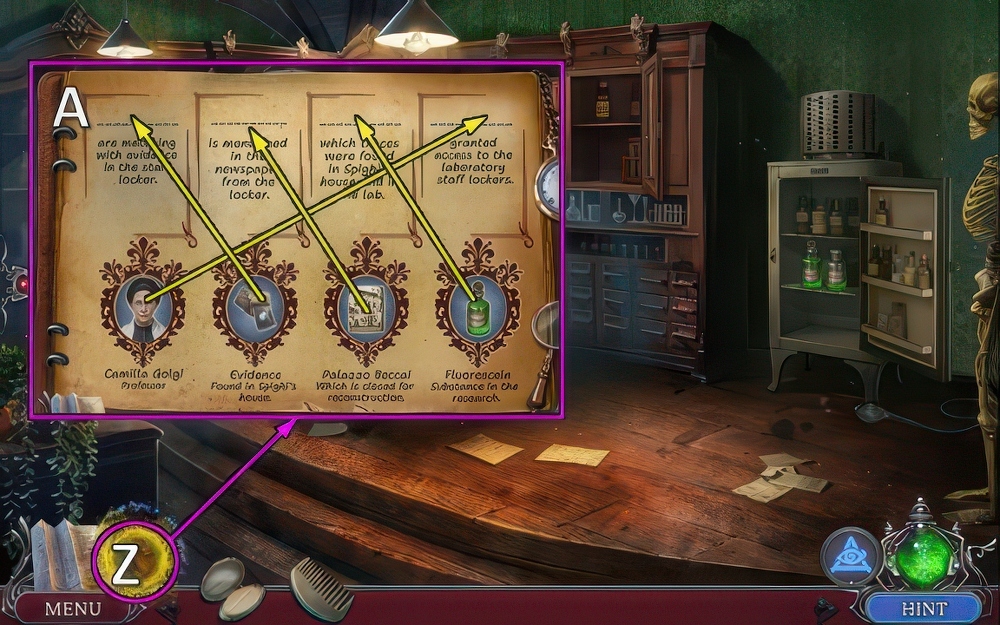
- Review evidence (Z).
- Solution (A).

- Select 1 (B).
- Select 3 (C).
- Select 1 (D).
- Take METAL BUTTON 1/2 (E).
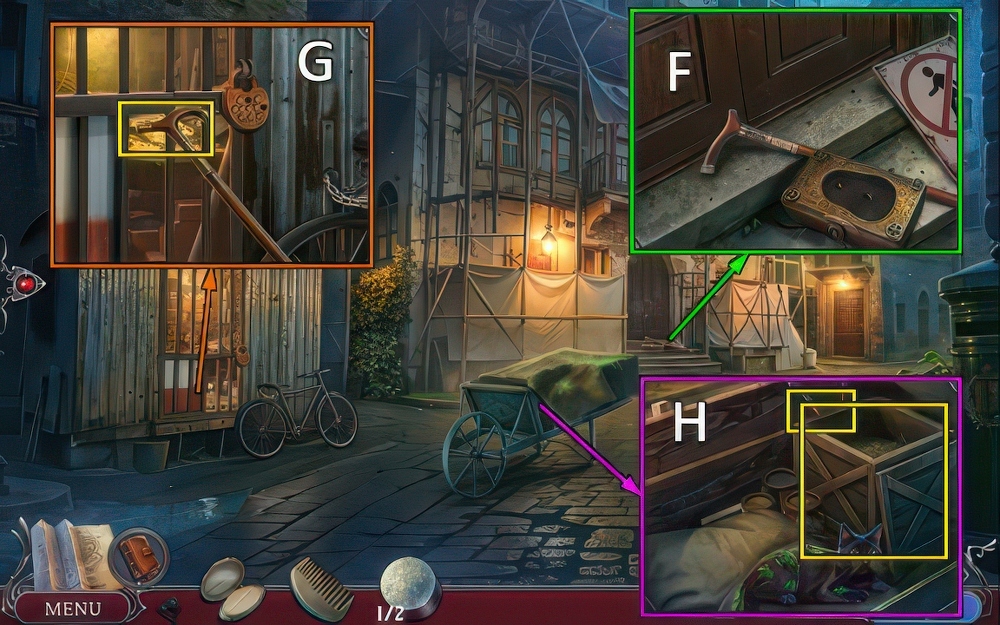
- Take TOOLBOX and CANE (F).
- Take DRIED FISH with CANE (G).
- Remove tarp.
- Use COMB, offer DRIED FISH.
- Take BOX and PRUNING SHEARS (H).

- Use PRUNING SHEARS (I).
- Place BOX.
- Solution (J-K).
- Go (L).

- Take ROPE (M).
- Take DAMAGED TOOLBOX INLAY and VALVE (N).
- Place DAMAGED TOOLBOX INLAY for puzzle (O), receive TOOLBOX INLAY.

- TOOLBOX INLAY on TOOLBOX, take CIGAR SCISSORS.
- Take BUCKLE and CODE, place VALVE (P).
- Place CODE, solution (Q).
- Use BUCKLE, take HANDKERCHIEF (R).
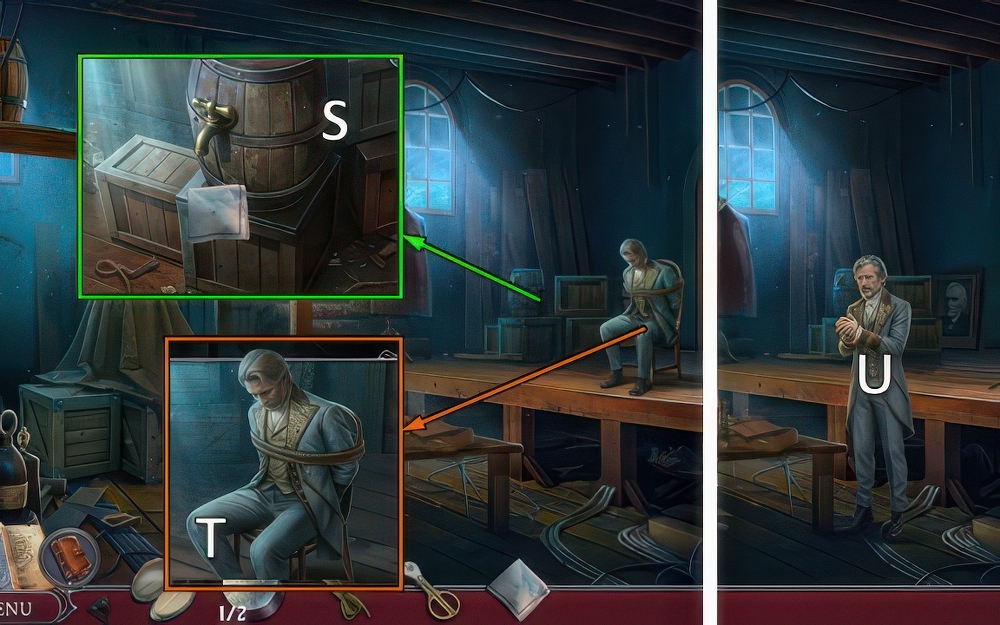
- Use HANDKERCHIEF (S), receive WET HANDKERCHIEF.
- Use WET HANDKERCHIEF and CIGAR SCISSORS (T).
- Talk (U).
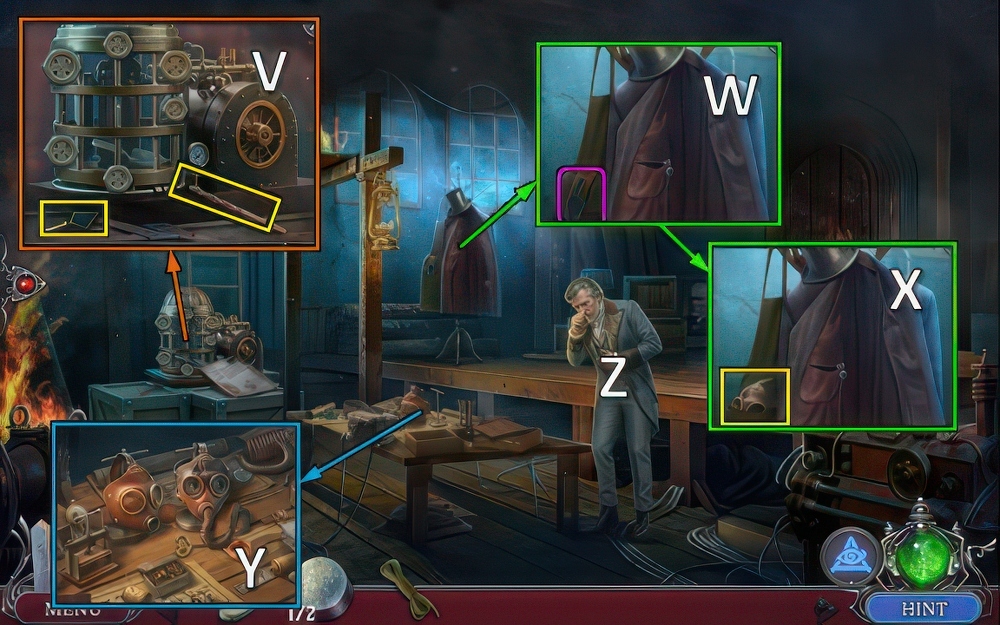
- Take BAG EMBLEM, note and BIT (V).
- Use BAG EMBLEM (W), take BROKEN GAS MASK (X).
- Place BROKEN GAS MASK for puzzle (Y), receive GAS MASKS.
- Use GAS MASKS (Z).
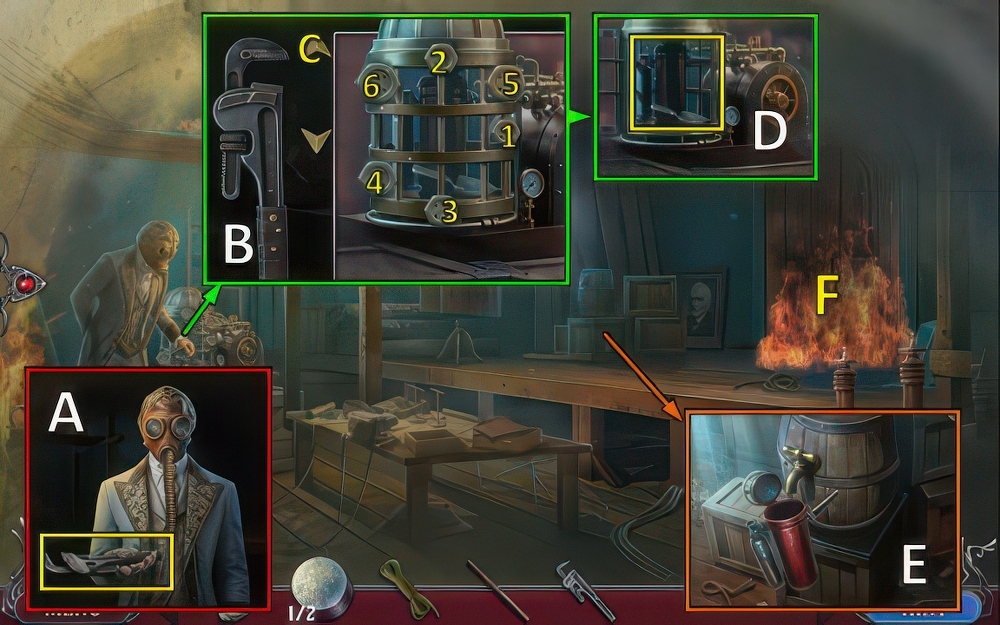
- Take WRENCH (A).
- Use WRENCH (B).
- Solution: 1-C-2-3-C-4-5-C-6.
- Take TROWEL and EMPTY EXTINGUISHER (D).
- Use EMPTY EXTINGUISHER (E), receive EXTINGUISHER.
- Use EXTINGUISHER, go (F).
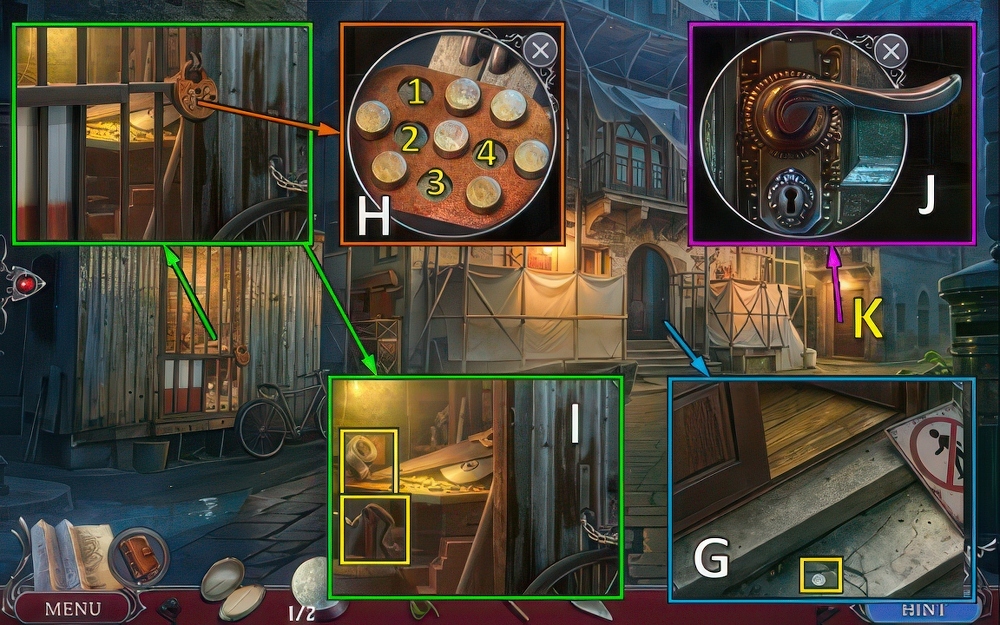
- Use TROWEL, take METAL BUTTON 2/2 (G).
- Place METAL BUTTON, use POWDER (H).
- Select 1-2-3-4.
- Place BIT, take DRILL and TAPE (I).
- Use DRILL, open (J).
- Go (K).
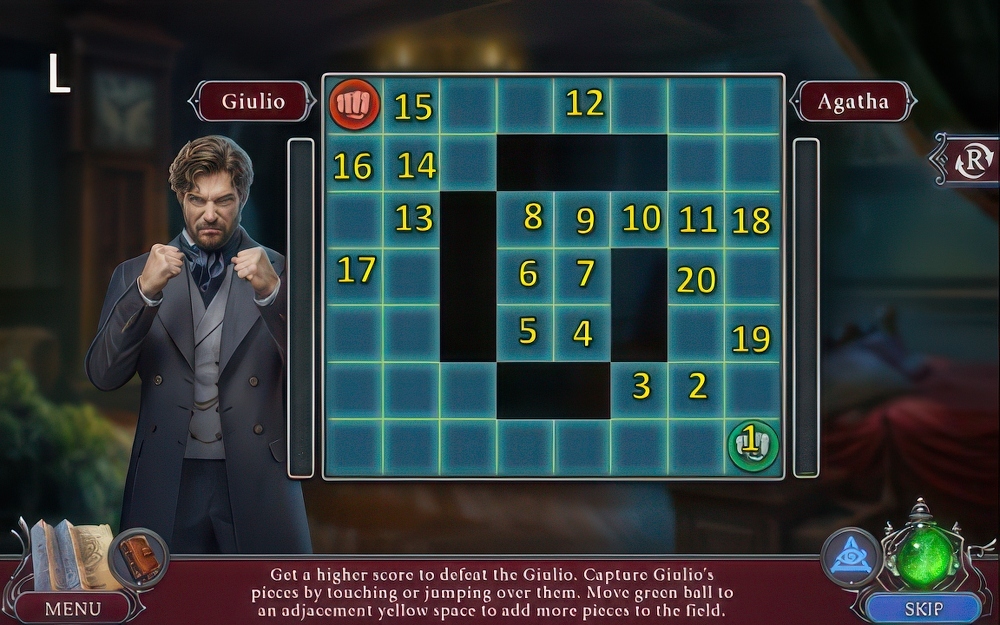
- Solution (L): (1-2)-(2-3)-(3-4)-(3-5)-(6-10)-(10-7)-(10-8)-(7-9)-(9-10)-(10-11)-(11-12)-(8-13)-(14-15).
- (16-17)-(5-6)-(9-8)-(9-11)-(10-18)-(11-19)-(20-2).
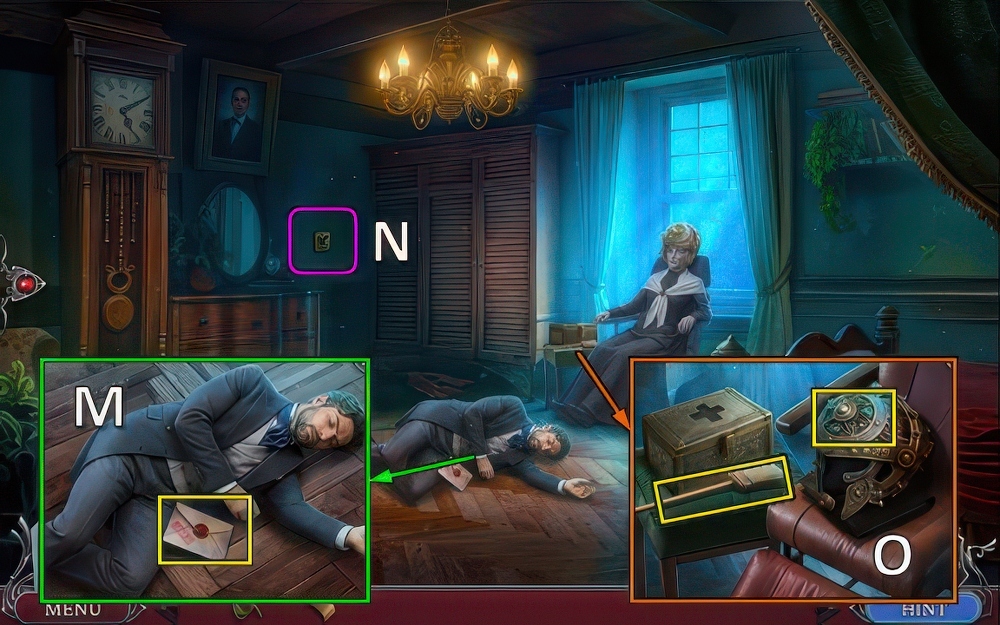
- Take note and LIGHTER, use ROPE (M).
- Use LIGHTER, turn on lights (N).
- Take BRUSH and VITRUVIUS DETAIL.
- Move helmet, take FOLDER (O).
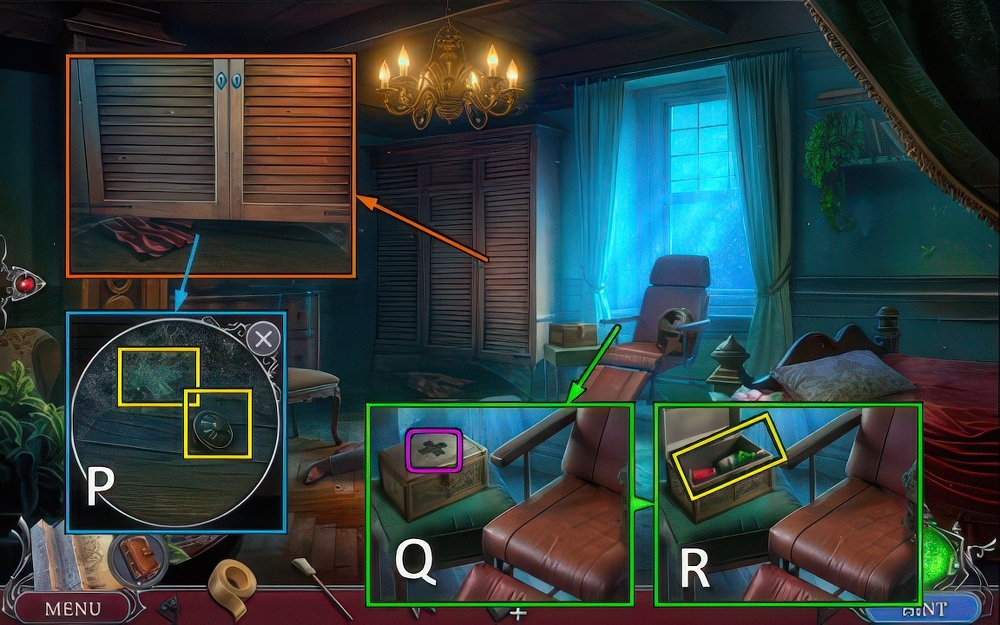
- Move scarf, take HANDLE.
- Use BRUSH, take MEDICAL KIT INLAY (P).
- Use MEDICAL KIT INLAY (Q), take THREAD and AMMONIA (R).
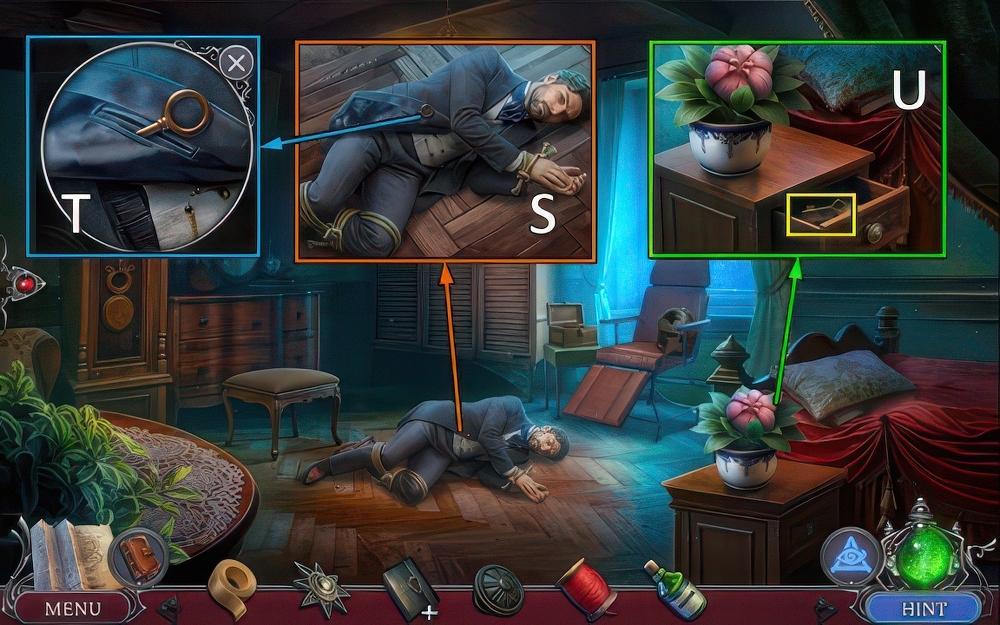
- Use AMMONIA (S), take WARDROBE KEY 1/2 (T).
- Use HANDLE, take WARDROBE KEYS 2/2 (U).
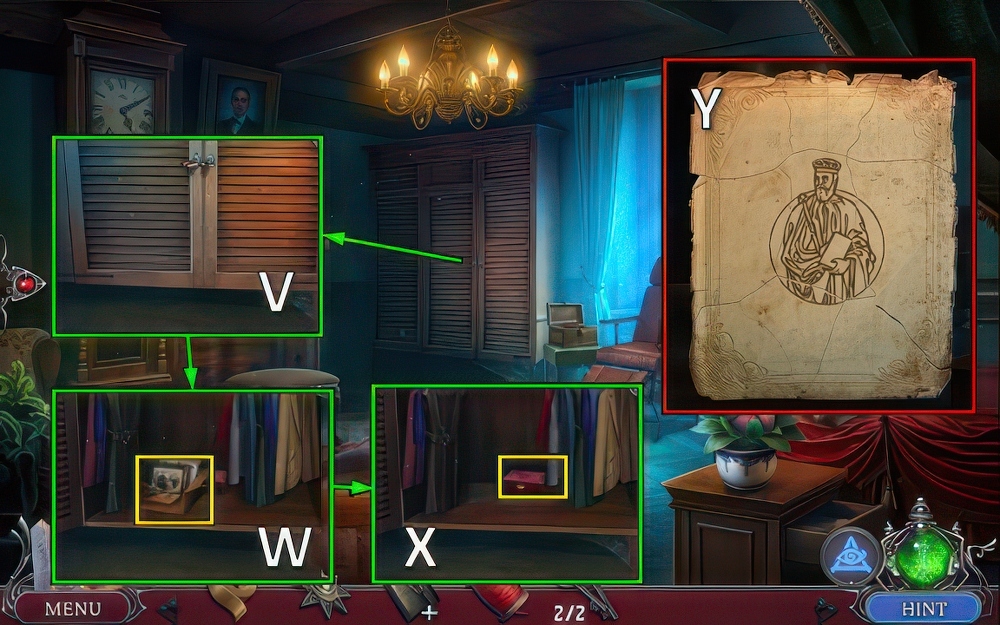
- Use WARDROBE KEYS (V).
- Move items, take GOBLET EMBLEM 1/2 (W).
- Place VITRUVIUS DETAIL, take LETTER (X).
- Restore LETTER and use TAPE (Y), take GOBLET AND SNAKE 2/2.

- GOBLET AND SNAKE on FOLDER, take FLOWER EMBLEM.
- Move pillow (Z), place FLOWER EMBLEM (A).
- Take INVITATION.
- Talk (B), offer INVITATION.
- Take FERRY TICKET (C).
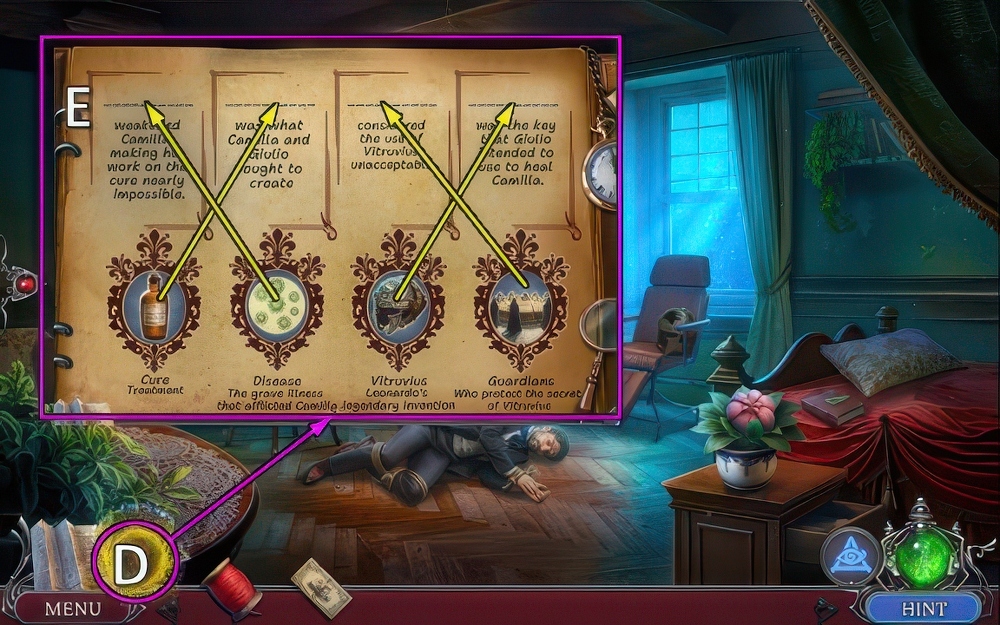
- Review evidence (D).
- Solution (E).
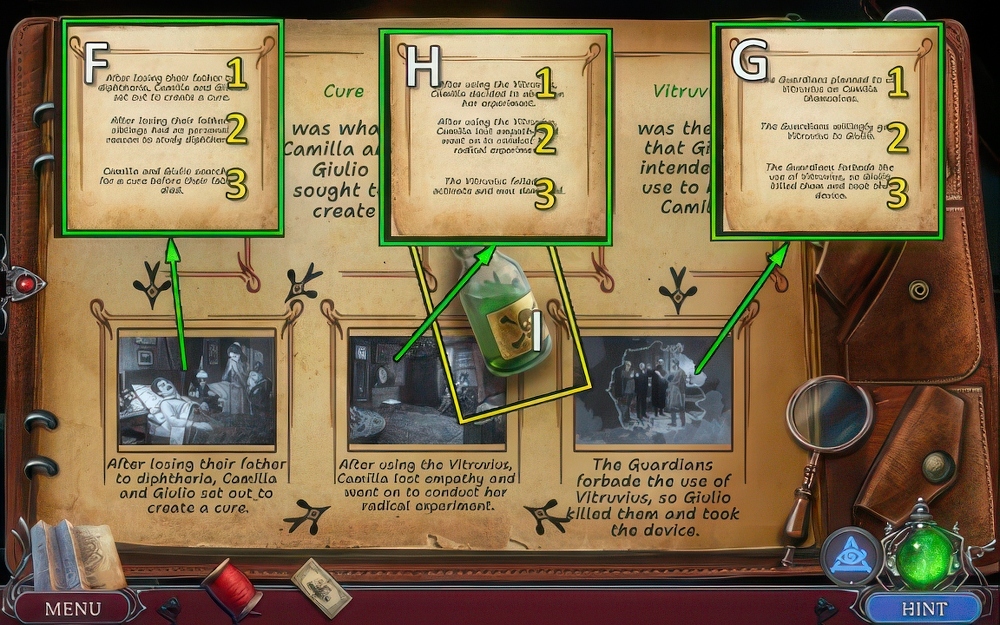
- Select 1 (F).
- Select 3 (G).
- Select 2 (H).
- Take ACID (I).
- Walk down.
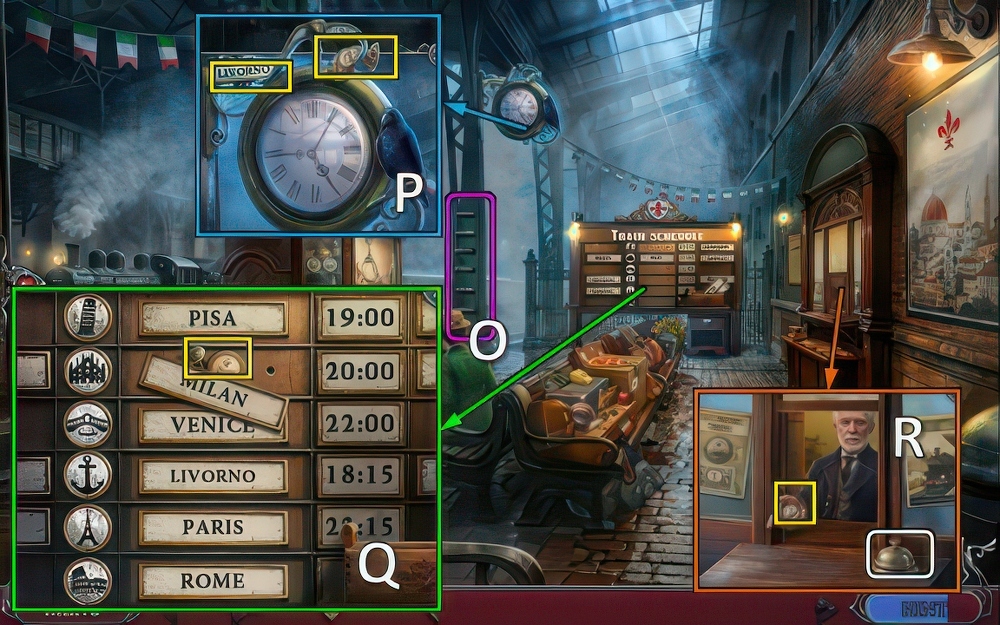
- Use ACID (J).
- Go (K).

- Try to take pen, take STEP 1/2 (L).
- Take STEPS 2/2 (M).
- Take STICK from lollipop (N).
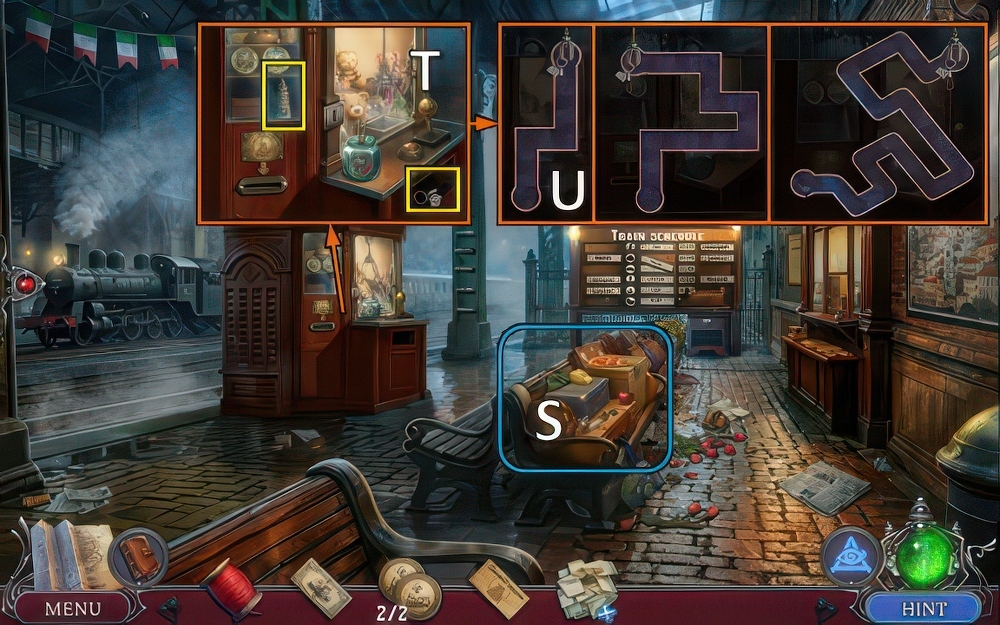
- Replace STEPS (O).
- Take BANKNOTE and STICKER (P).
- Place STICKER, place plates as shown.
- Take BELL BUTTON, take TOKEN 1/2 with STICK (Q).
- Place and use BELL BUTTON.
- Take COUPON.
- Offer BANKNOTE, take TOKEN 2/2 (R).
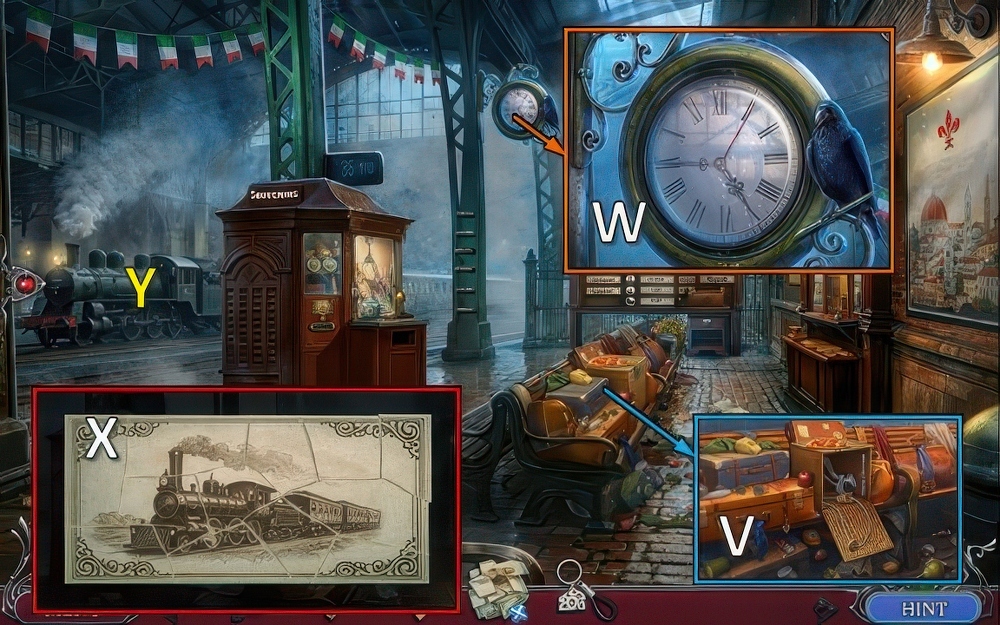
- Play puzzle (S), receive TORN TICKET.
- Use TOKENS (T).
- Drag claw through maze (U).
- Take BASKET CHARM.
- Use COUPON, take GLUE (T).
- Place BASKET CHARM for puzzle (V), receive TREAT.
- Offer TREAT (W), receive BRUSH.
- Restore TORN TICKET, use GLUE and BRUSH.
- Brush glue on ticket, take TICKET (X).
- Use TICKET (Y).
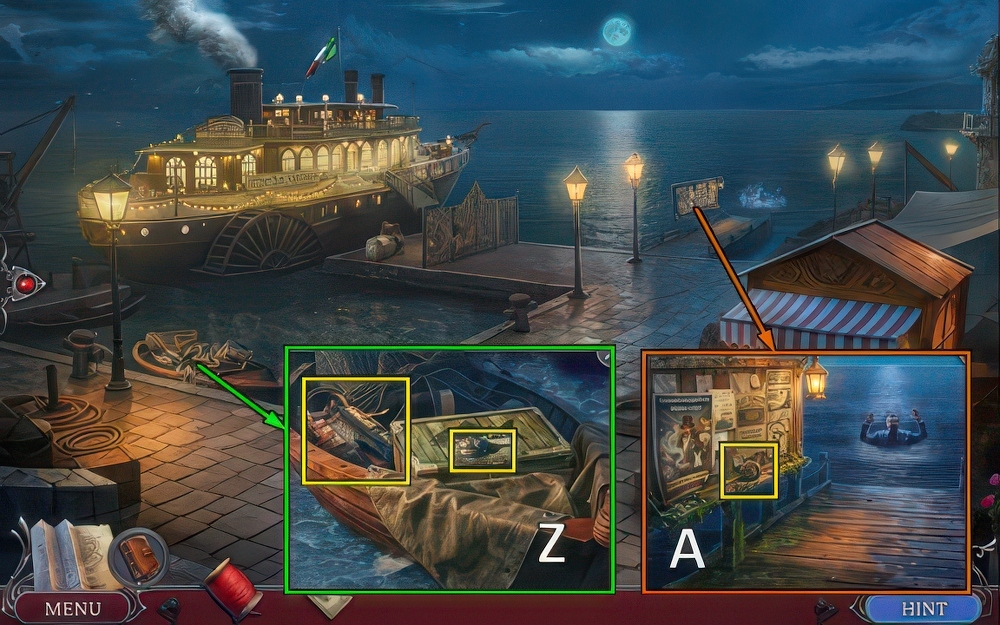
- Remove tarp, take FLOWER KEYS 1/2 and BROKEN LIFE JACKET (Z).
- Take FLOWER KEYS 2/2 (A).
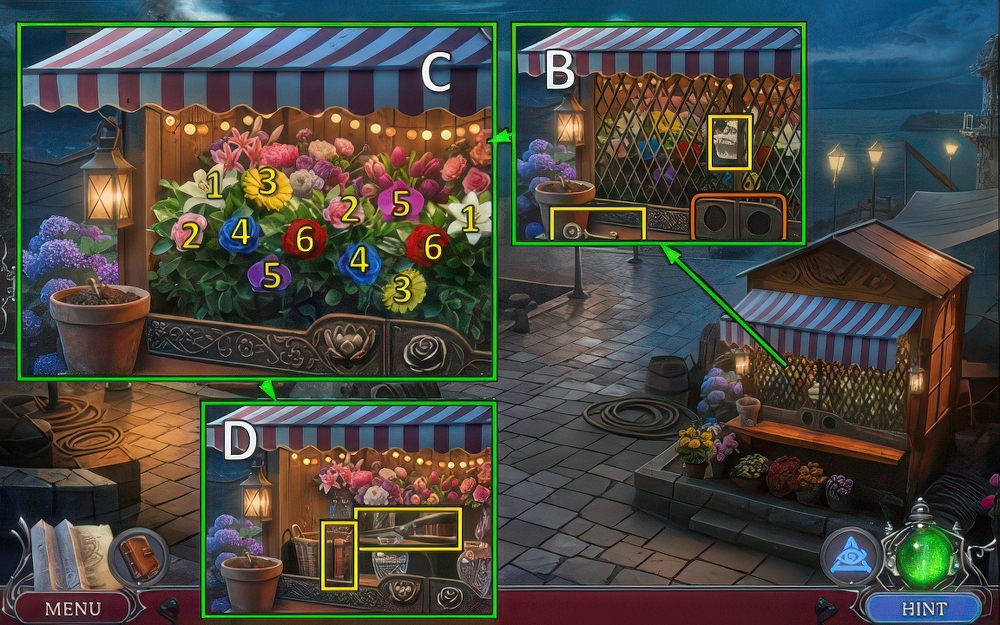
- Take BRIDGE KEY and GUEST LIST 1/2.
- Place FLOWER KEYS (B).
- Find pairs (C).
- Take STRAP and SCISSORS (D).
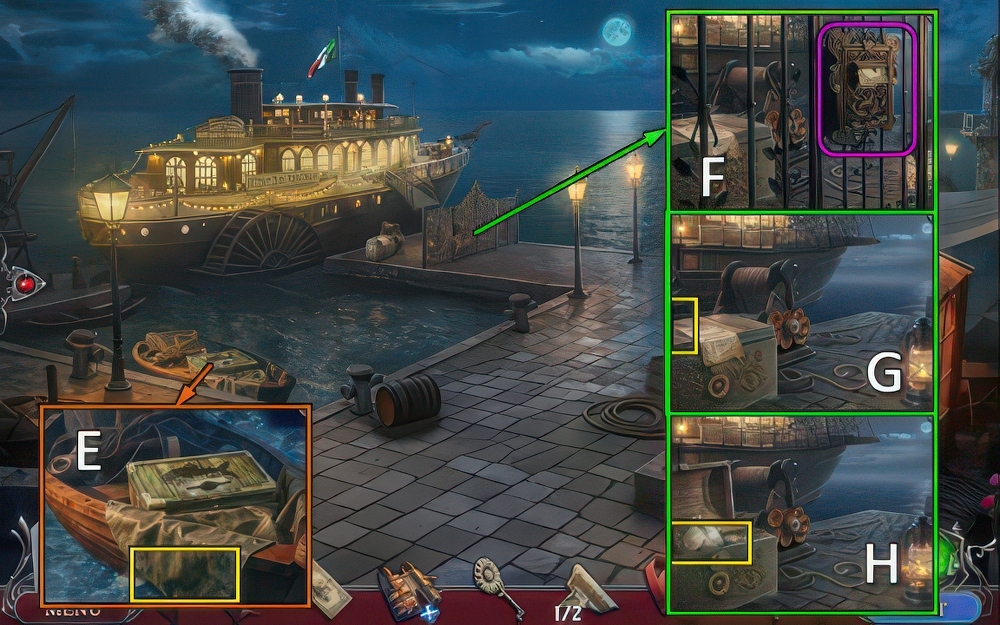
- Take PATCH with SCISSORS (E).
- Use FERRY TICKET (F).
- Take NEEDLE (G).
- Use BRIDGE KEY, take SHOVEL (H).
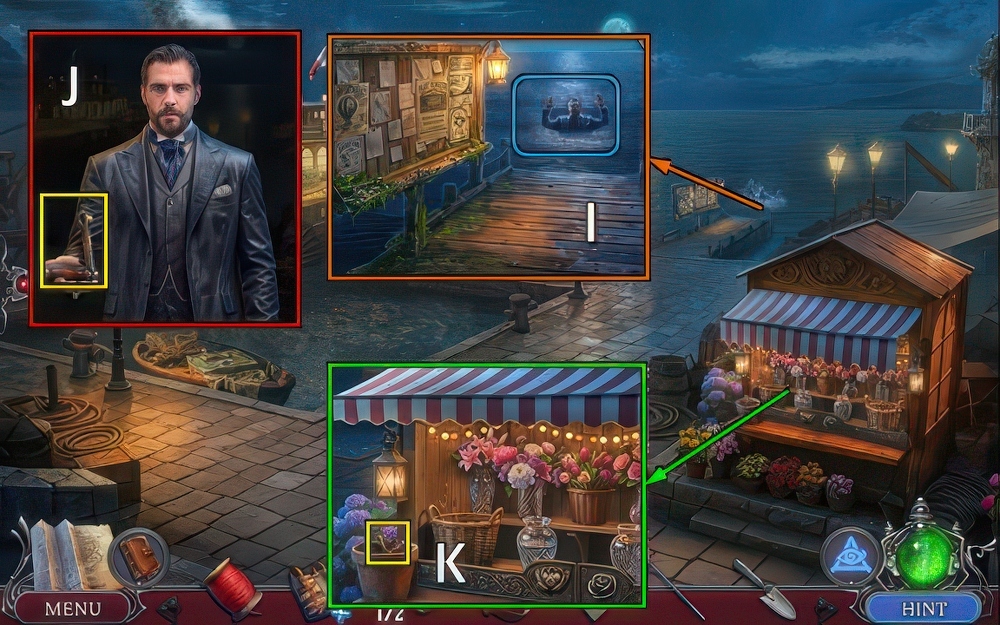
- THREAD, PATCH and NEEDLE on BROKEN LIFE JACKET, restore and take LIFE JACKET.
- Offer LIFE JACKET (I).
- Take WINCH HANDLE 1/2 (J).
- Use SHOVEL, take BOAT KEY (K).
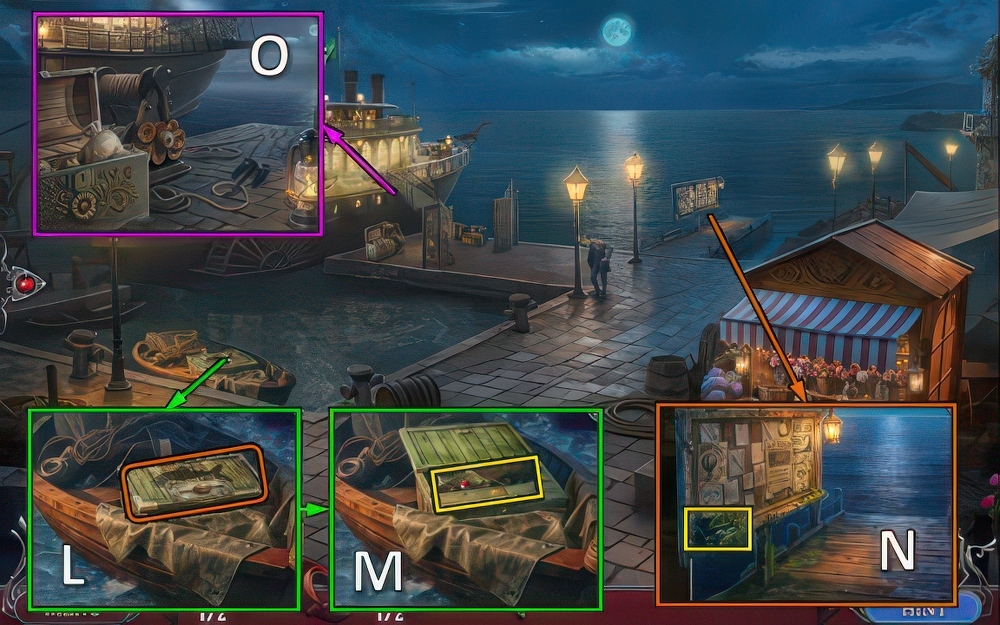
- Use BOAT KEY (L), take FISH RASP and WINCH HANDLE 2/2 (M).
- Read notes, use FISH RASP.
- Take ANCHOR (N).
- Place and throw ANCHOR, place WINCH HANDLE (O).
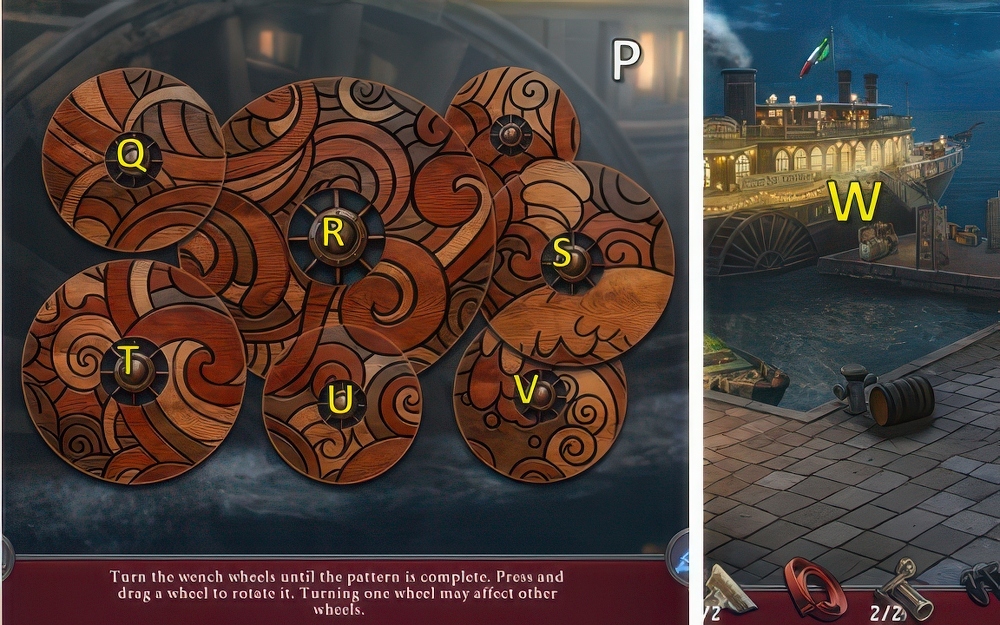
- Solution (P).
- Adjust dials in the order U-Q-S-R-V-T.
- Go (W).
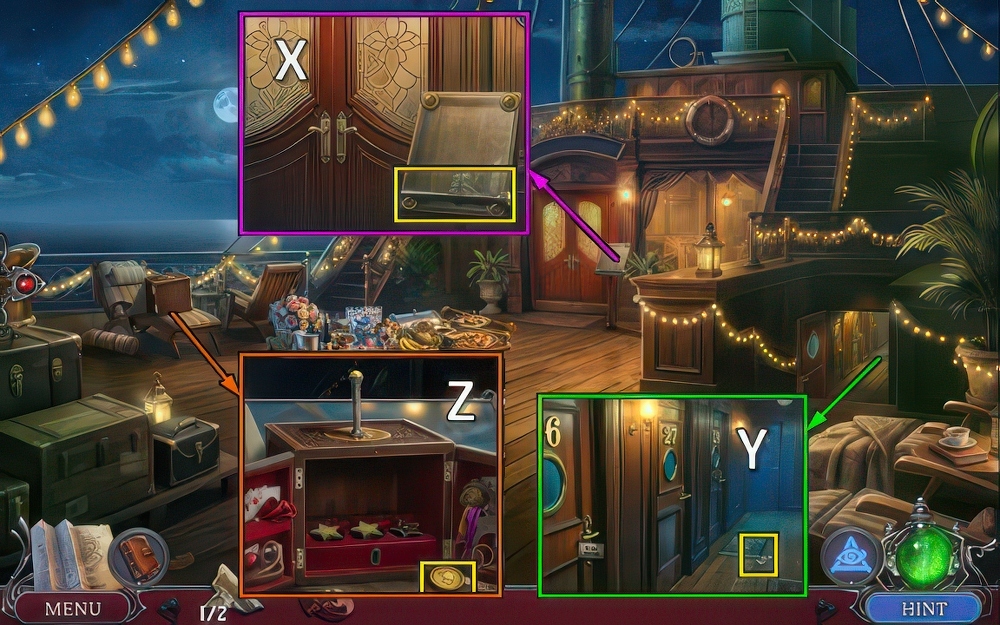
- Take WAND (X).
- Take GUEST LIST PIECES 2/2 (Y).
- Use WAND, take COIN (Z).
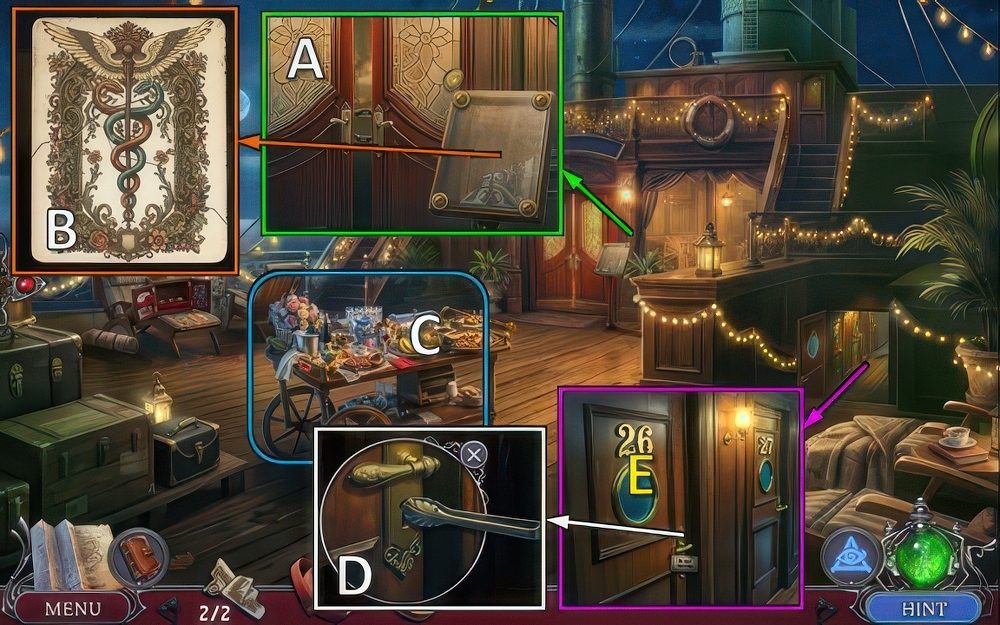
- Use COIN, place GUEST LIST PIECES (A).
- Restore guest list (B).
- Play puzzle (C), receive TONGS.
- Use TONGS (D), go (E).
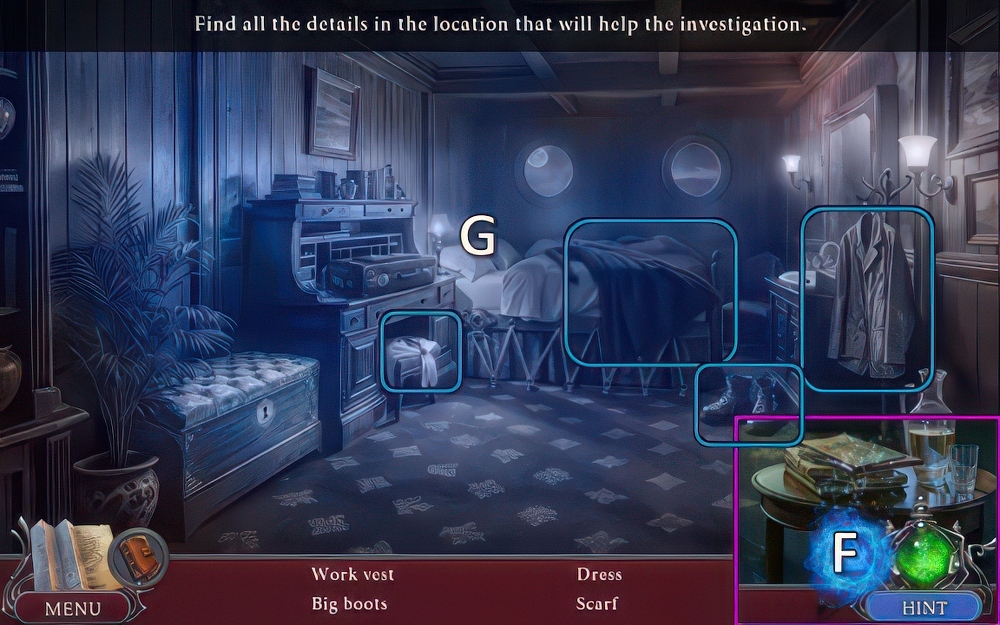
- Select eye (F).
- Find clues (G).
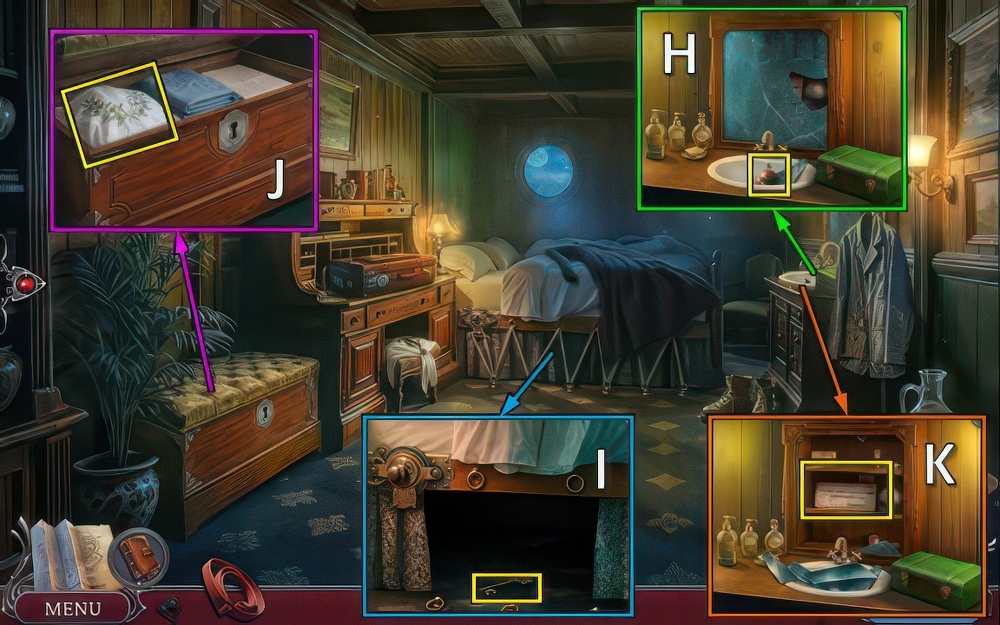
- Take BED INSERT (H).
- Use BED INSERT, remove rope and items.
- Take CHEST KEY (I).
- Use CHEST KEY, take VEIL (J).
- Use VEIL, take note and INHALER (K).
- Walk down.
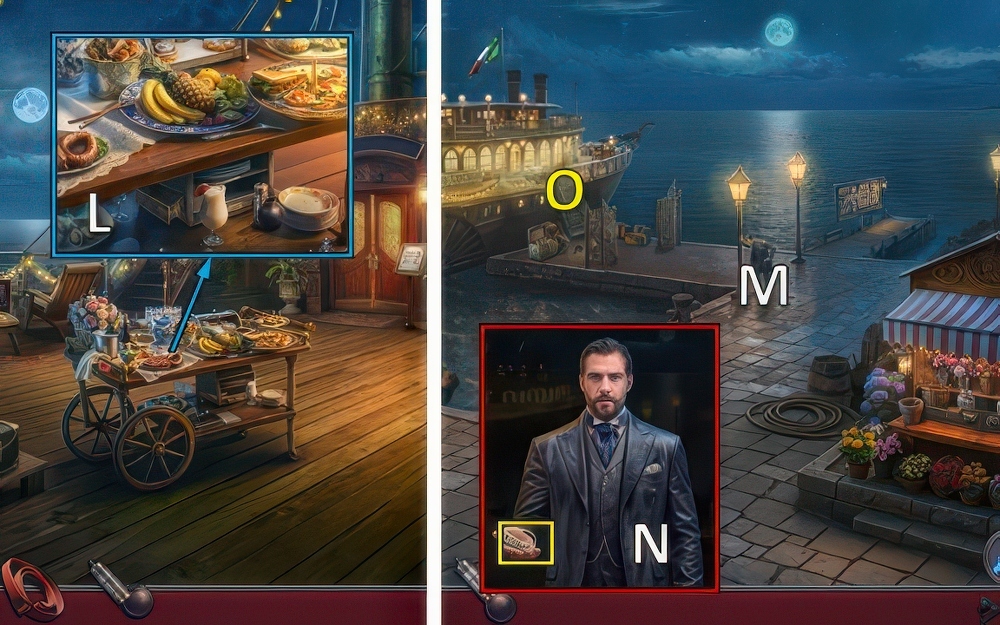
- Place INHALER for puzzle (L), receive INHALER.
- Walk down.
- Offer INHALER (M).
- Take CODE (N).
- Go (O).
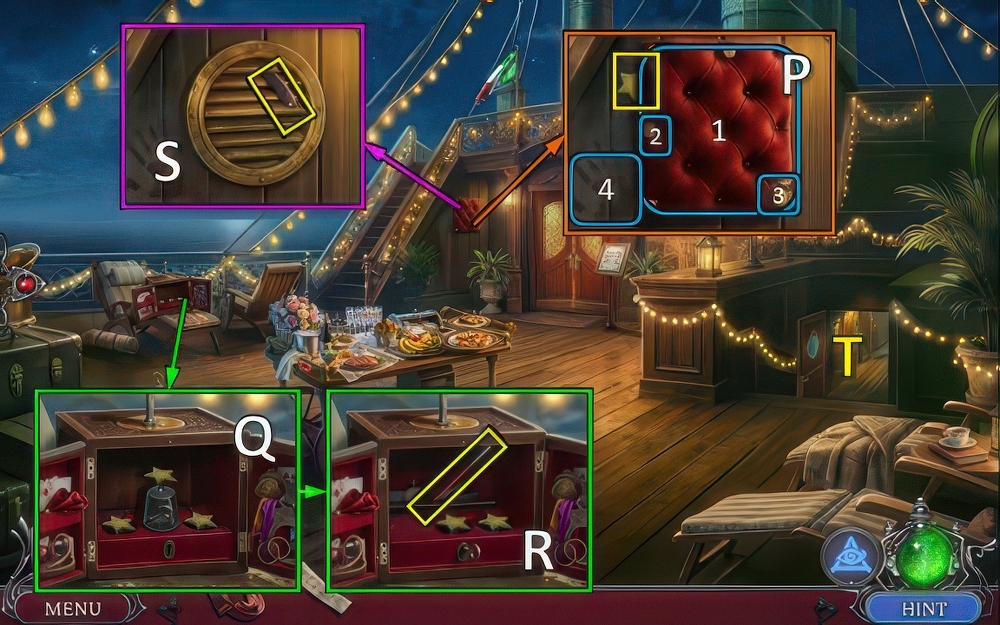
- Find clues.
- Take STAR (P).
- Place STAR, find and use key (Q).
- Take NAIL PULLER (R).
- Use NAIL PULLER, remove cushion.
- Take RAZOR HANDLE (S).
- Go (T).
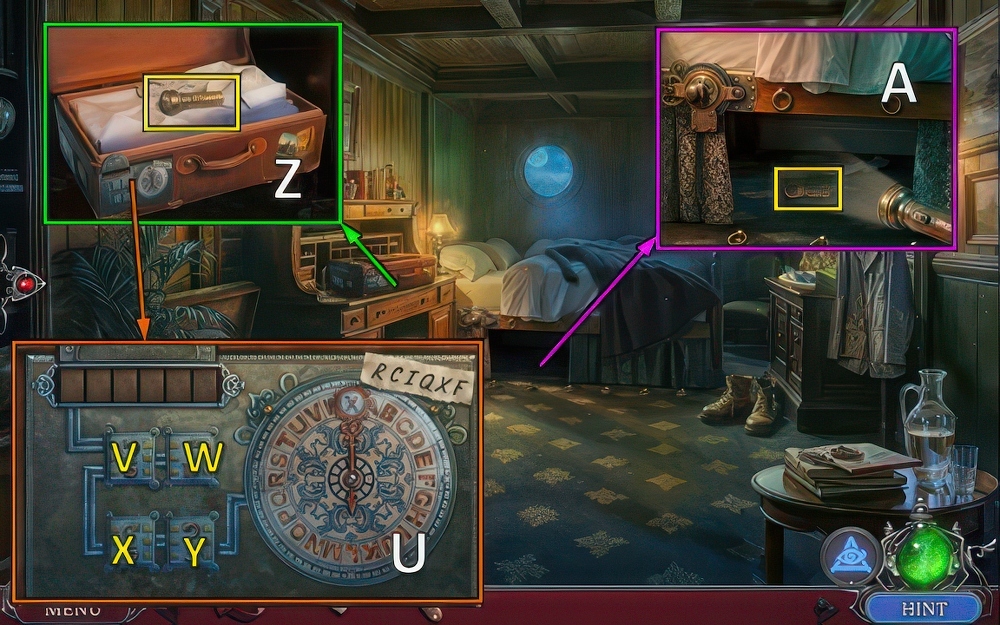
- Place CODE (U).
- Solution: Y-Y-X-X-Y-X-W-Y-X-X-V-X.
- Take FLASHLIGHT (Z).
- Use FLASHLIGHT, take RAZOR KEY (A).
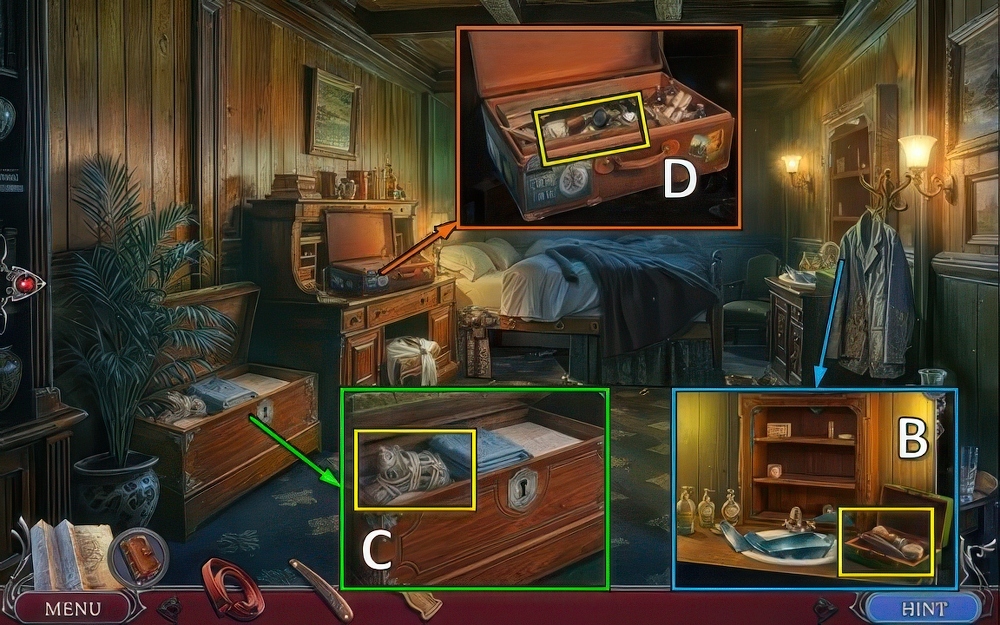
- Use RAZOR KEY, place RAZOR HANDLE.
- Take RAZOR (B).
- Use RAZOR, take STATUE (C).
- Use STATUE, take MASK, ANTITOXIN and BOLT CUTTER (D).
- Walk down.
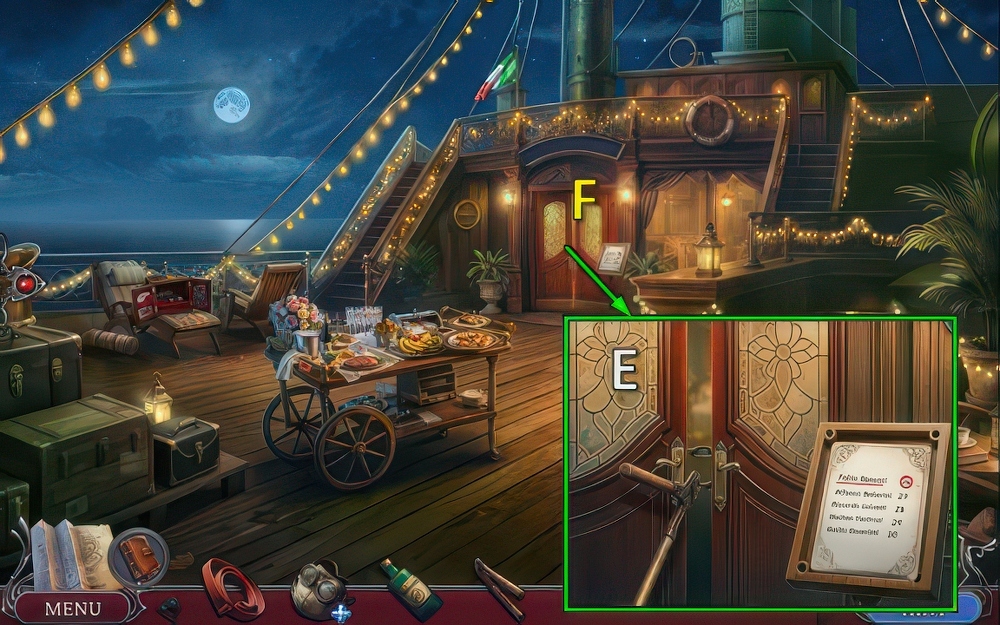
- ANTITOXIN and STRAP on MASK, restore and take PROTECTIVE MASK.
- Use BOLT CUTTER (E).
- Use PROTECTIVE MASK, go (F).
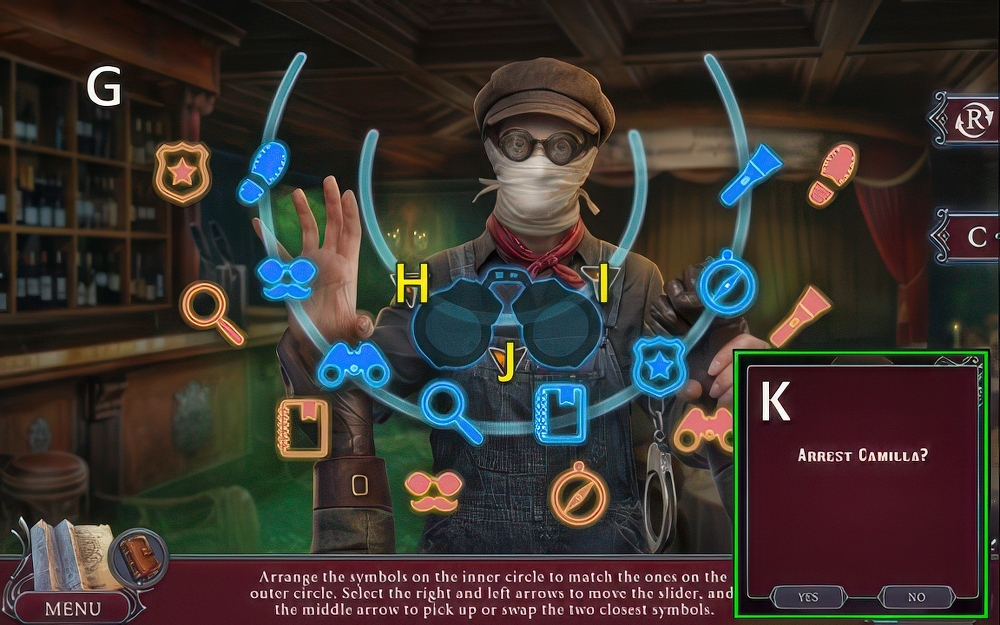
- Casual solution (G): Ix2-J-Hx4-J-Ix2-J-H-J-Ix2-J-I-J-H-J-I-J.
- Hard solution (G): Ix2-J-Hx5-J-Ix5-J-Hx2-J-Hx2-J-Ix5-J-Hx3-J-I-J-Ix2-J-Hx2-J.
- Select yes or no (K).
- Walkthrough Bonus Chapter, at the link below.